After the success with my first try at sewing up an asymmetrical spinnaker for the Prairie Mermaid, I thought it would be fun to give sail-making another go. The cat ketch rig on the Mana presents a possibility that intrigued me the first time I saw photos of a similar rig sporting a mizzen staysail. Once again I went to the good folks at SailRite for their assistance. Sailmaker Jeff Frank came back with a mizzen staysail custom designed for the Mana 24.
After fall had turned into winter, I again took over a large part of the basement and set to sewing up the kit.
SailRite provides excellent instructions with their sail kits. In addition, they are a phone call away to answer questions and I took advantage of the service to get some clarification from Jeff on one issue that arose.
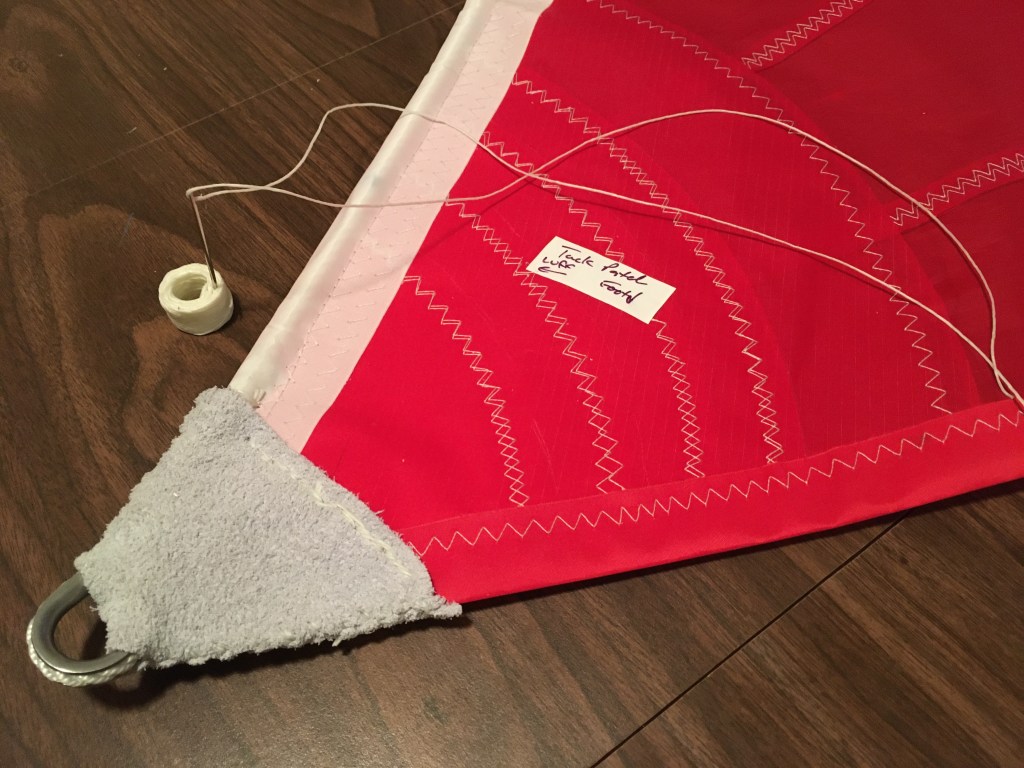
Sewing up the panels is quite straight forward. A double zig zag stitch is used and soon the sail has been produced. The detailing requires hand stitching. Clearly drawn diagrams make it easy for a rookie sail-maker like me to end up with a professional looking product.
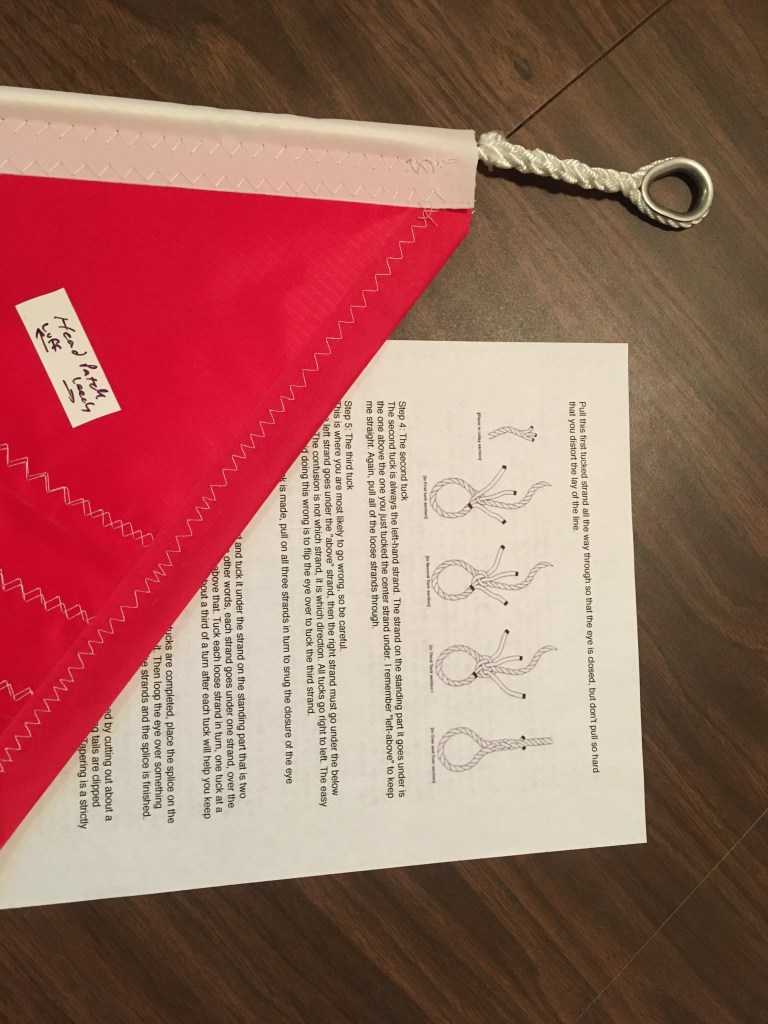
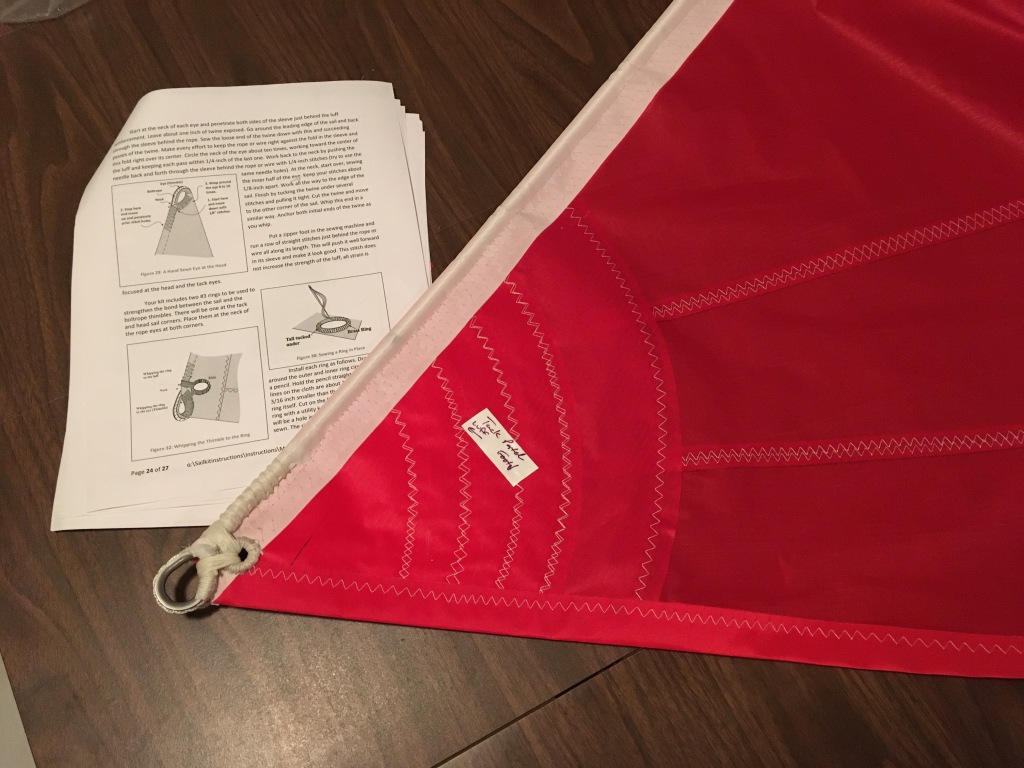
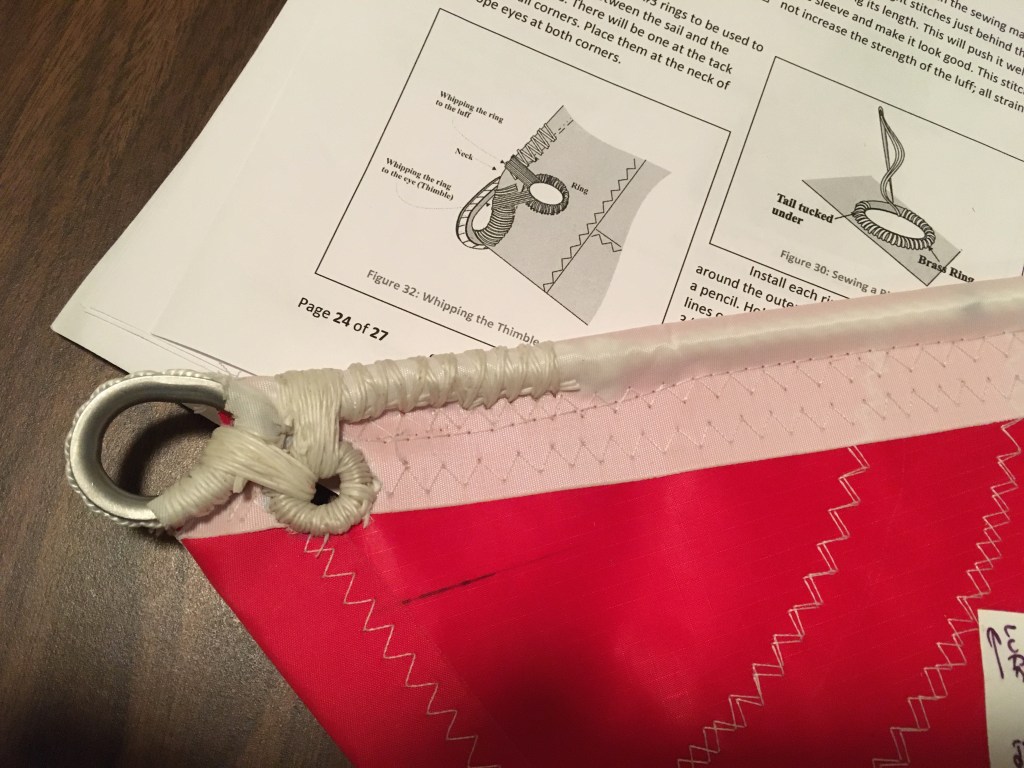
Clew with D-ring sewn inThimbles are sliced onto each end of the bolt rope – first time for splicing 3 stranded rope for me – great fun.Tack with boltrope and thimble sewn into placeClose-upLeather protection added to the three corners of the sailThe SailRite logo
The project was soon completed. The sail (and sailor) wait until sailing season for the first trial. Stay tuned.
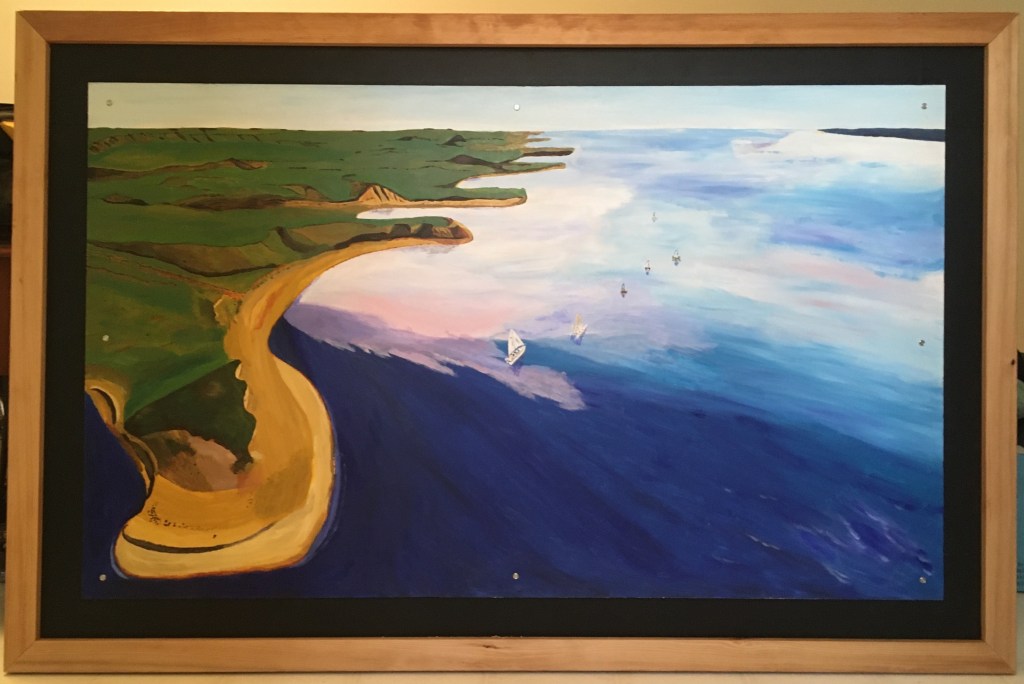
For seven summers, the sailing highlight of the season for me each year has been the week-long Elbow Run on Lake Diefenbaker. The 2019 Run was another great camping/sailing event. We were very fortunate to have on the Run again our very good sailing friend, Dave Fischl along with his son, Chad. They brought with them Dave’s new drone and the results were some very dramatic shots of the lake. From that vantage high above, we see the lake with a new perspective. I used Dave’s shots as inspiration for a series of paintings.
The wide vistas lend themselves to big paintings. This one is 36″X60″, acrylic on MDF board (framed size – 42″X66″).
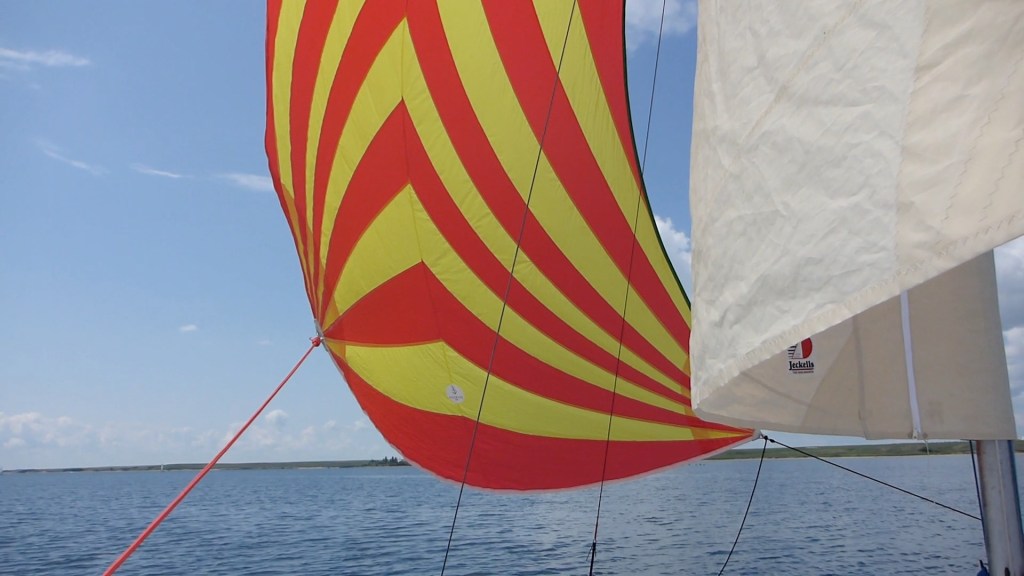
Spinnakers. Those big beautiful, brightly coloured sails puffed out in front of sailboats as they ghost their way down the lake… Yes, the image conjures up in my mind the ultimate in sailing experience and so of course, I was determined to add an asymmetrical spinnaker to the sail locker of my Mana 24, “Prairie Mermaid”.
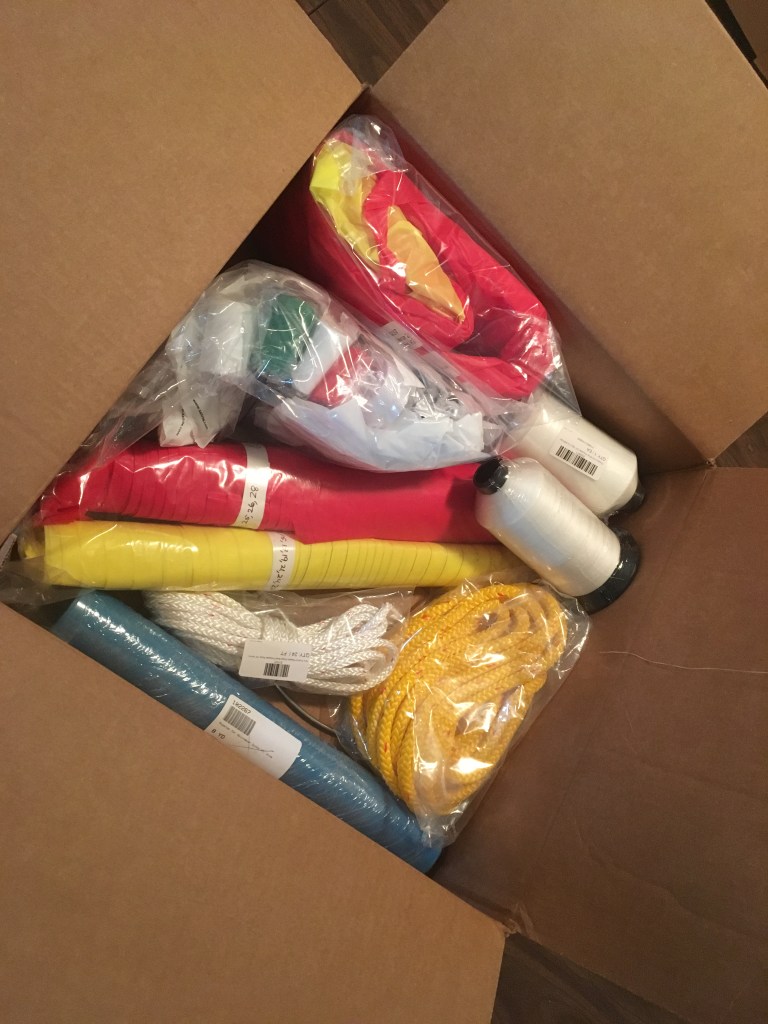
I wanted to play a part in creating the sail but I do not have the necessary design skills. I turned to SailRite for their design expertise. Their sail maker, Jeff Frank presented me with a lay-out and asked me for my choice of colours. After considering the various choices and combinations, I chose red and yellow and placed my order. The kit soon arrived.
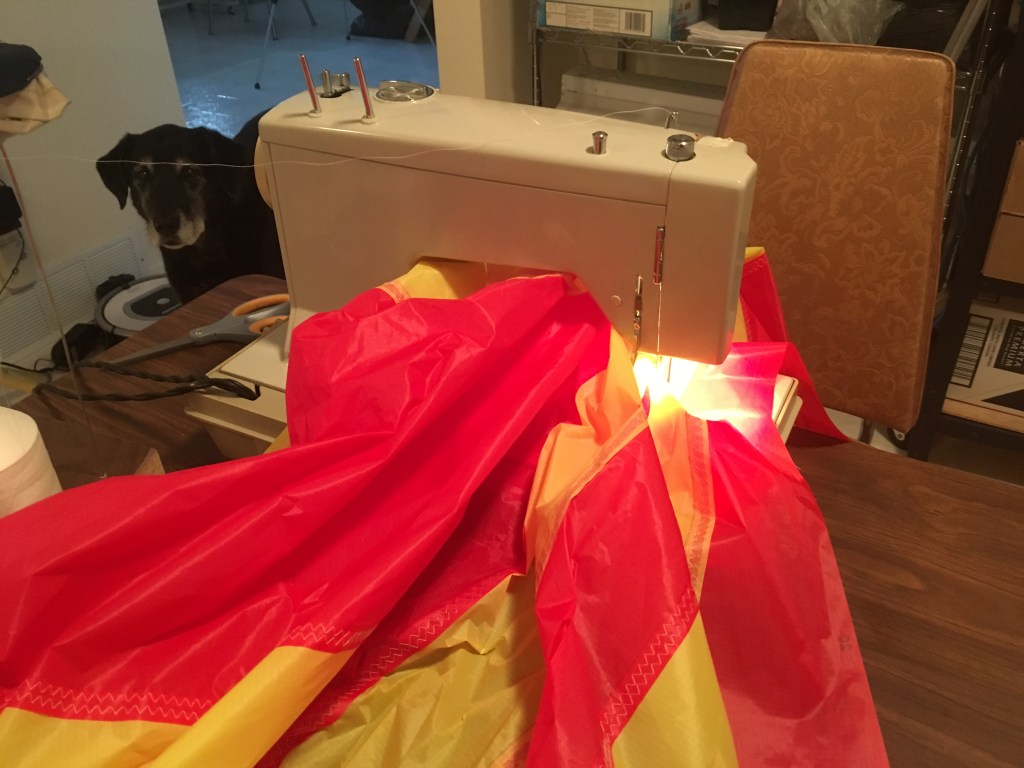
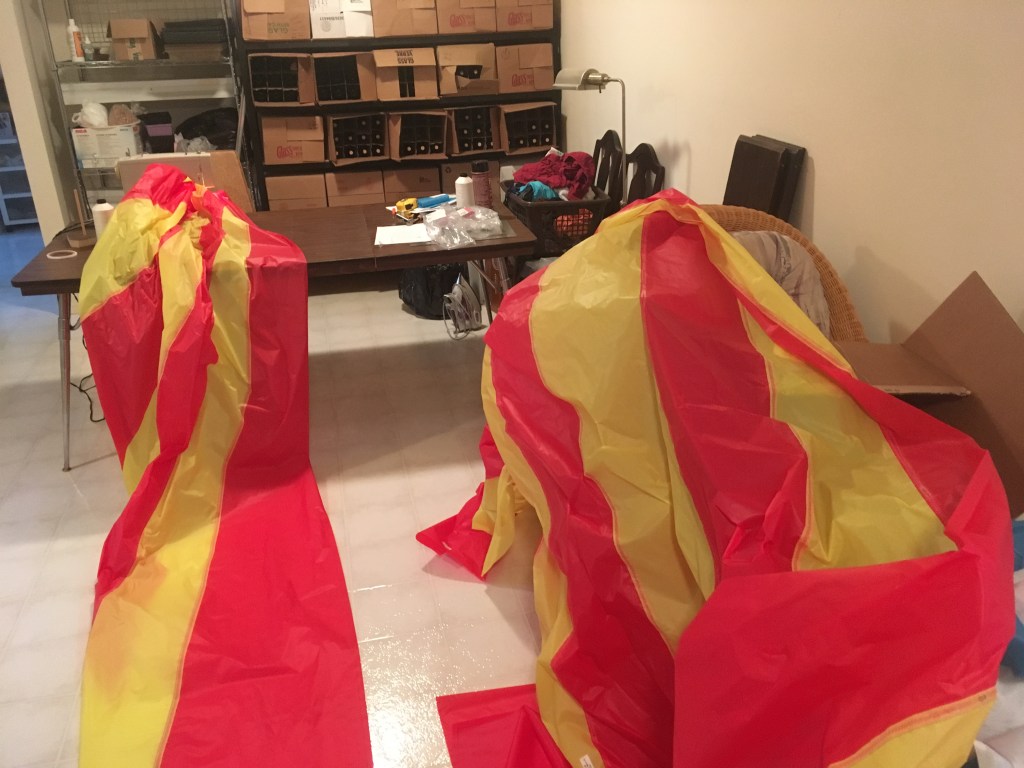
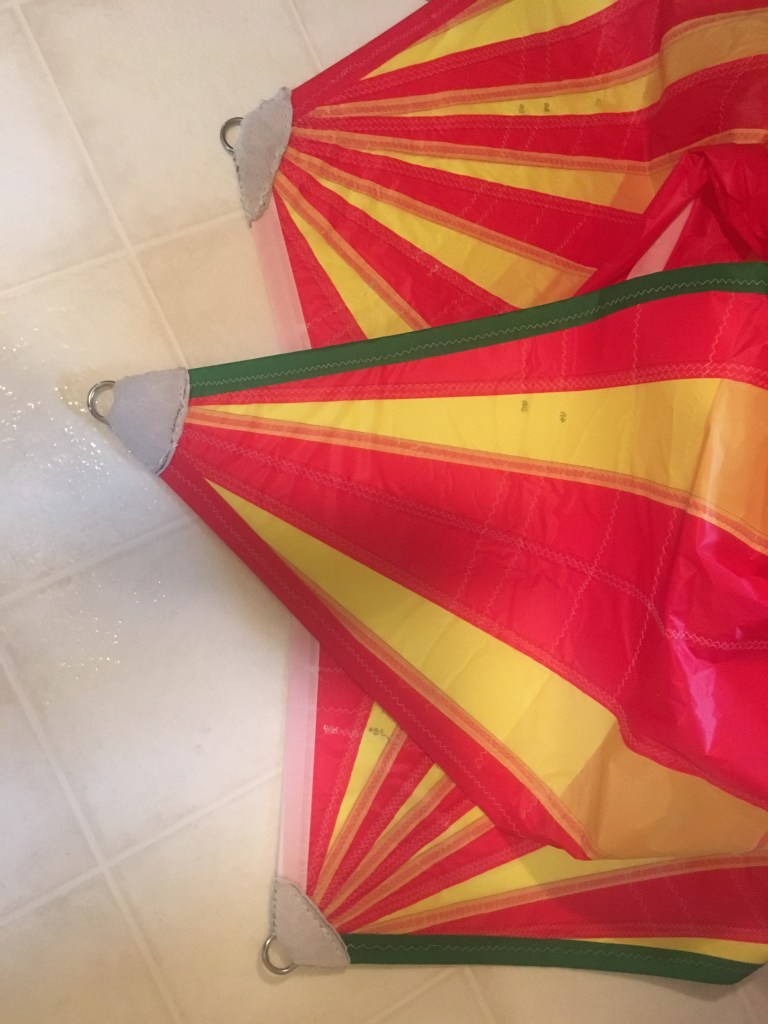
Instructions were very easy to understand. With my partner’s trusty old Kenmore, quickly I was assembling the first of three sections of the sail. Once each one had been completed, they in turn were sewn together. After hand sewing leather to protect the corners, I had a finished sail.
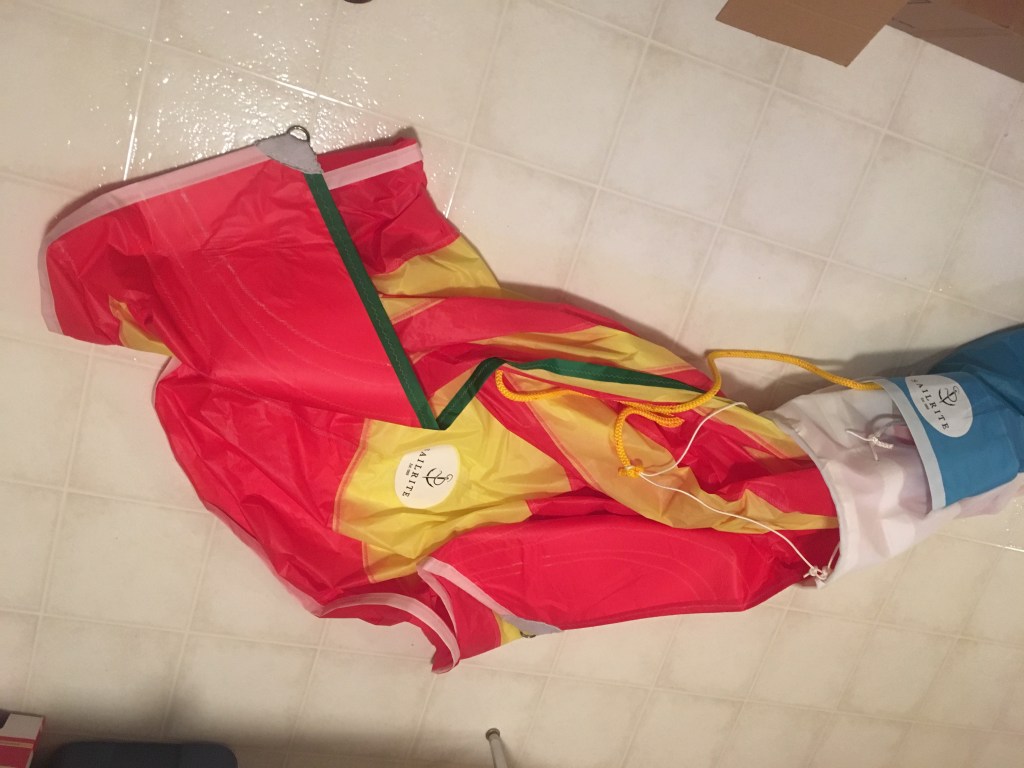
In addition to the sail, I had ordered a launching sock kit. The sock required a bit more thought and measuring but it also came together well.
The sail went into a bag and then waited until June for the its first trial.
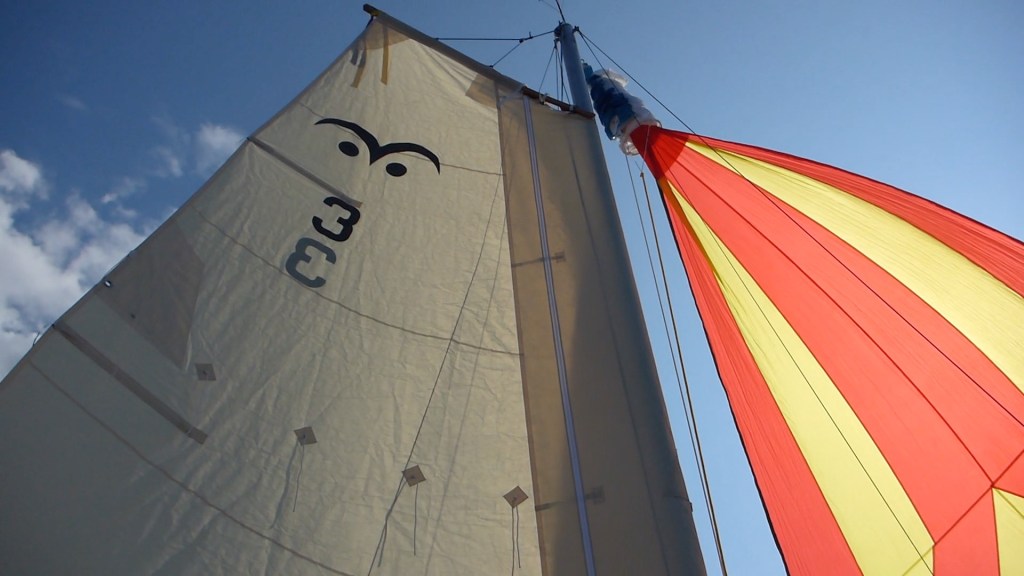
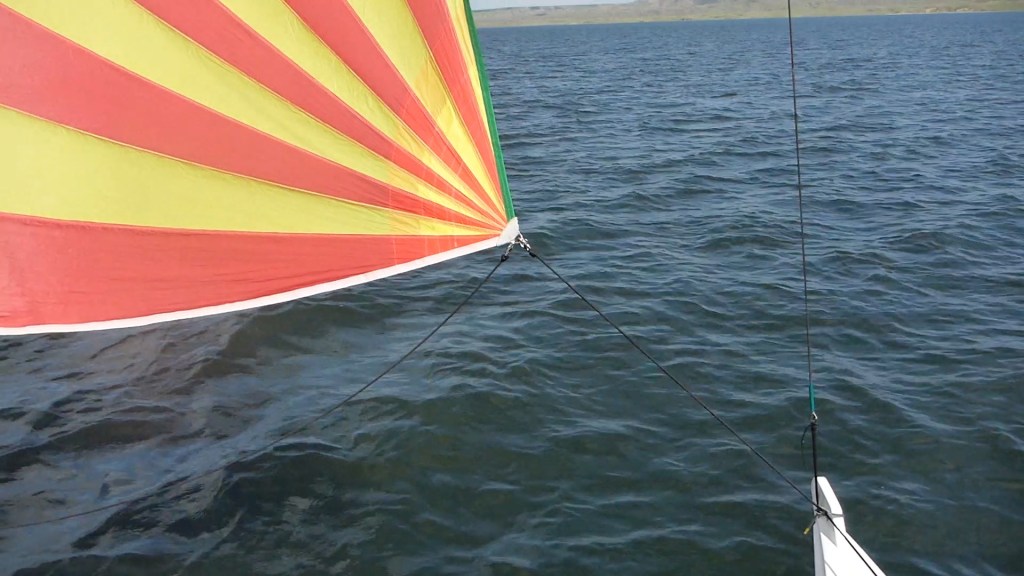
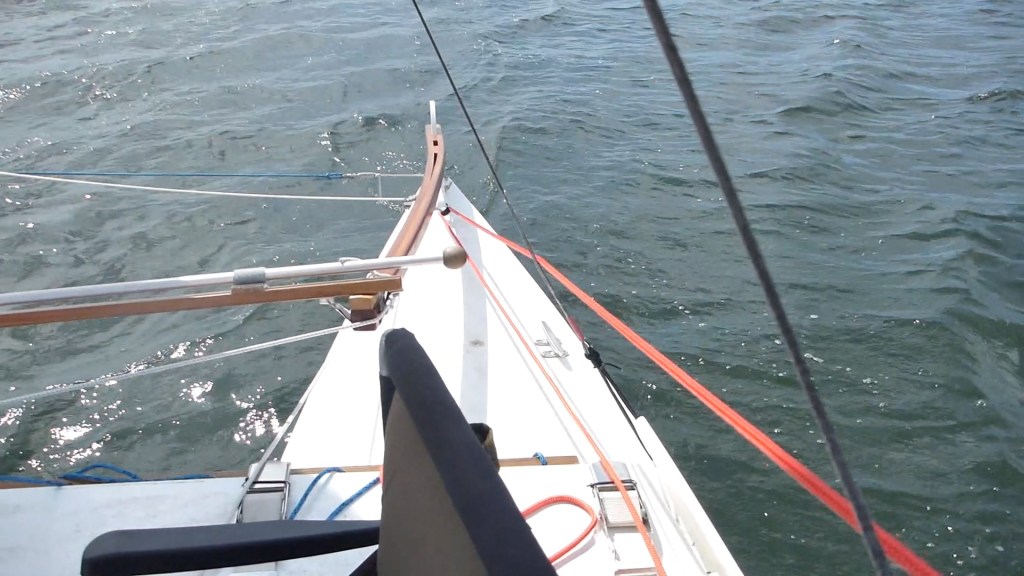
My sailing friend, Rick, joined me for the day. We were blessed with light winds perfect for the task at hand. Things went very well and I was very pleased with the result. Check out the video account of the day.
Following examples I had found online, this is the equipment I used to fly the sail. Tack lines run to blocks attached with soft shackles to both port and starboard bows, allowing the sail to be moved from side to side to suit wind directions. These lines are tied off to cleats installed on the forward cabin tops. Sheets lead from the clew to blocks attached to stern posts with soft shackles and tie off to cleats installed on aft cabin tops.
In spite of my inexperience but with a successful initial trial under my belt, I began our annual weeklong camping/sailing event, the Elbow Run 2019, flying the asymmetrical within the first half hour of the start. My crew mate, Russell, came aboard as a rookie sailor and by the end of the Run, the two of us were taking turns setting and adjusting the new sail as if we both knew what we were doing!
During the Run, the spinnaker proved to be an invaluable asset to the boat. There were four WindRider 17 trimarans in our group. On the days when winds were light, the WindRiders, being much lighter, were able to move ahead of us until we hoisted the spinnaker and then we took over the lead. Brent was the exception on his WR17 – he was also sporting a spinnaker. Brent is a very talented sailor and he was consistently impossible to catch.
Final assessment? Unlike my experiment with the deck tent, the asymmetrical spinnaker is a great success. The sock makes launching it stress free. The sail turns a light wind day into a pleasurable time. I am very happy with the addition.
Not all ideas are manifest to be successful. Ideas drawn out on a piece of paper, no matter how carefully they may have been drawn to scale become something quite different when reproduced in reality. These are two truths that I learned this past year.
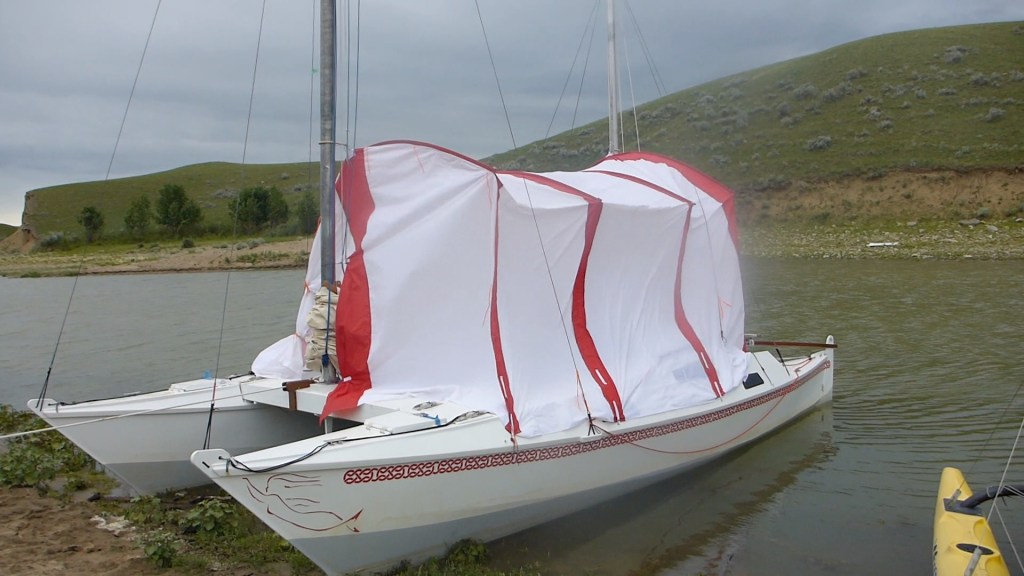
My Mana 24 catamaran has a large and very open deck which is ideal for sailing but provides no shelter when camping on board. Last winter I set about to design and sew a tent which would fulfill that limitation. I was partially successful, but my design was deficient in one important aspect. More on that later.
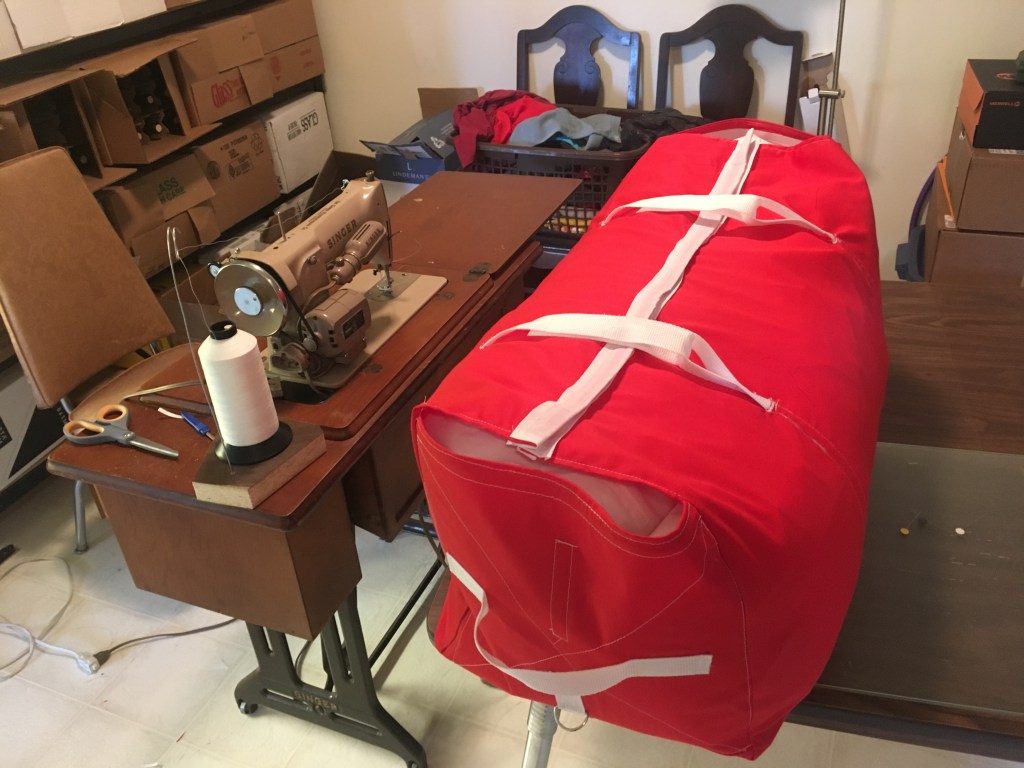
The tent project followed the completion of a sewing ‘first’ for me – a new sail for the boat, an asymmetrical spinnaker and launching chute (another post coming soon). There was an incentive for a new sewing project – the acquisition of my mother’s 1956 Singer Model 191B sewing machine.
The tent design attempted to address the desire for shelter on the deck while being still being able to access the hull cabins. I wanted to be able to easily open the hatches without impediment from the tent and so I came up with the idea of an arched roof, suspended between the two masts and formed by flexible tent poles. My scale drawing called for a height of 96 inches in order for the hatch to clear the tent wall.
Two ingredients were required – tent material and tent poles. A search on the internet came up with willing suppliers. Ripstop By the Roll have an extensive selection of materials available and from them I ordered 35 yards of 1.9 ounce white rip-stop nylon plus 8 yards of 2.2 ounce ripstop nylon in racing red. From another accommodating supplier, Tent Pole Technologies came four tent poles, each 129.5 inches long. Time to get to work.
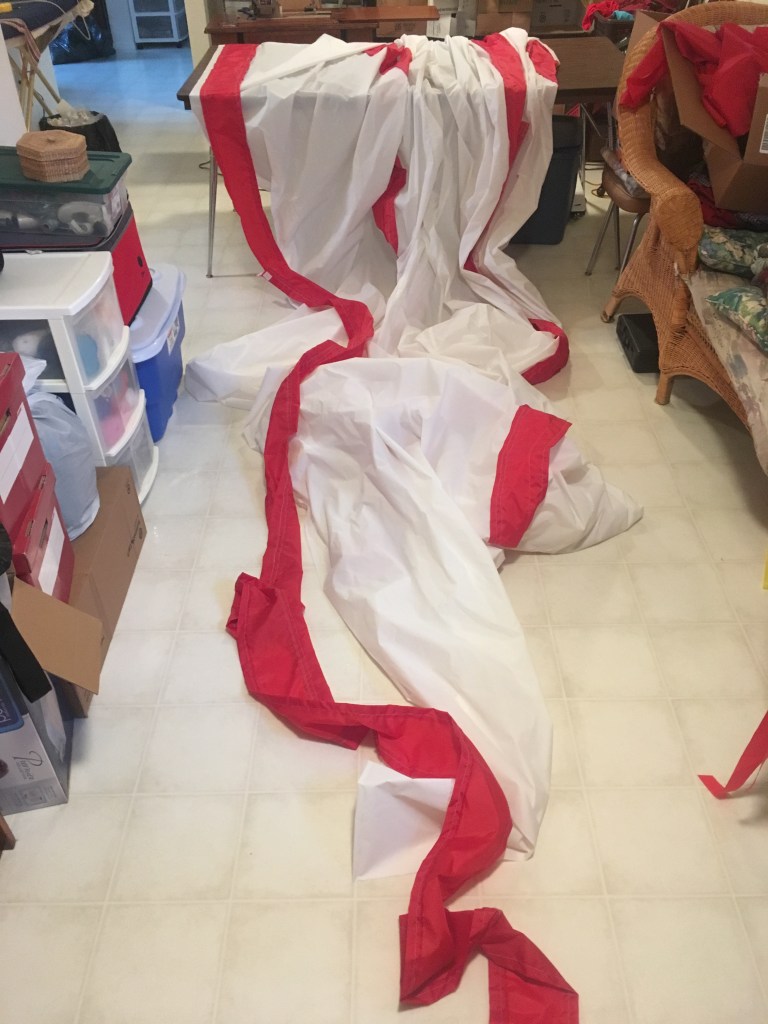
Of course, when I was doing the drawing and ordering the material, I really had no clear sense of just how big the tent would be or how much material it would involve. It was only after starting to cut and piece and sew it together did I fully appreciate the undertaking. I was soon sewing 24 foot long seams to join panels forming the top and walls of the tent. Mom’s old Singer machine was not nearly so phased by that as I was.
The end panels came with their own challenge, with 8 foot zippers sewn in just off-centre to allow access from from both the bow and the stern of the boat. The basement seemed at times to be filled with rip-stop nylon!
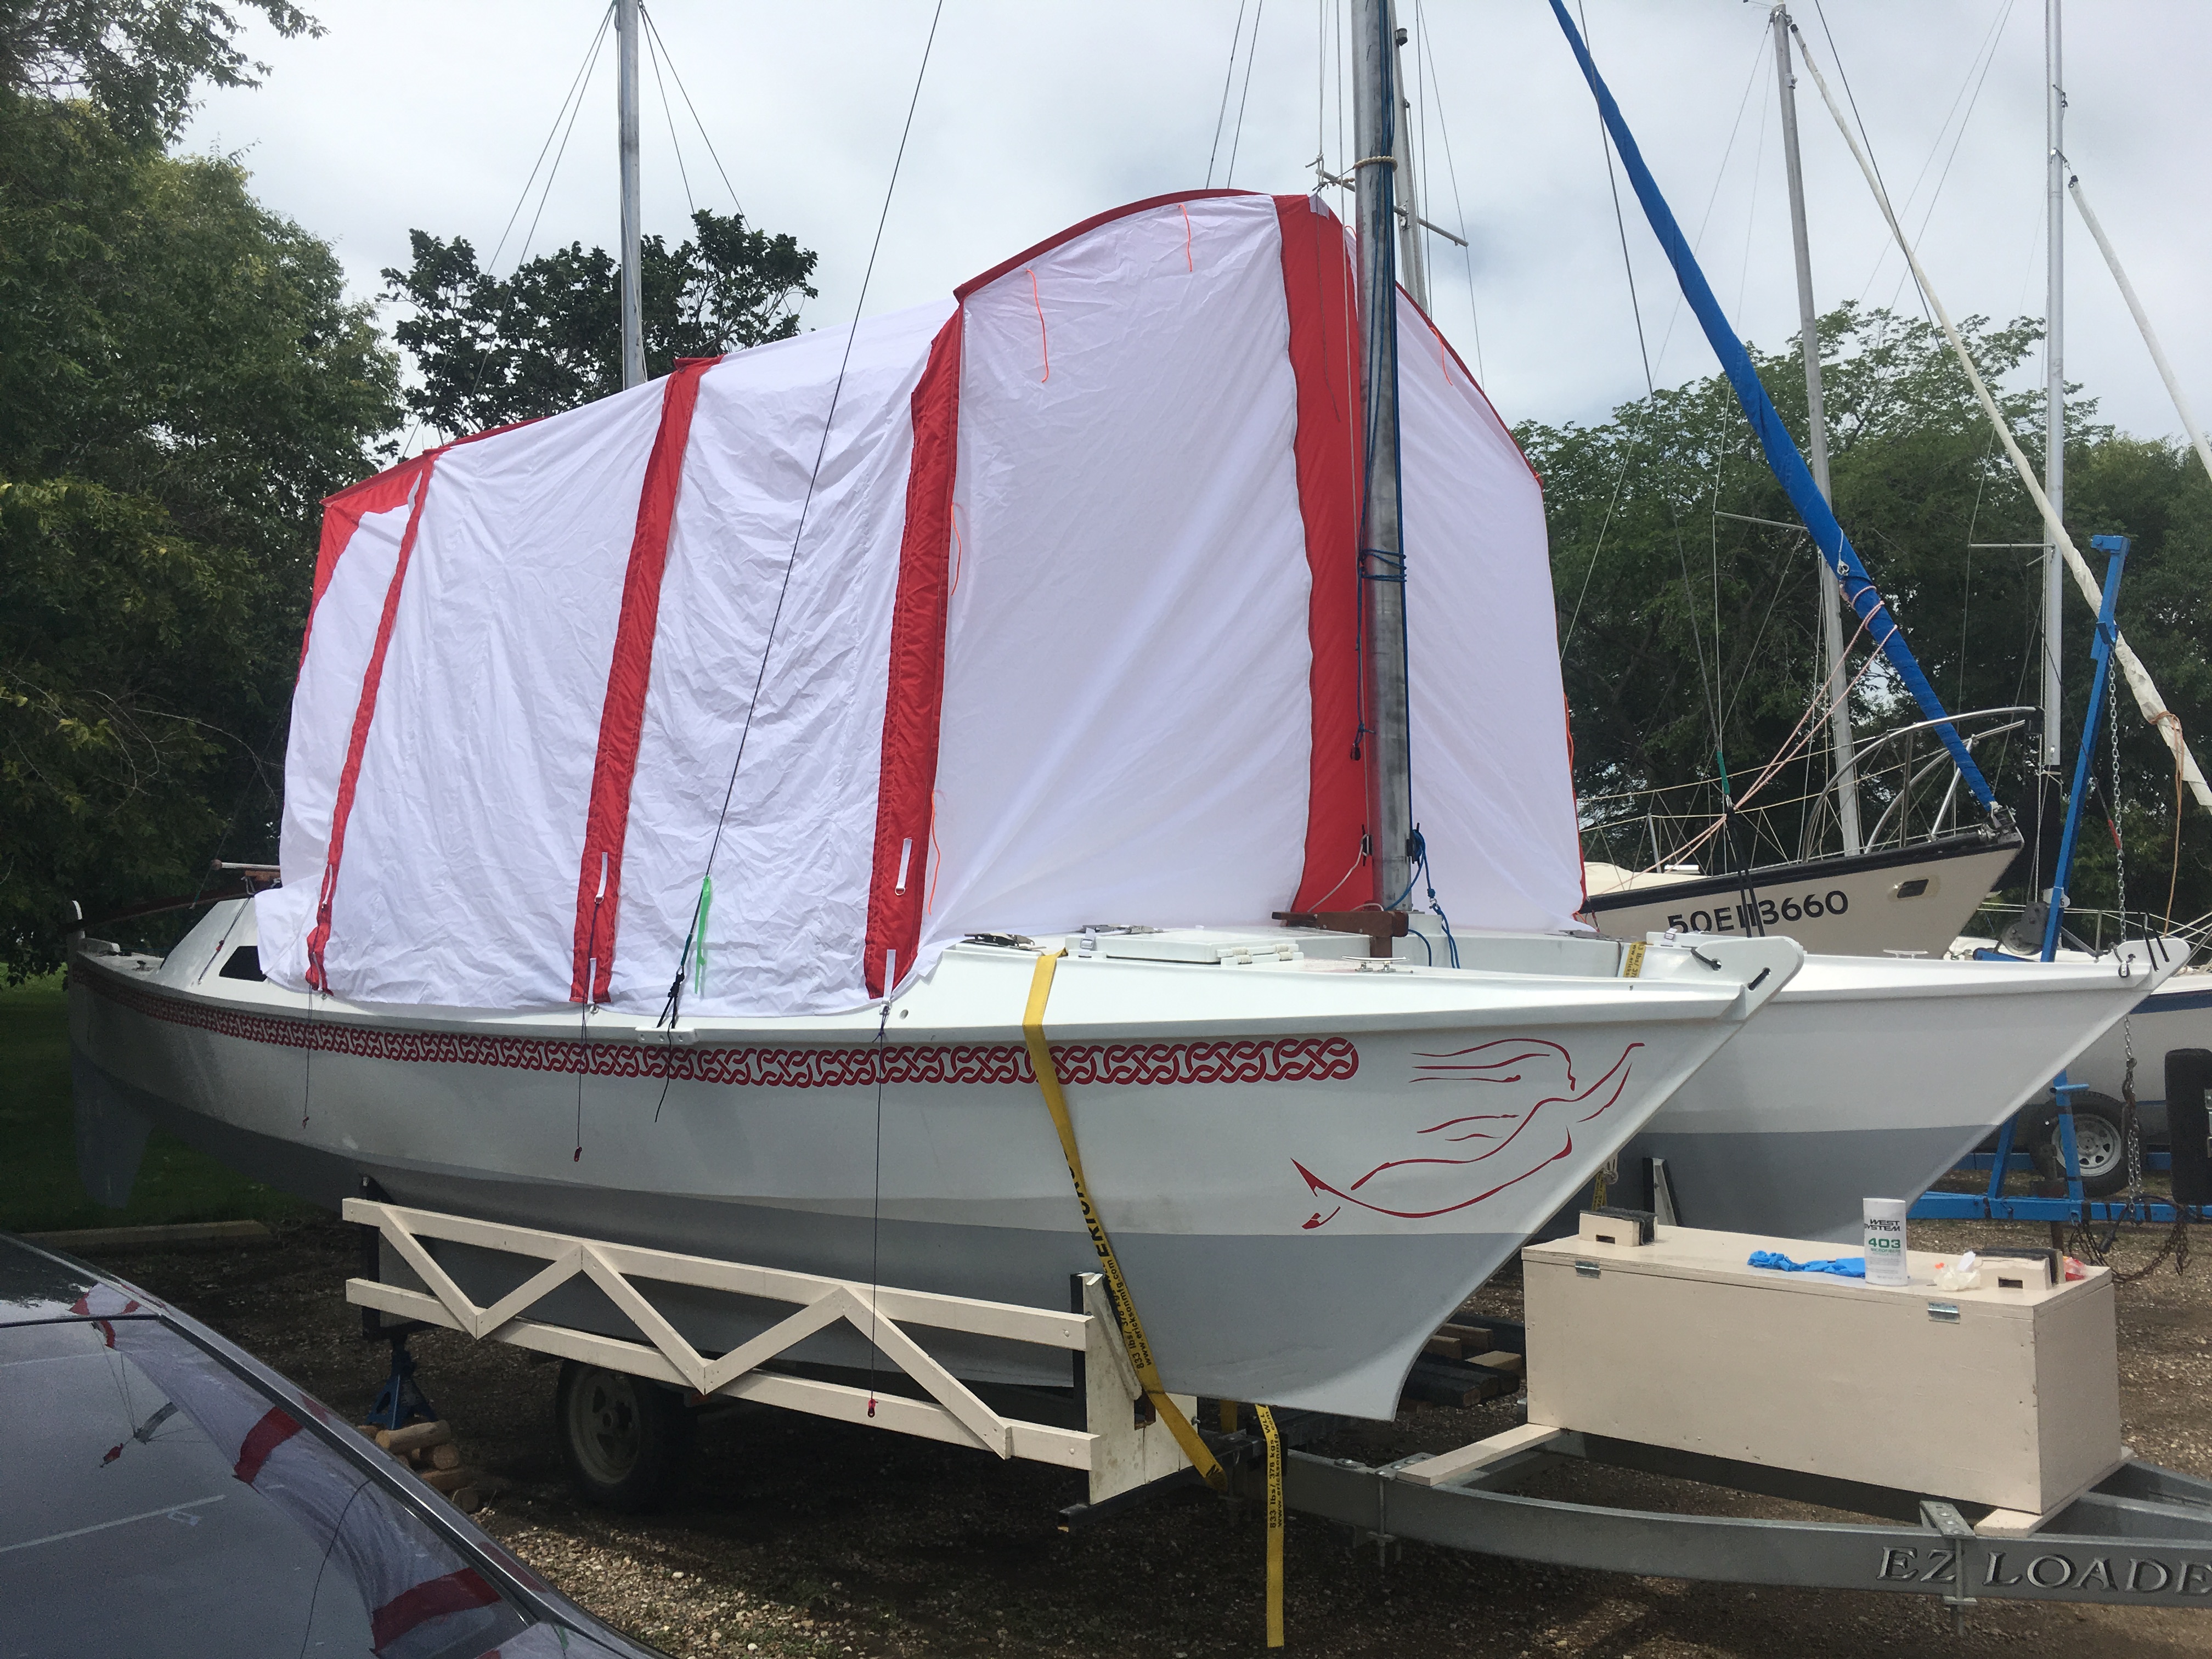
The big test came in July during our annual camping/sailing event, the Elbow Run 2019, on Lake Diefenbaker, with seven sailboats and ten sailors gathered. The new tent looked rather impressive that first night, and the guys teased me about the size, suggesting that it was large enough to be a dance hall, or better yet, a floating conference room.
My crew mate and cousin, Russell, and I set about making our living quarters comfortable and cooking our evening meal on board while others were resigned to cooking in the open beside their tents. Life was good.
Things were not so congenial however when the wind started to blow later in the week, as you can see in the following photos.
Yes, things did get a bit wild, and on two separate nights we decided we would fare better in the wind without the tent!! The big sidewalls, having nothing to support them, could not hold their shape. There were other issues also. I had not taken into account that the main sail would prevent closure of the bow entrance to the tent, and so half of that end wall flapped continuously in the wind.
BUT, the sewing did not come unravelled. AND the rip-stop nylon proved that it could easily handle the wind. AND most importantly, the tent proved the worthiness of a shelter when camping on an open deck catamaran. So, its back to the drawing board and Mom’s old Singer machine this winter to come up with Mana Deck Tent Mark II.
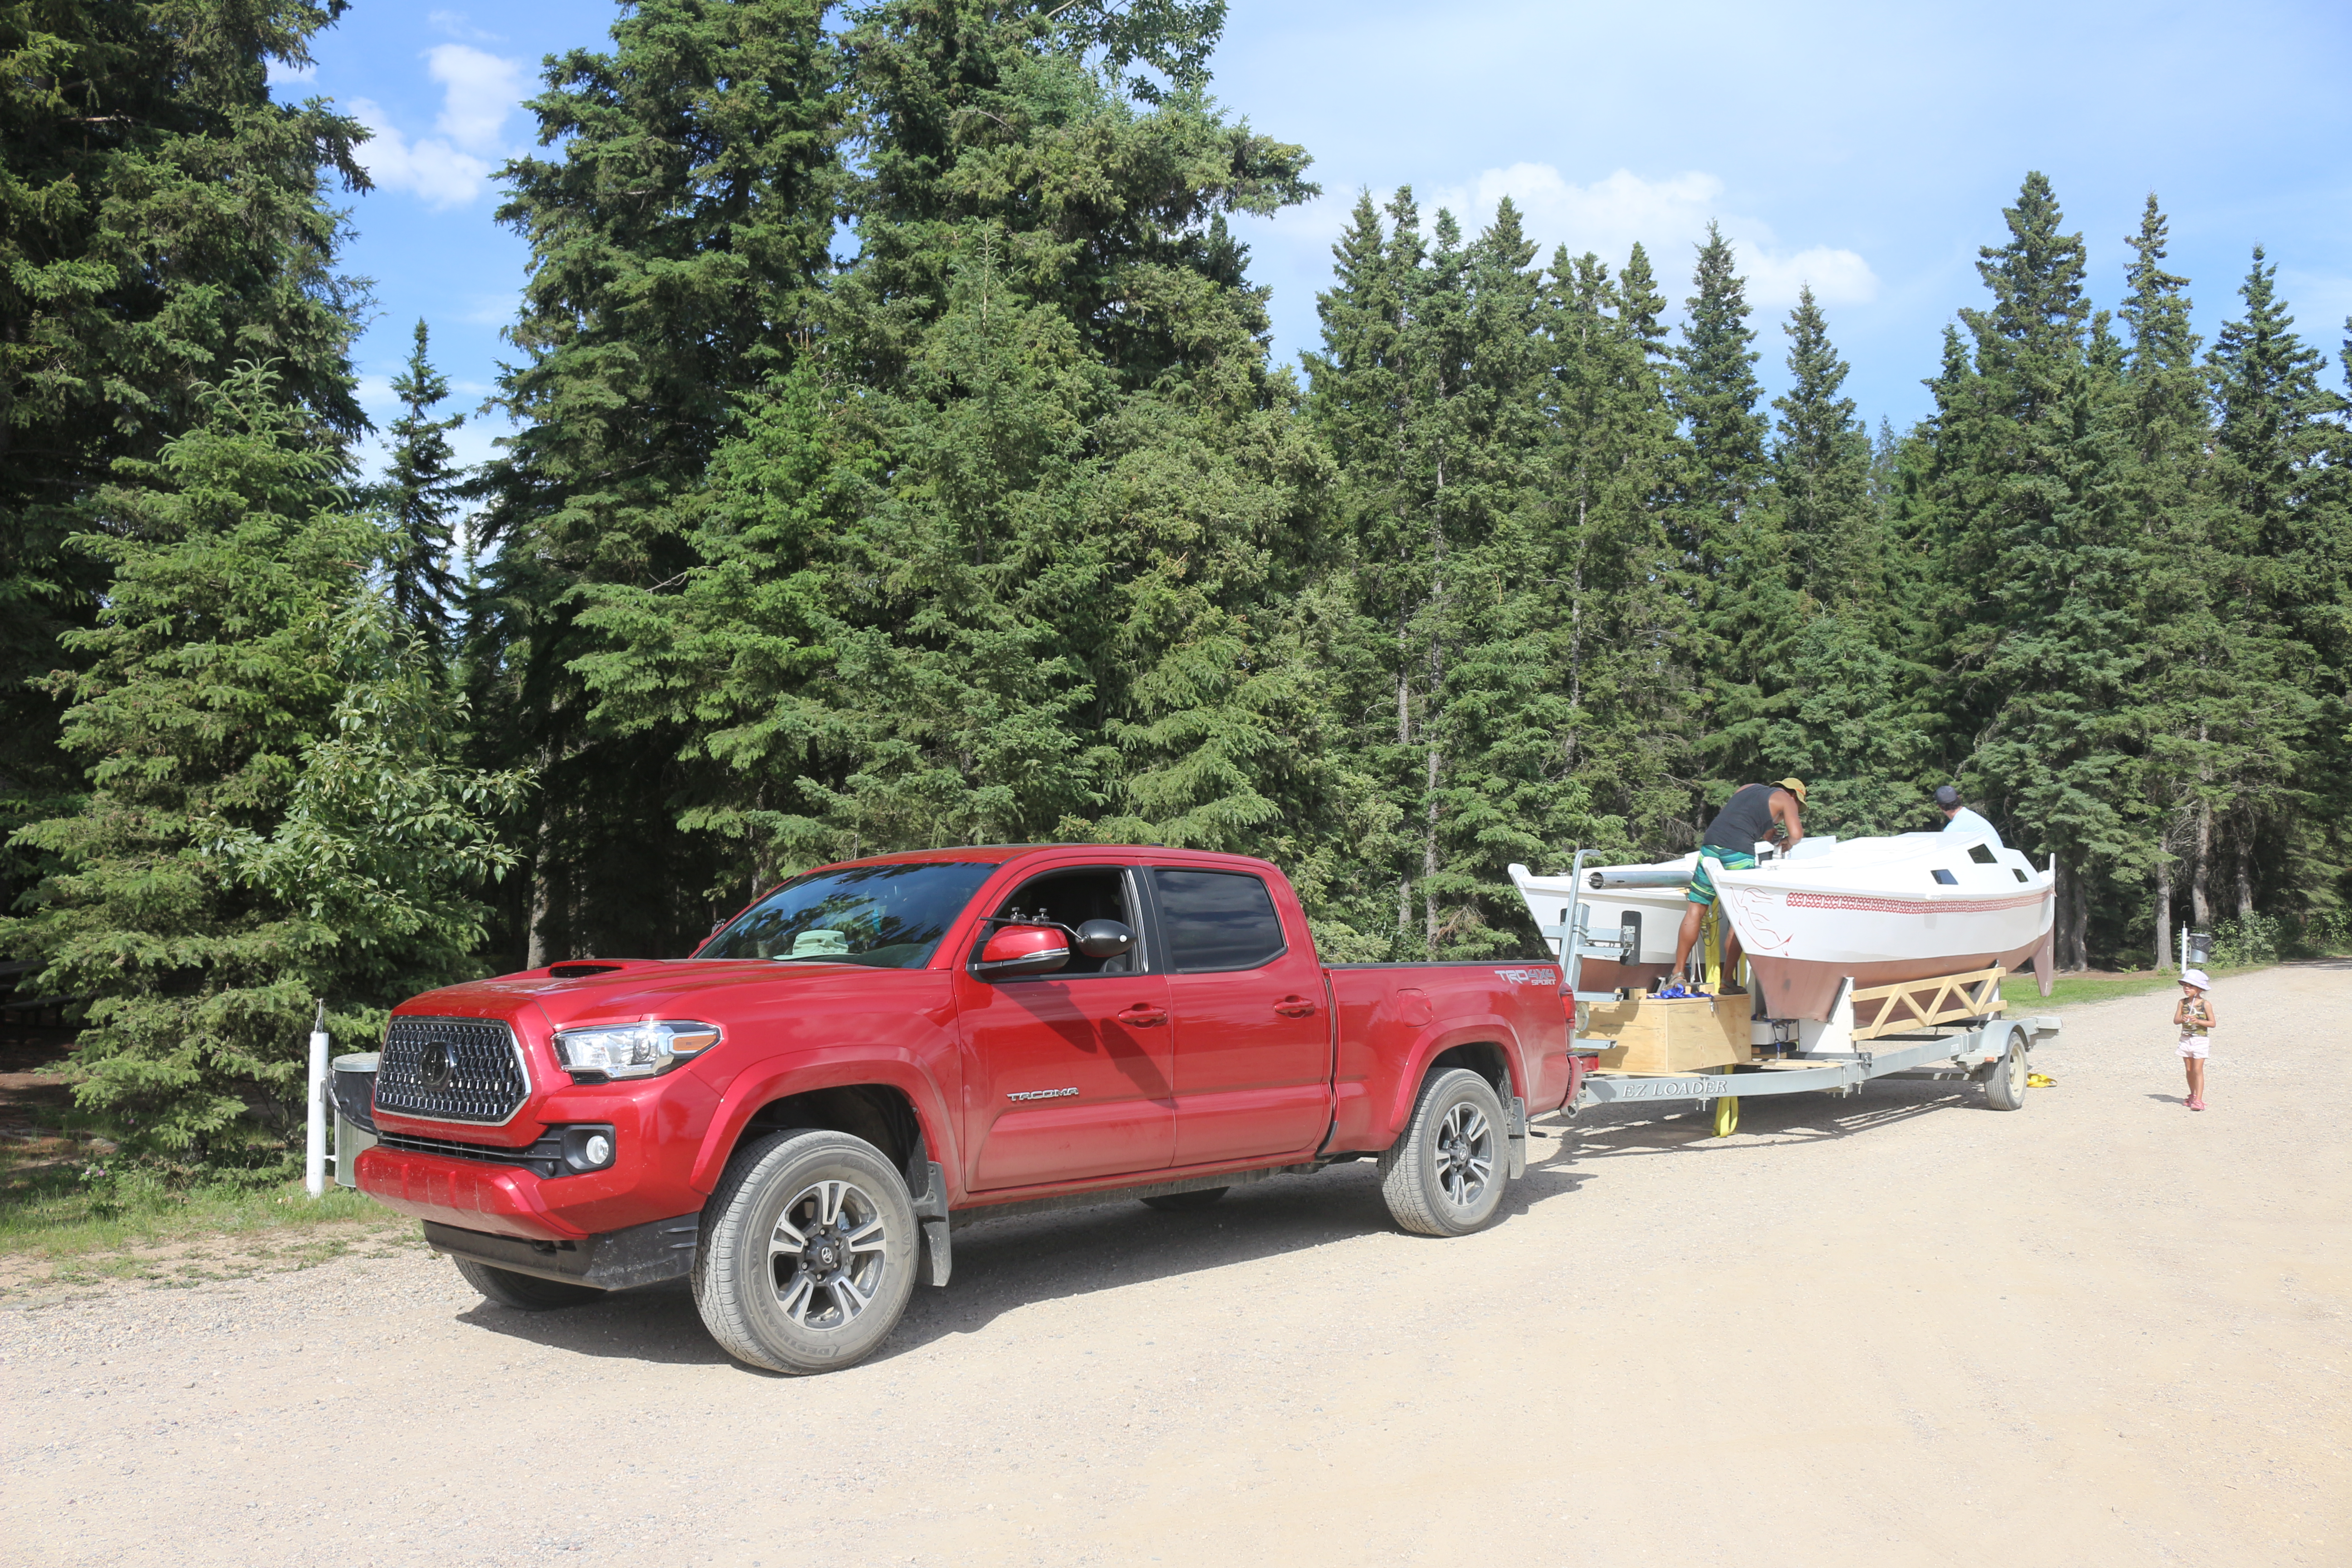
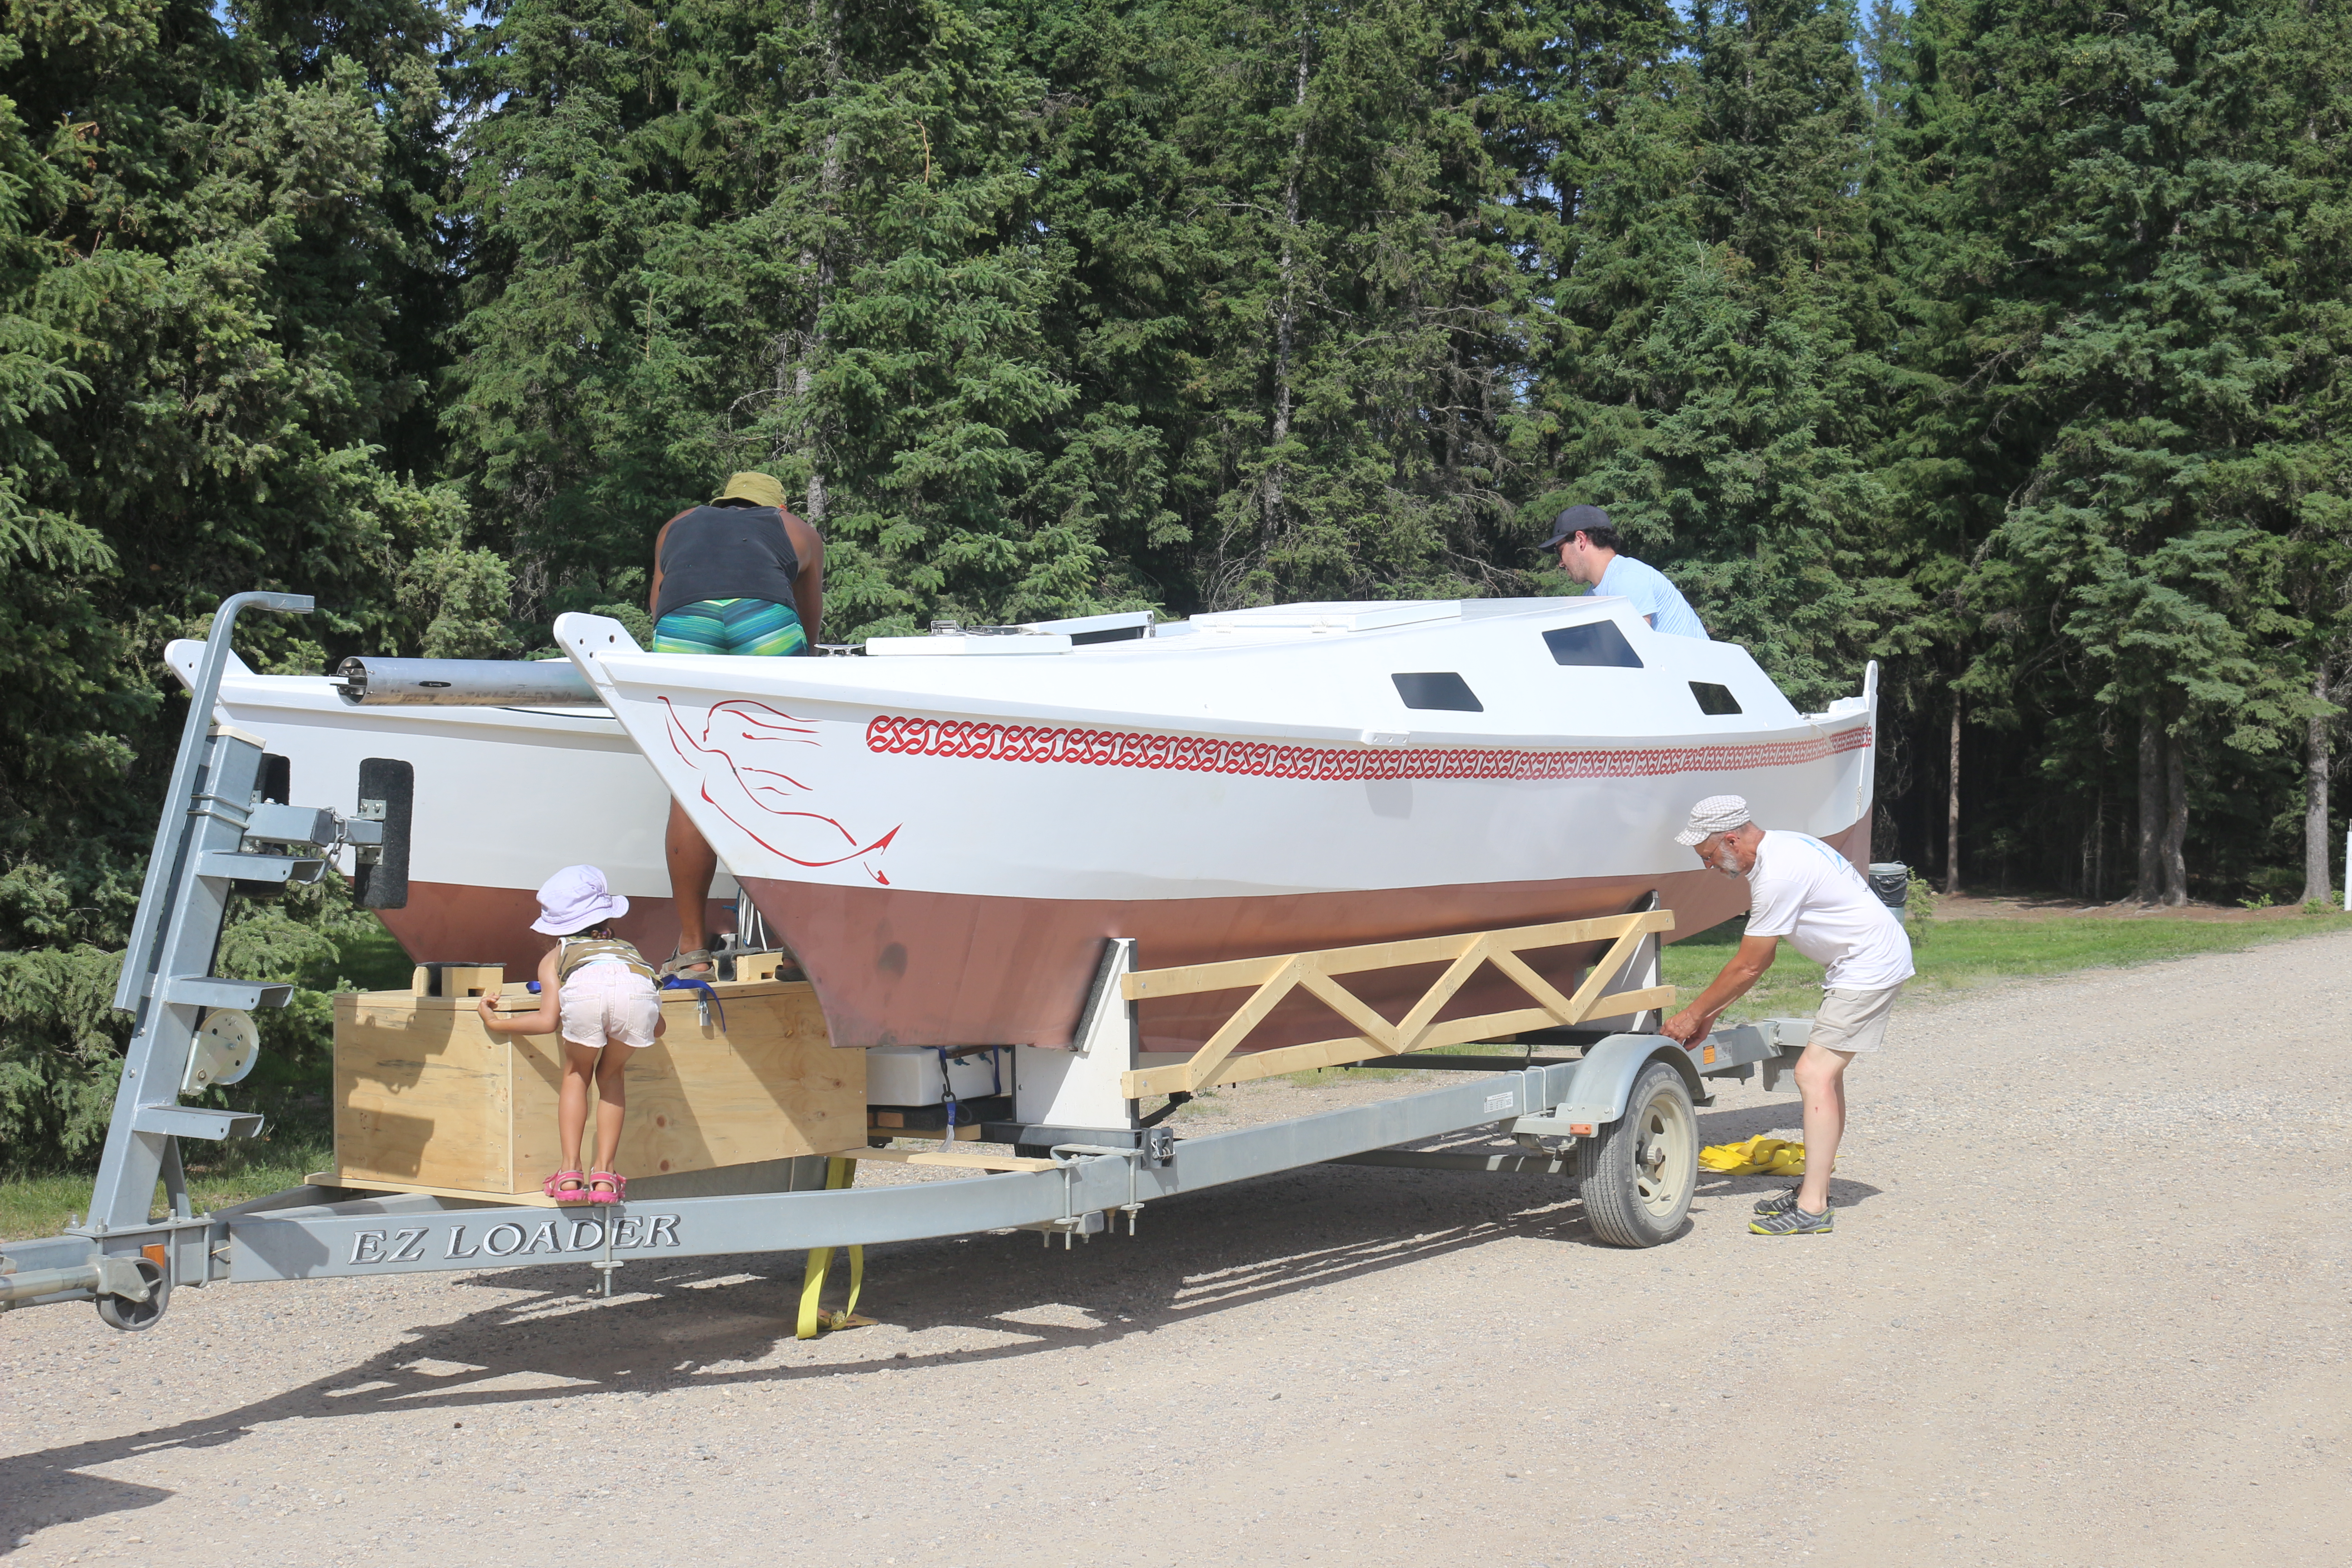
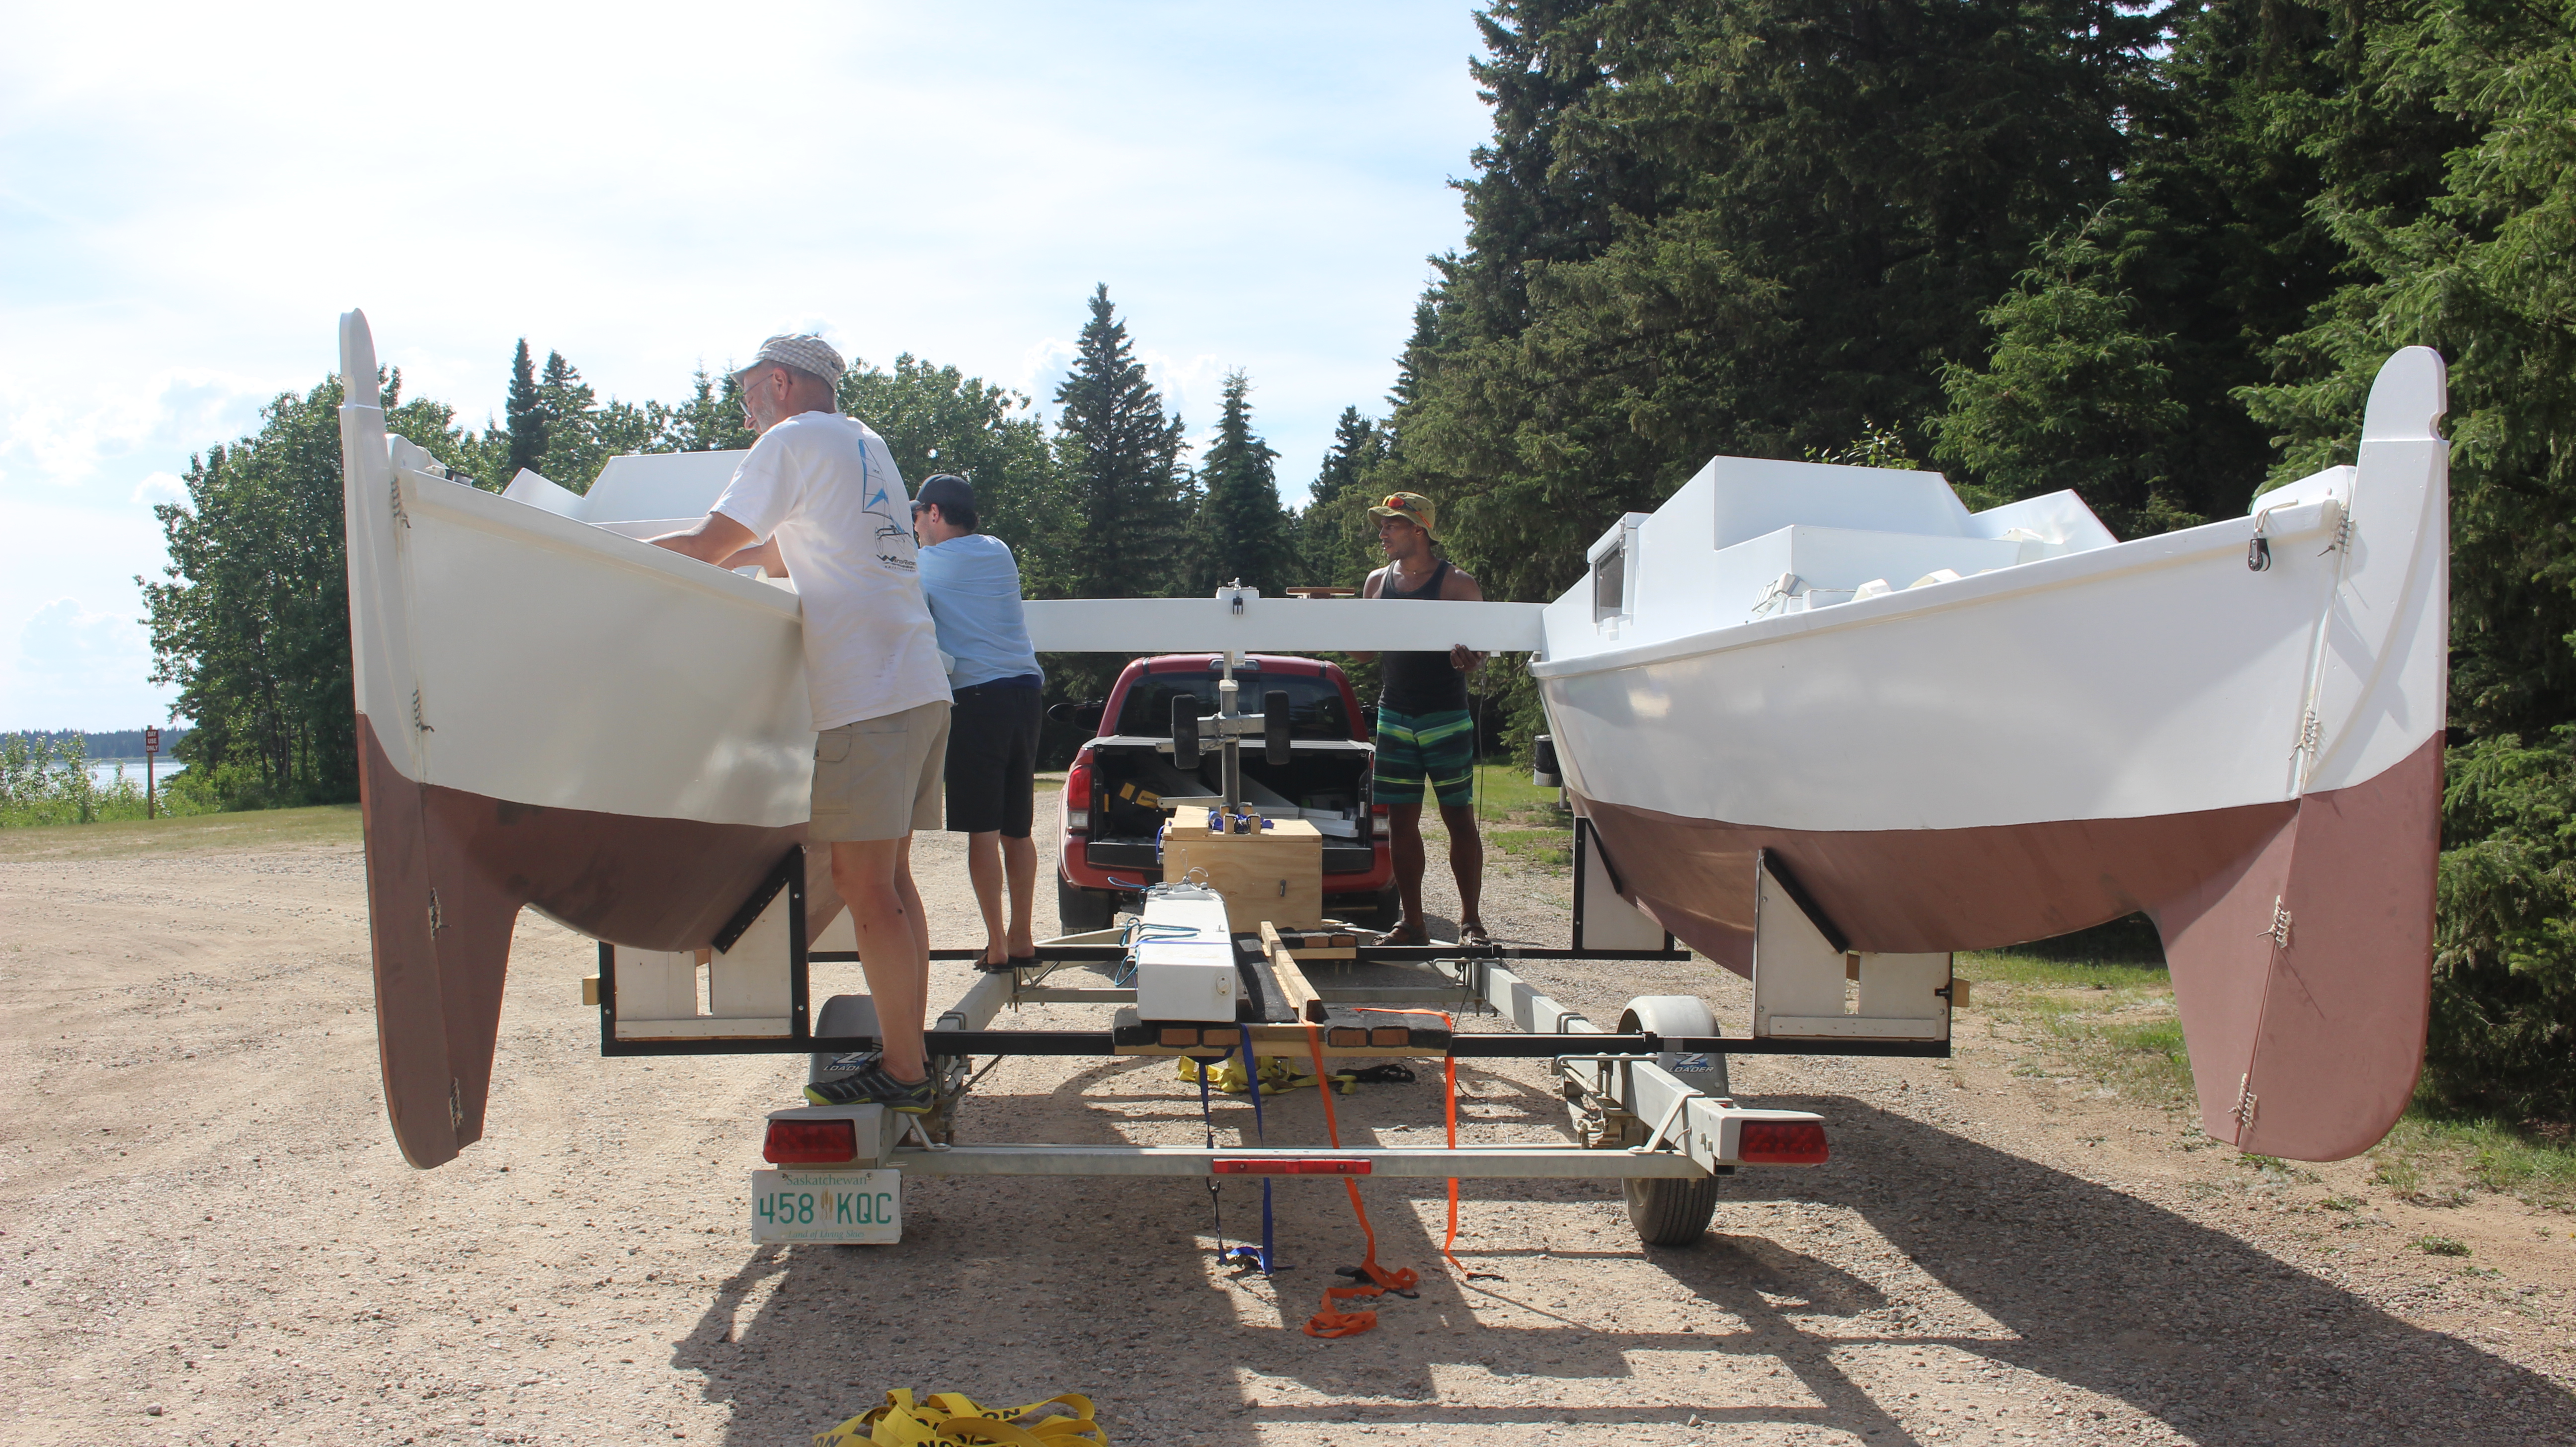
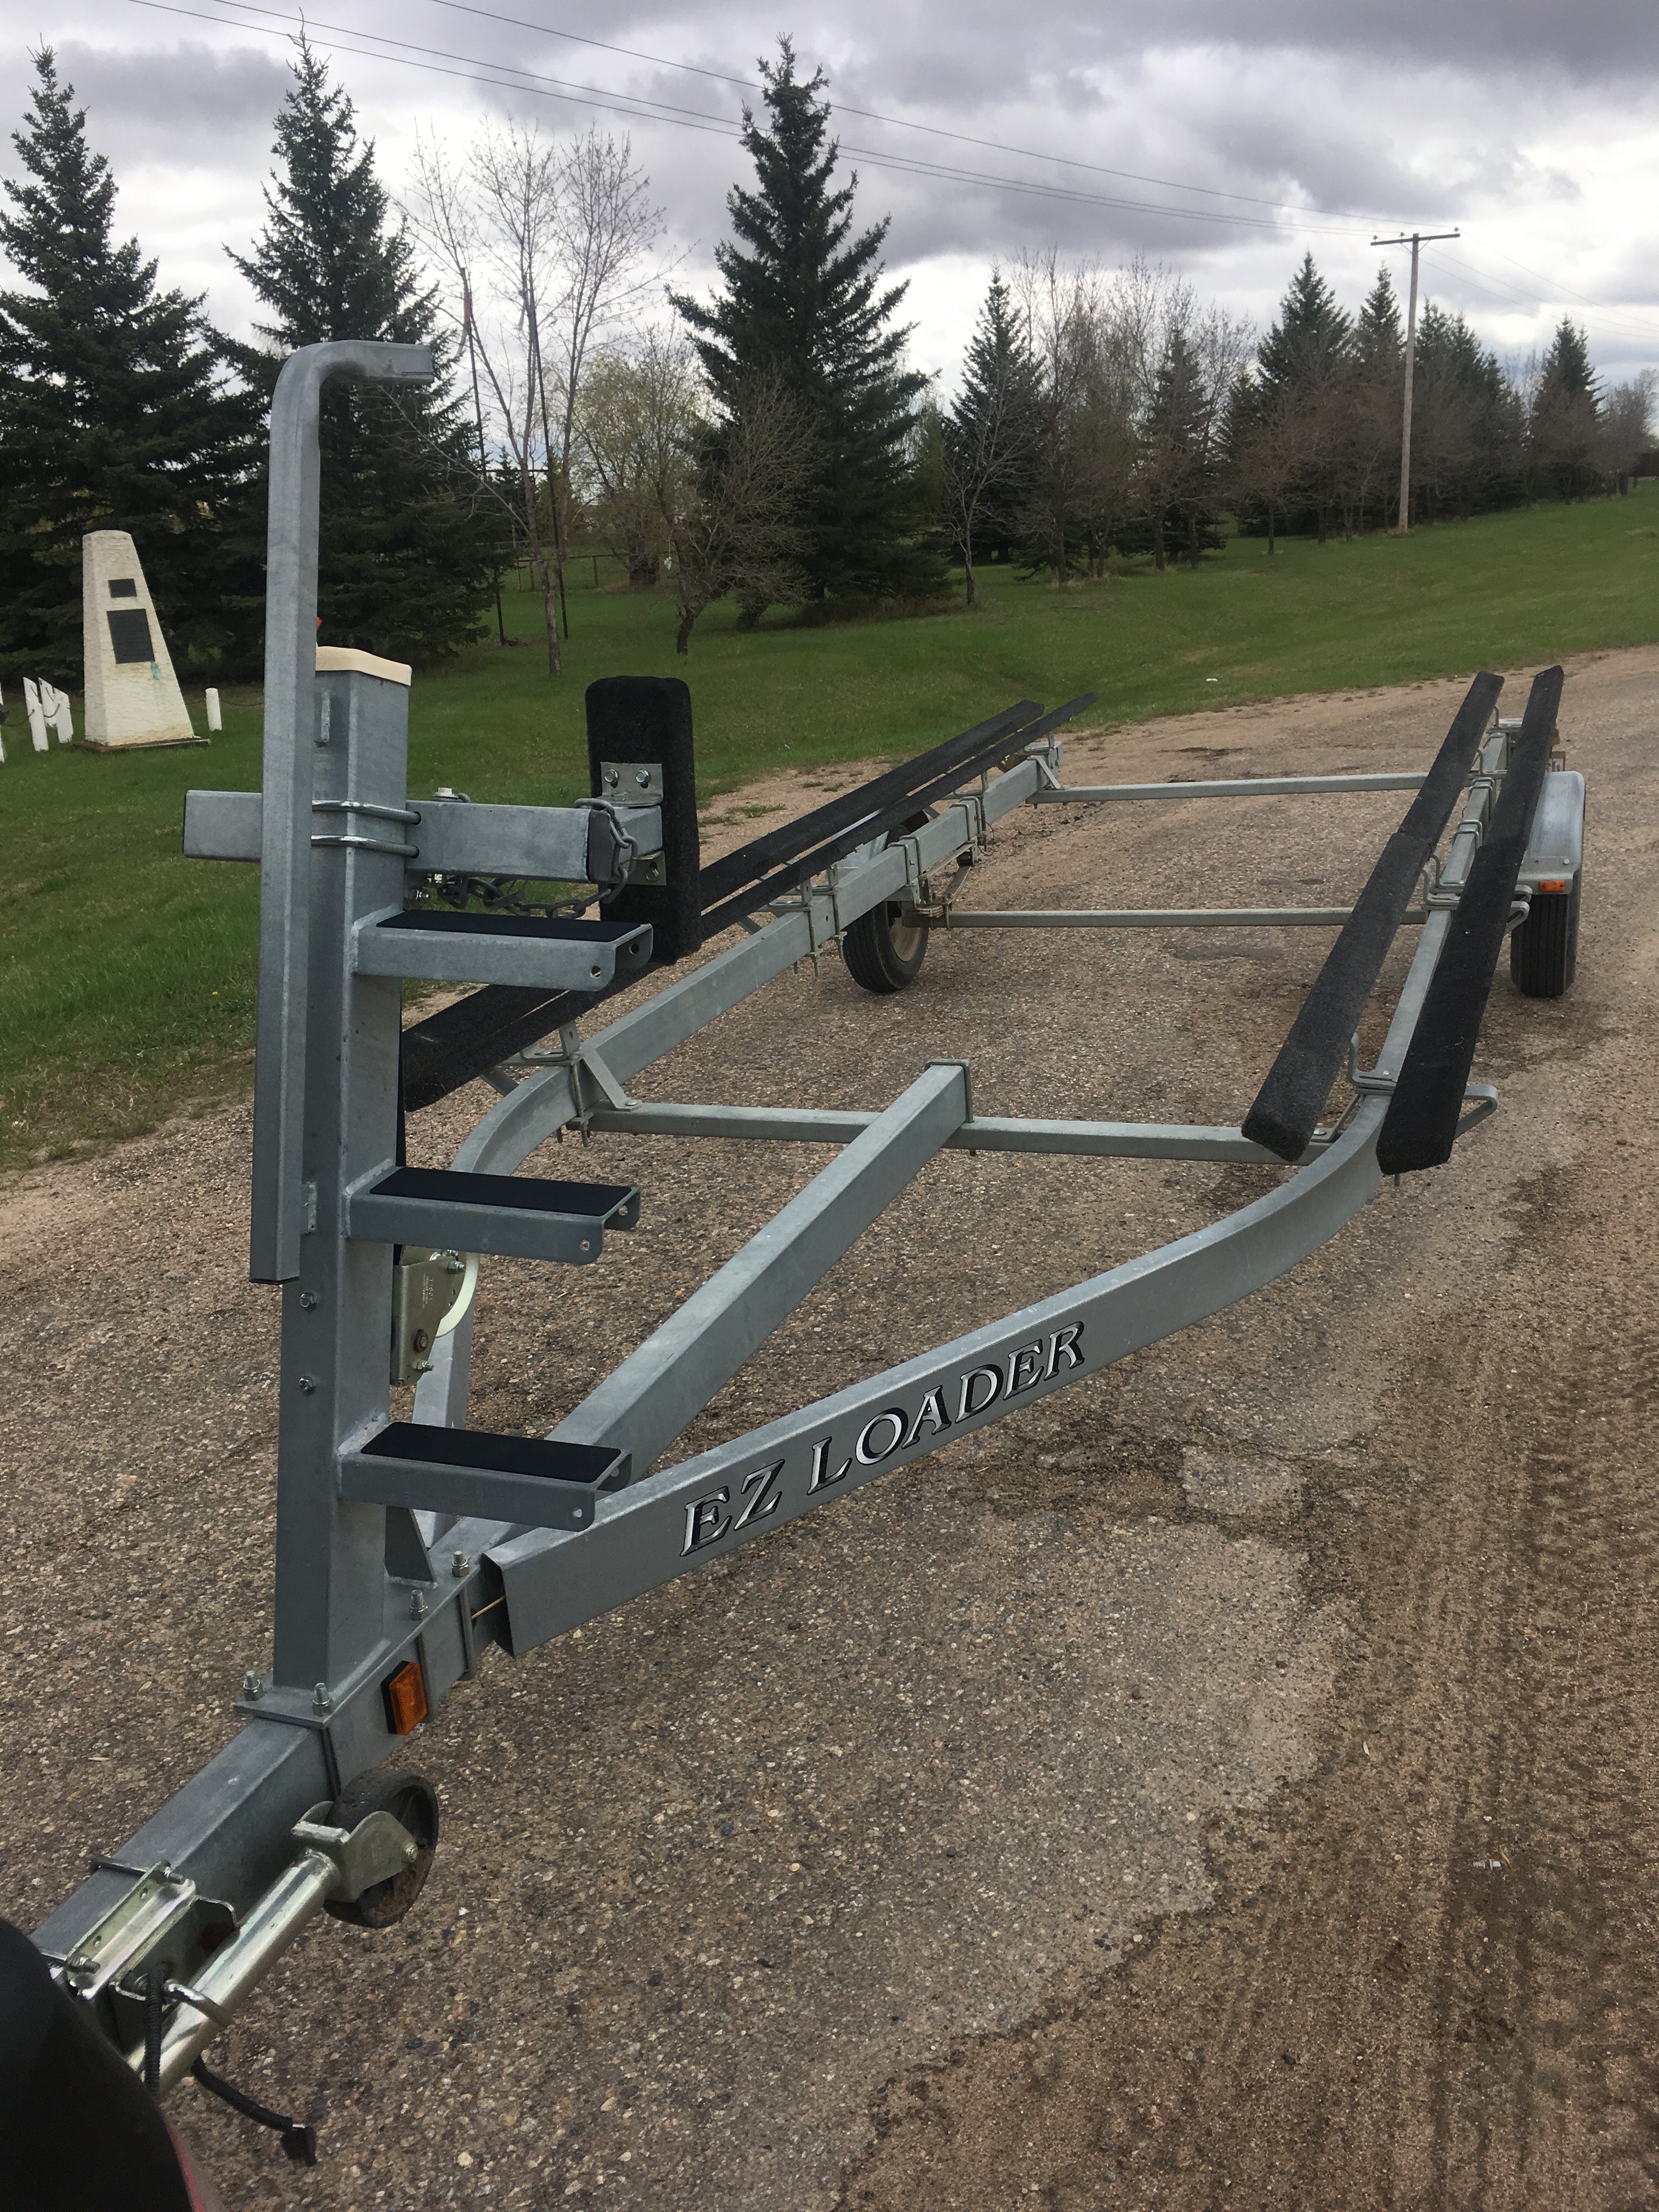
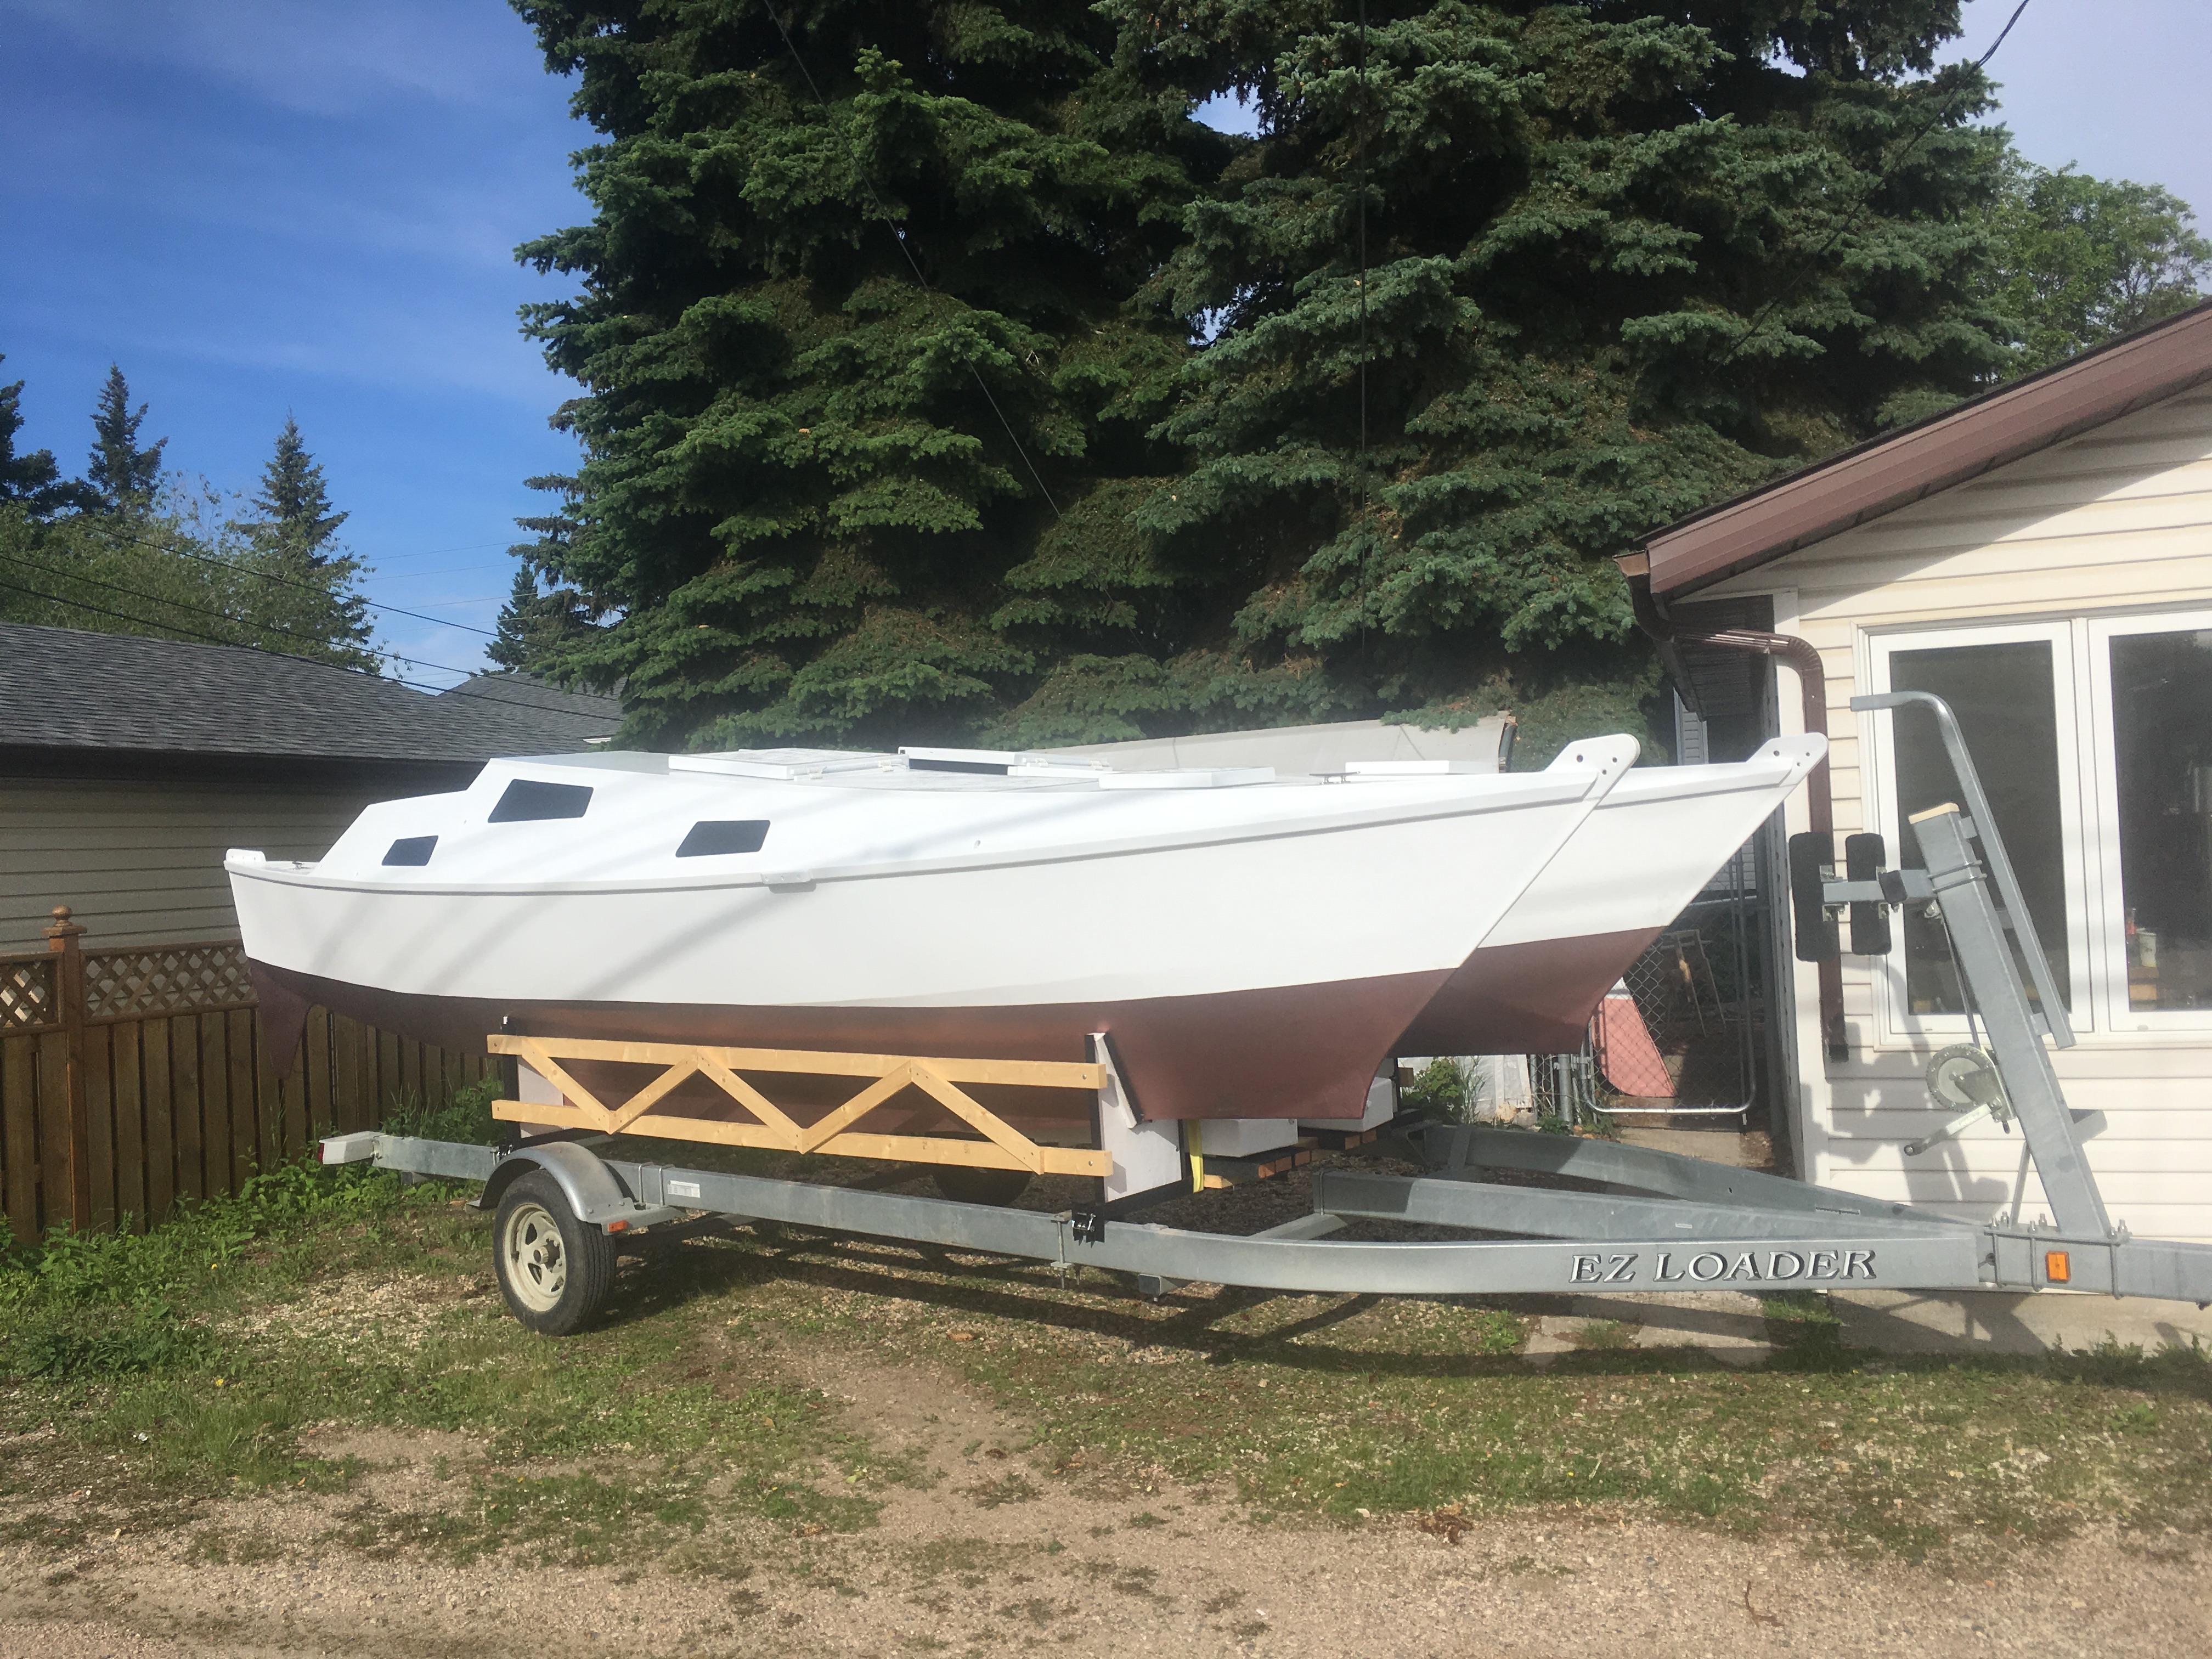
The Manafits on the trailer very well, with the outside of the hulls sitting within the outside of the trailer’s wheel wells.
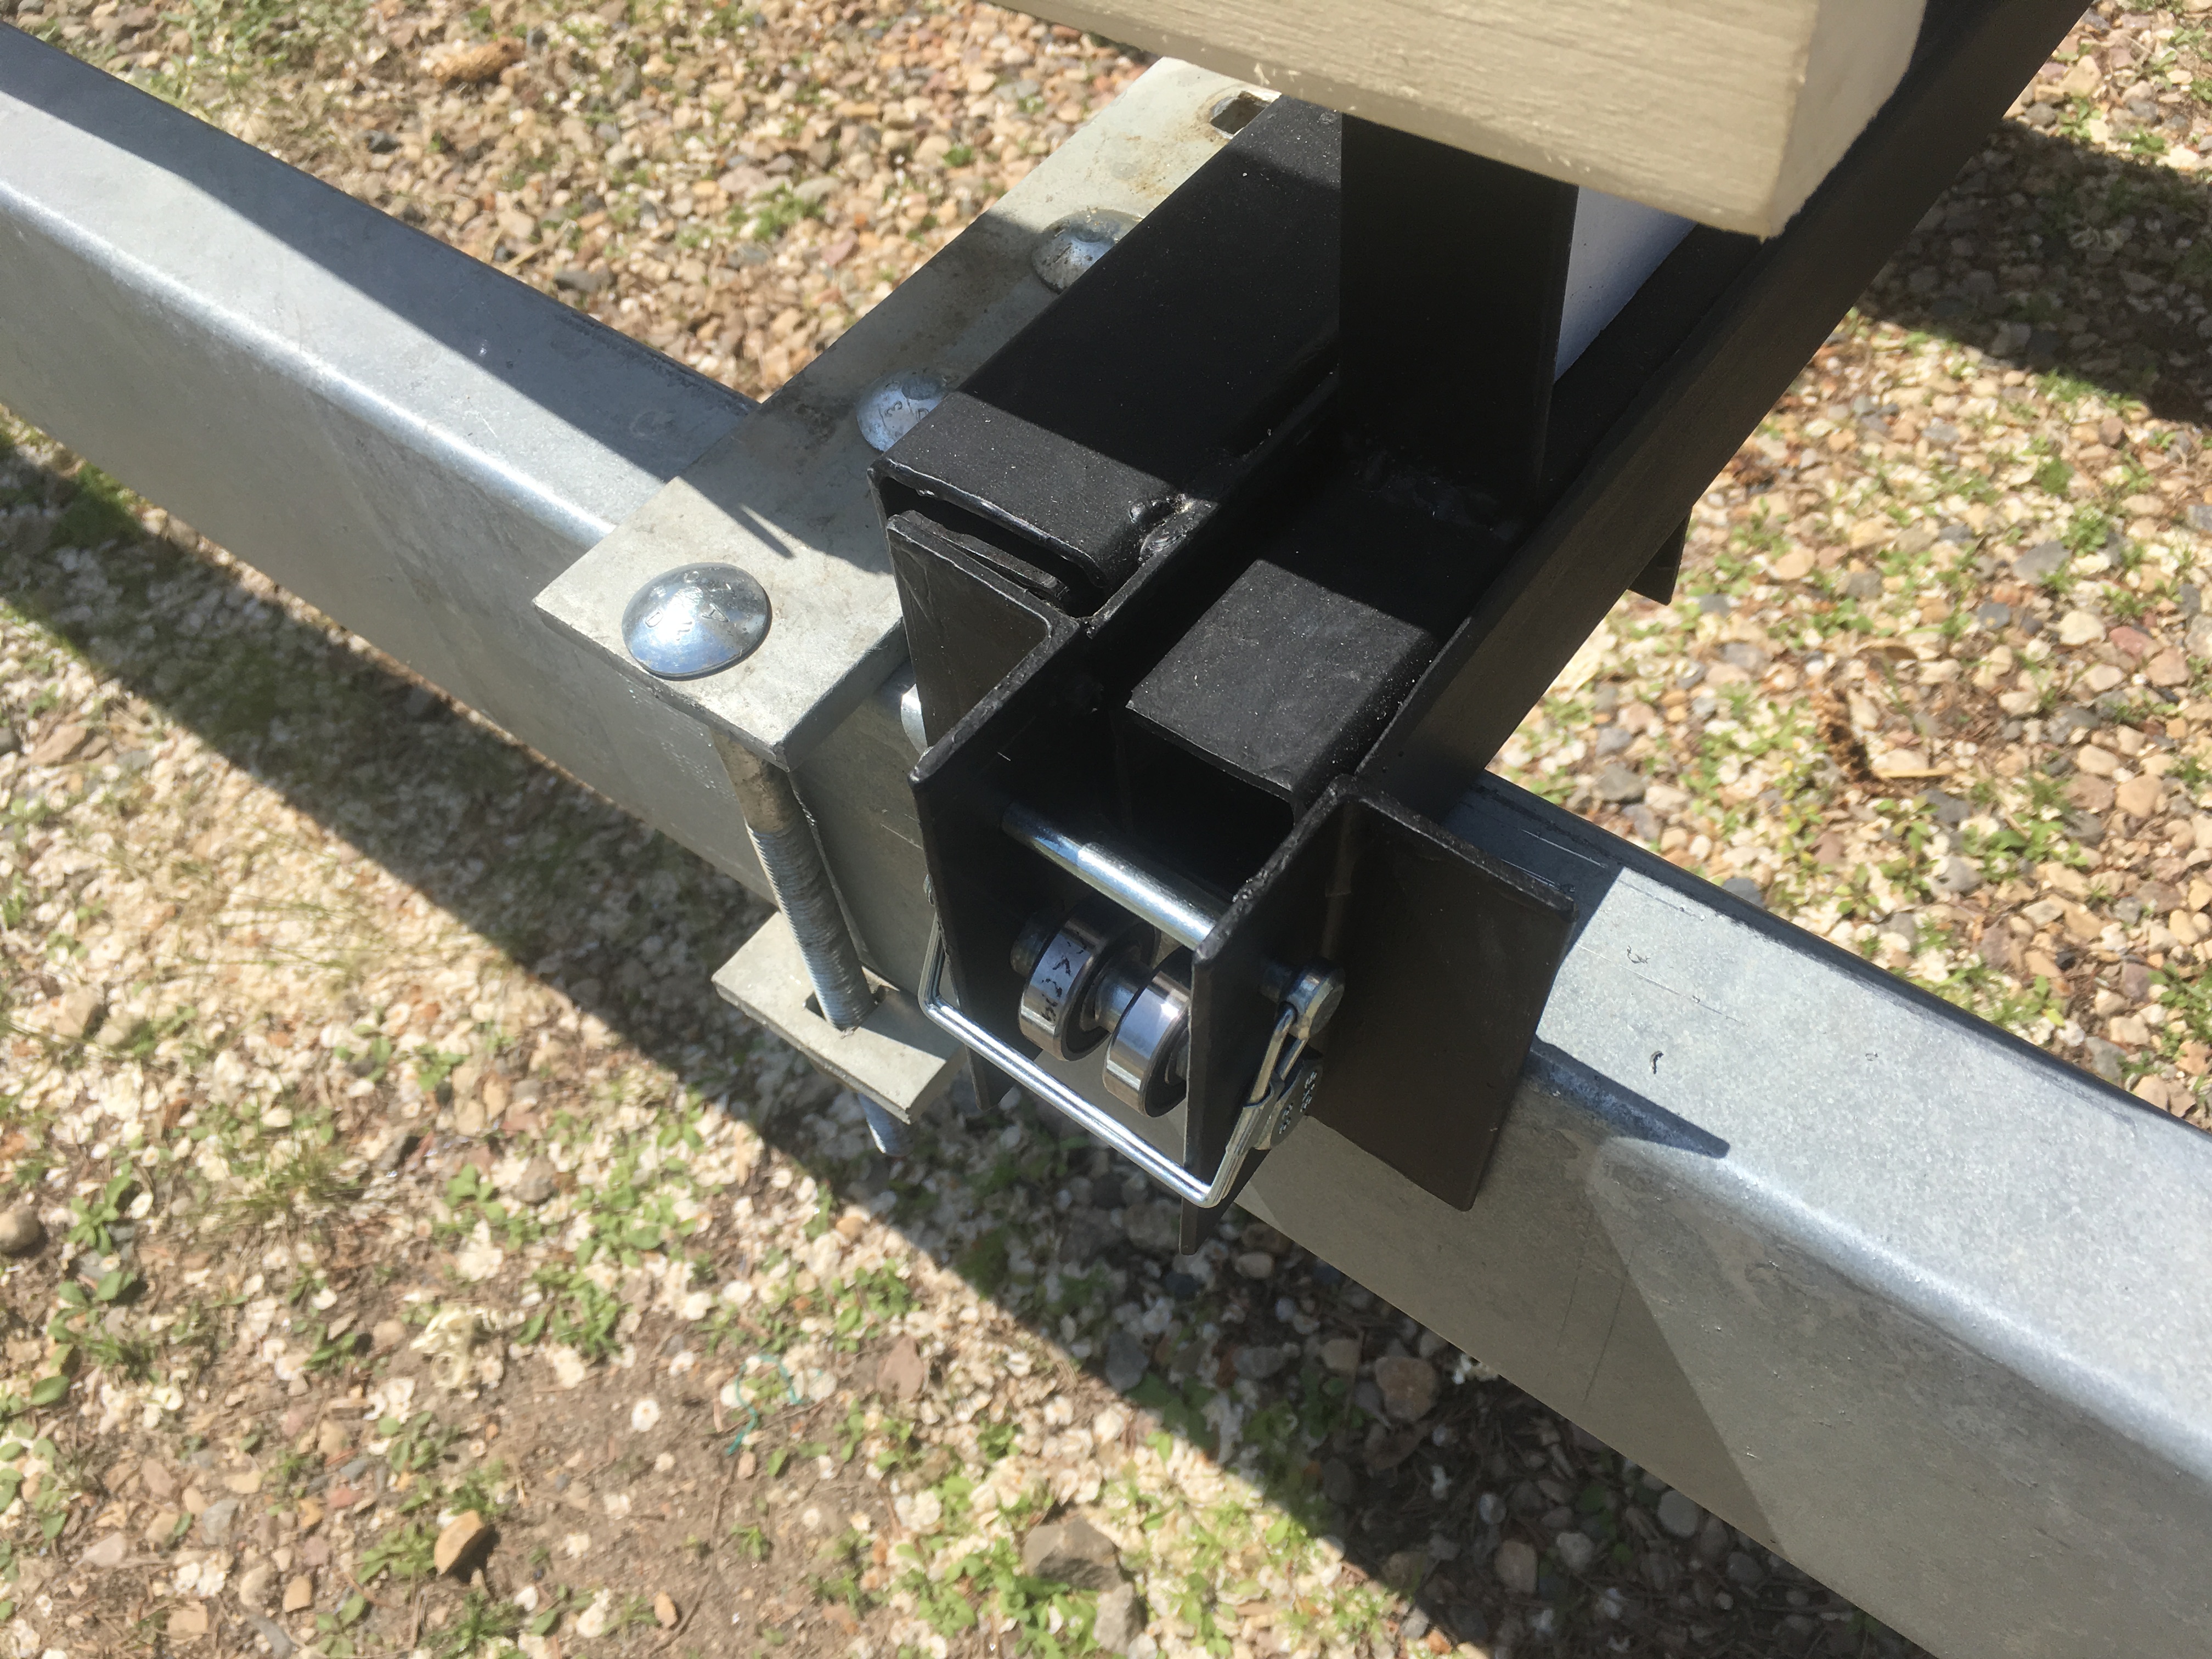
Retaining pins are removed to enable the trailer to expand
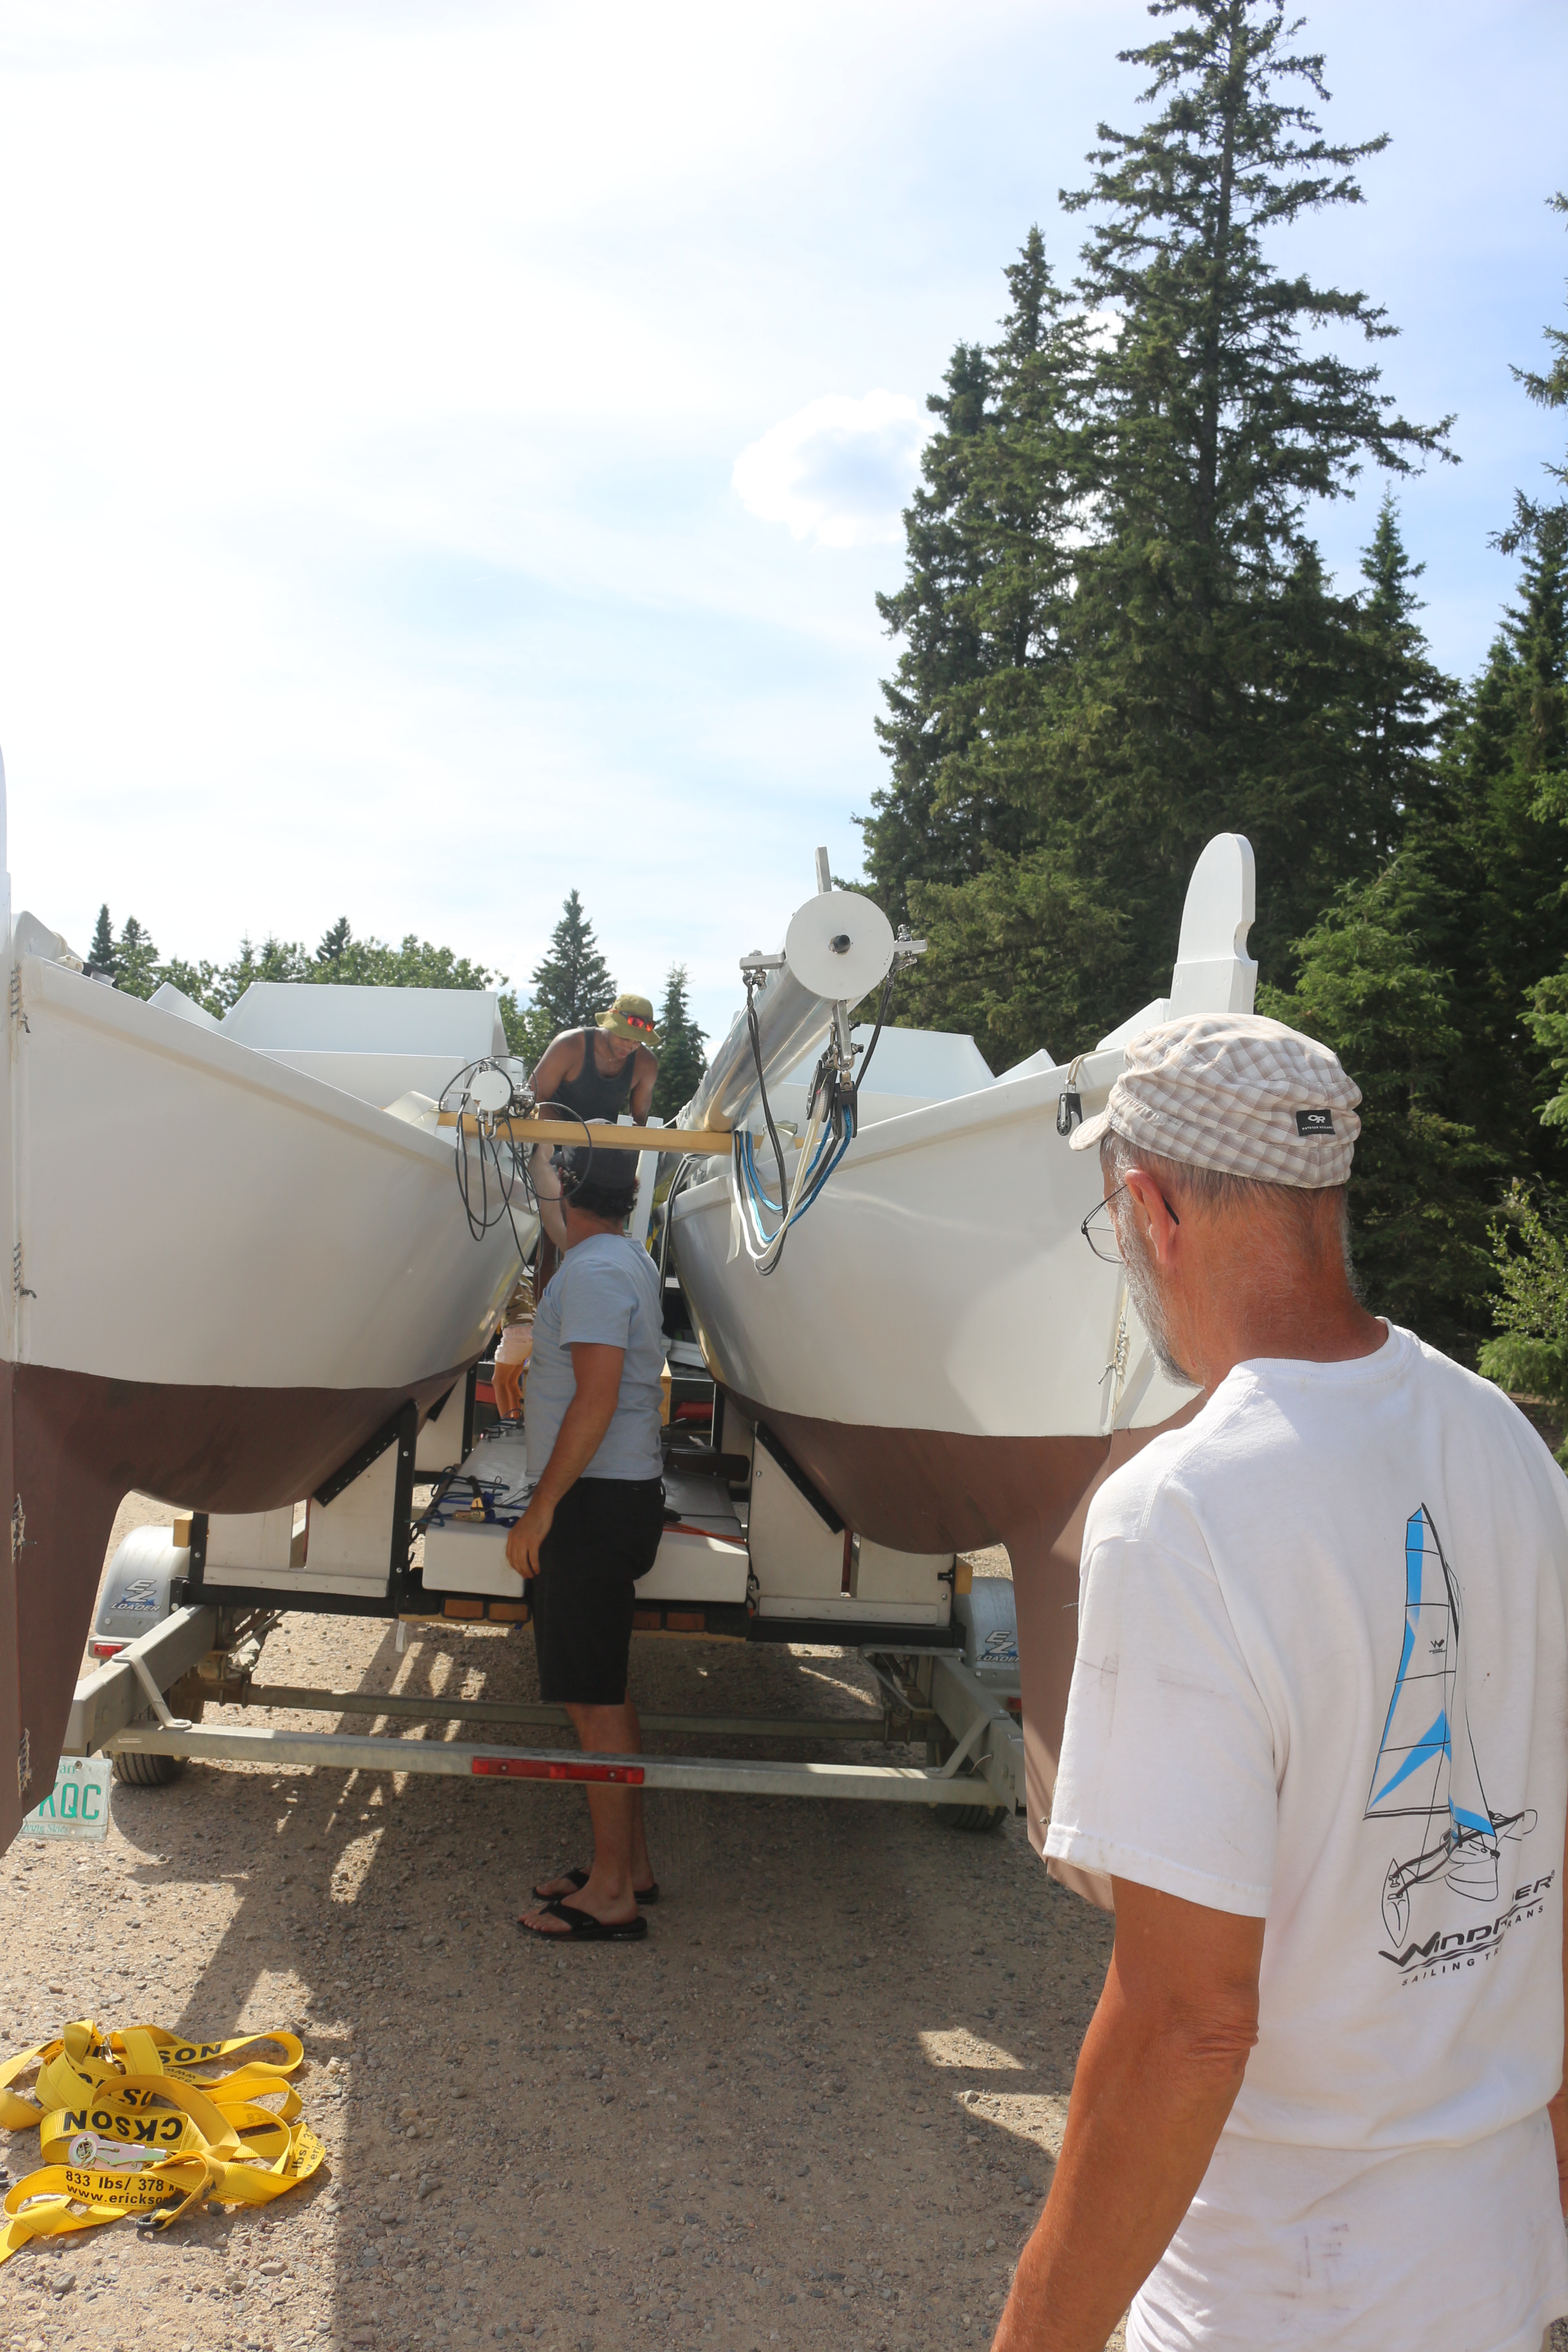
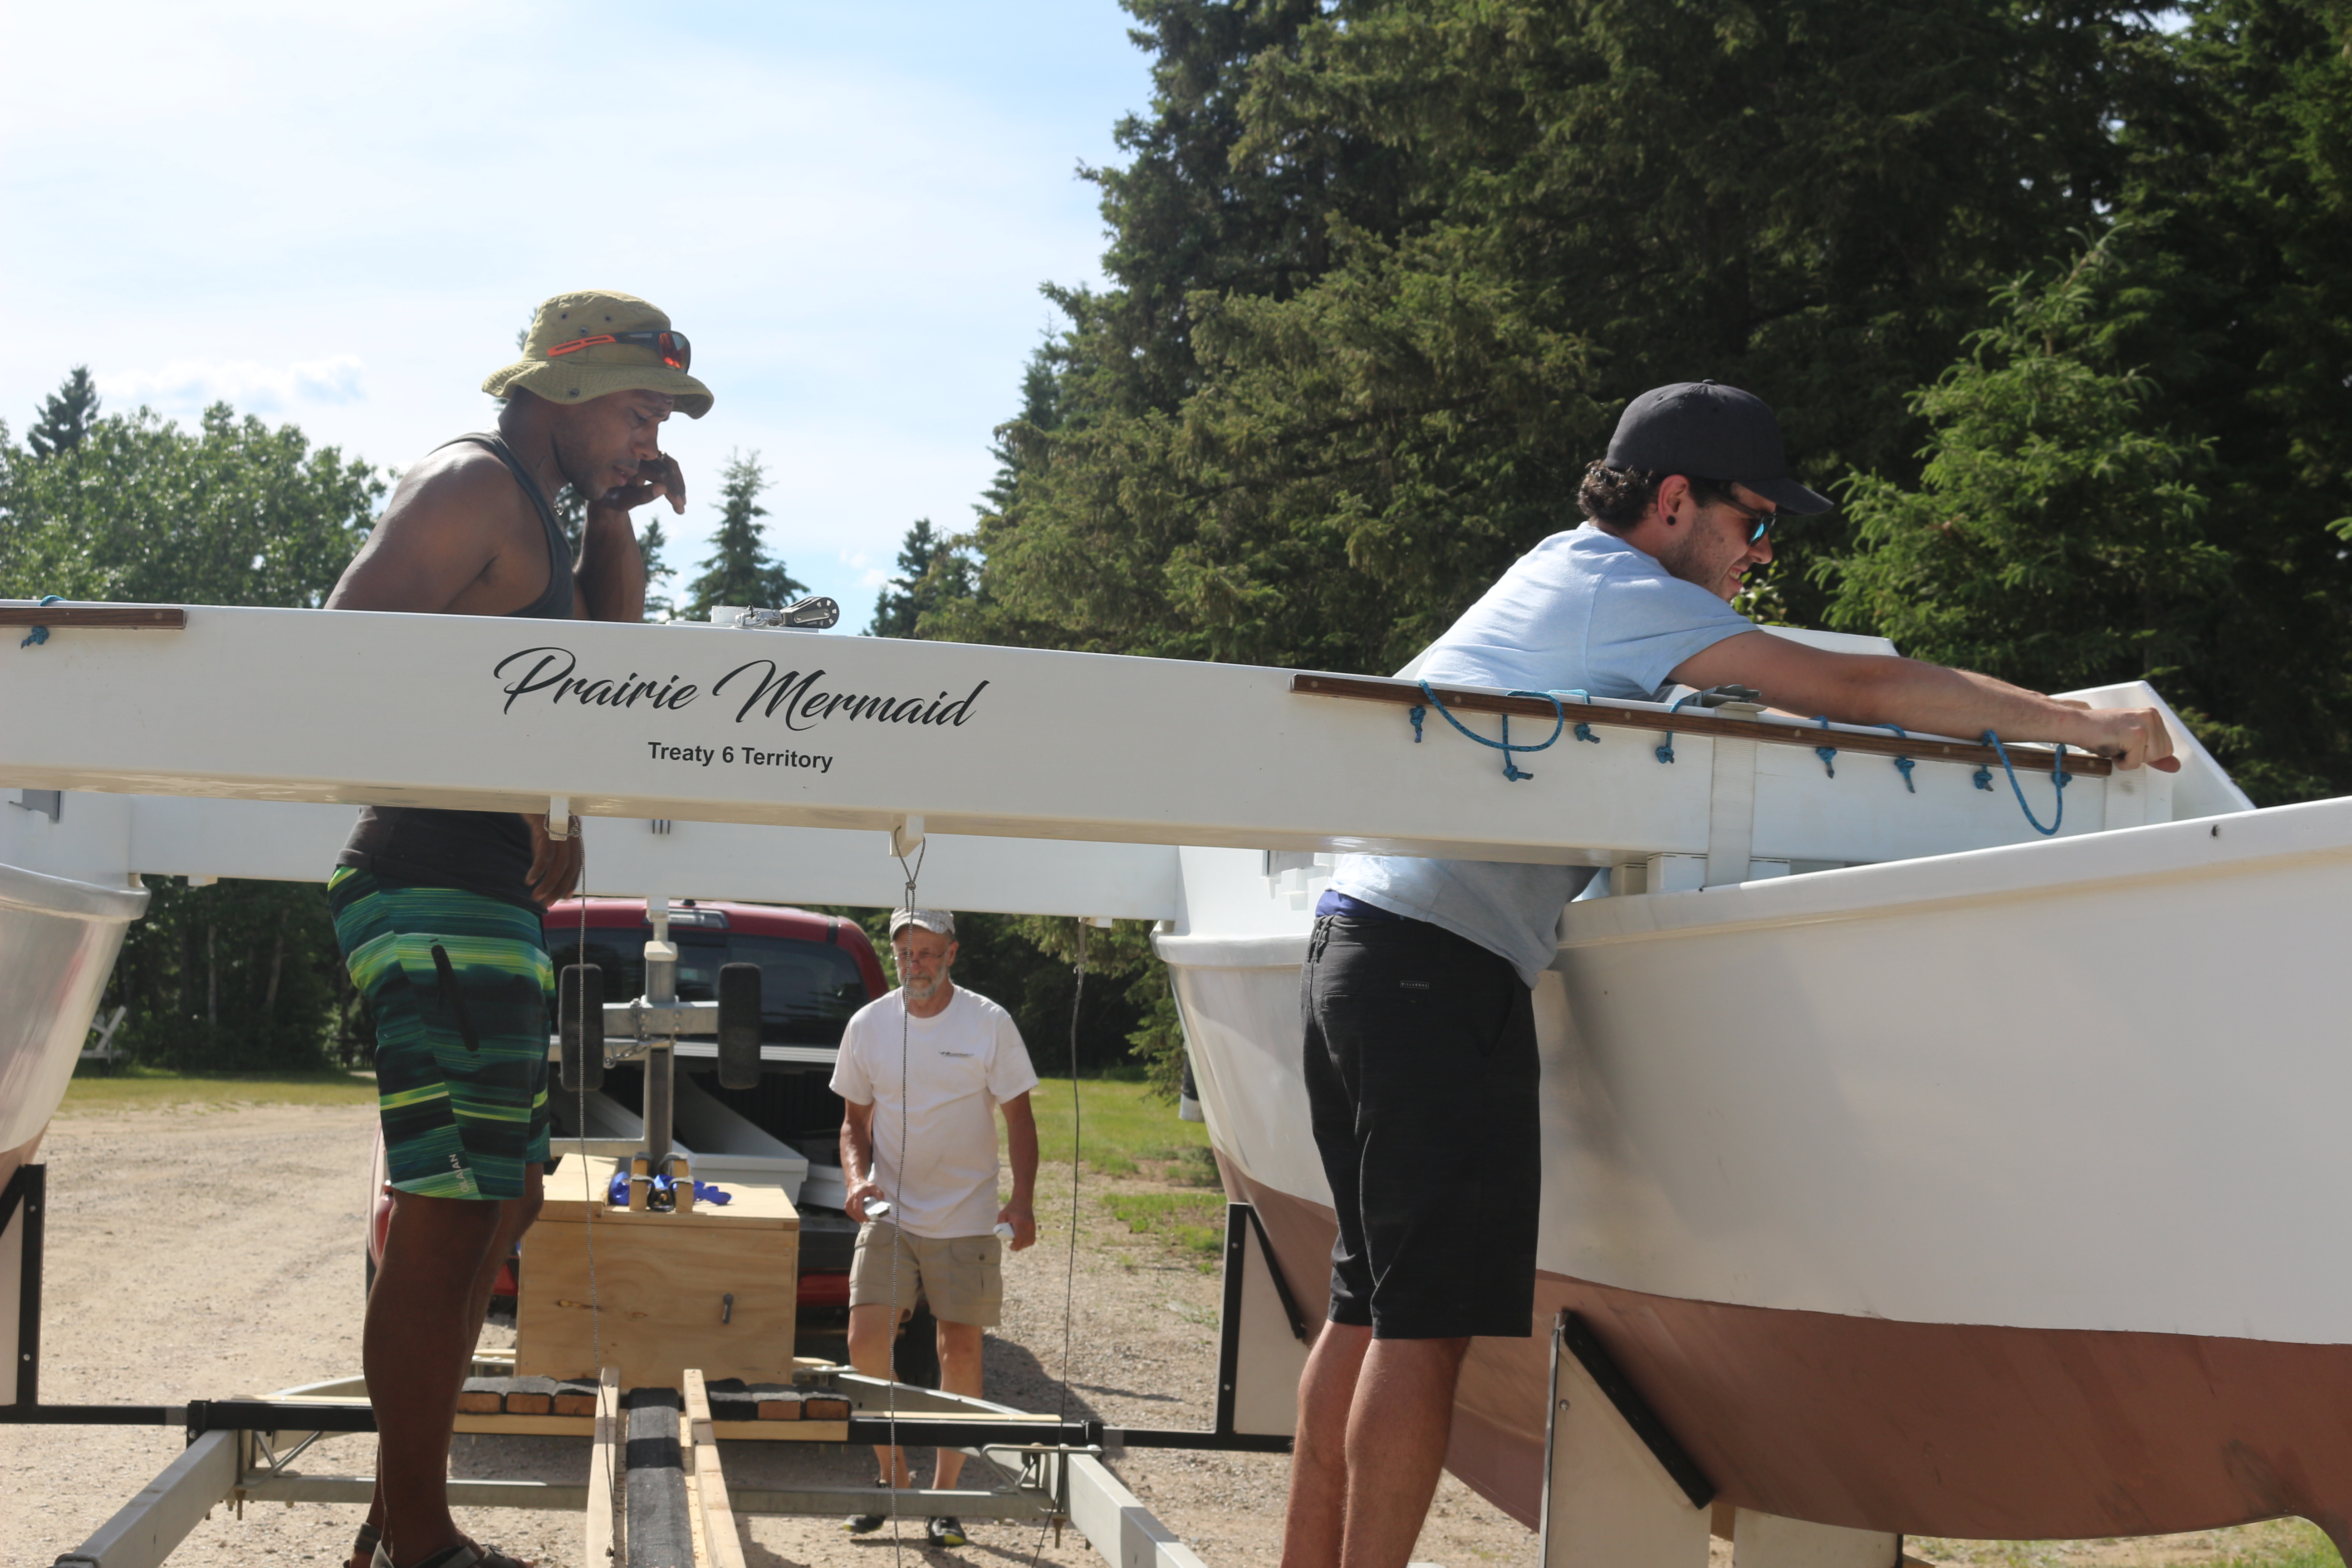
James Wharram Designs, the boat’s designer, had sent me photos of the trailer they used to carry the prototype Mana to its first launch. They lashed temporary crossbeams between the two hulls to stabilize them and then placed the masts on top of them. I followed their example, placing the four panels that make up the centre platform upright between the masts. The proper crossbeams were then placed lengthwise on the trailer frames.
Note that the bunks are still in trailering position in this shot
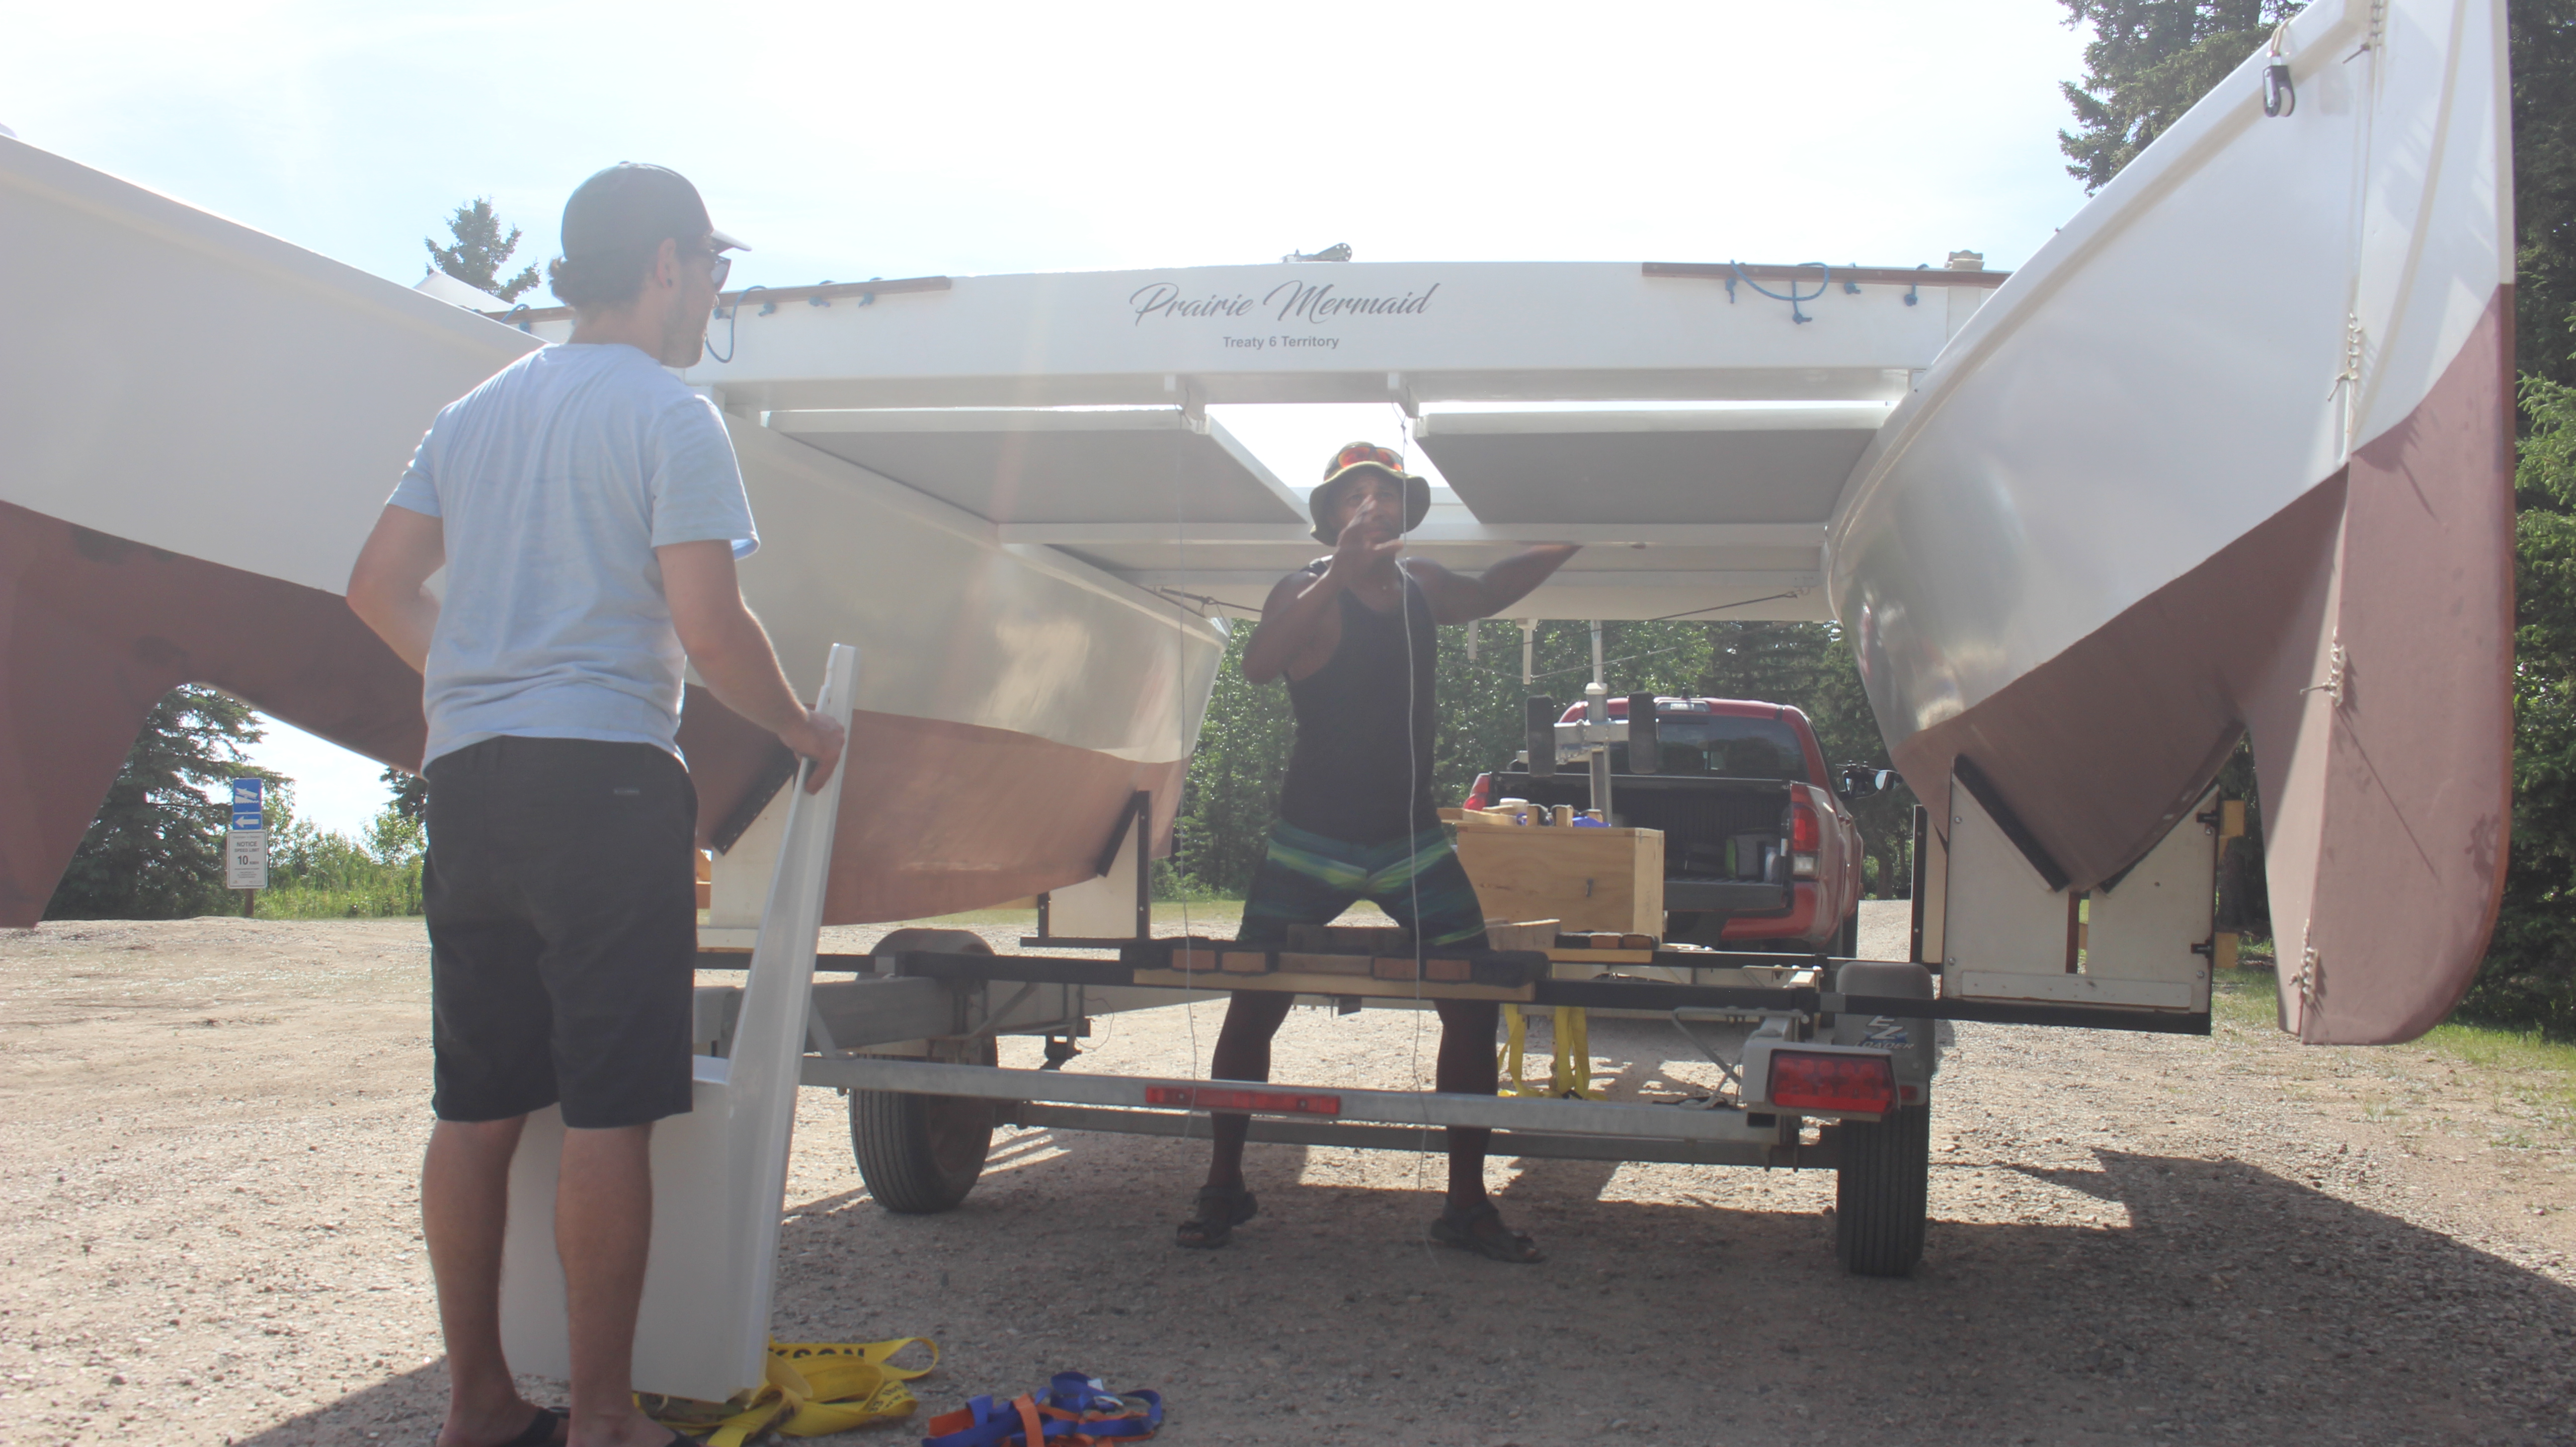
Once the hulls are pulled apart, crossbeams set in place quickly and are held down by straps and over centre cam buckles.
The trailer has now been “expanded” wide enough to drop the front crossbeam in place, and the aft crossbeam is still resting on the trailer
With both crossbeams locked into position, the four sections of lightweight honeycomb platform are put in place. The motor mount is the last part of the puzzle to be added.
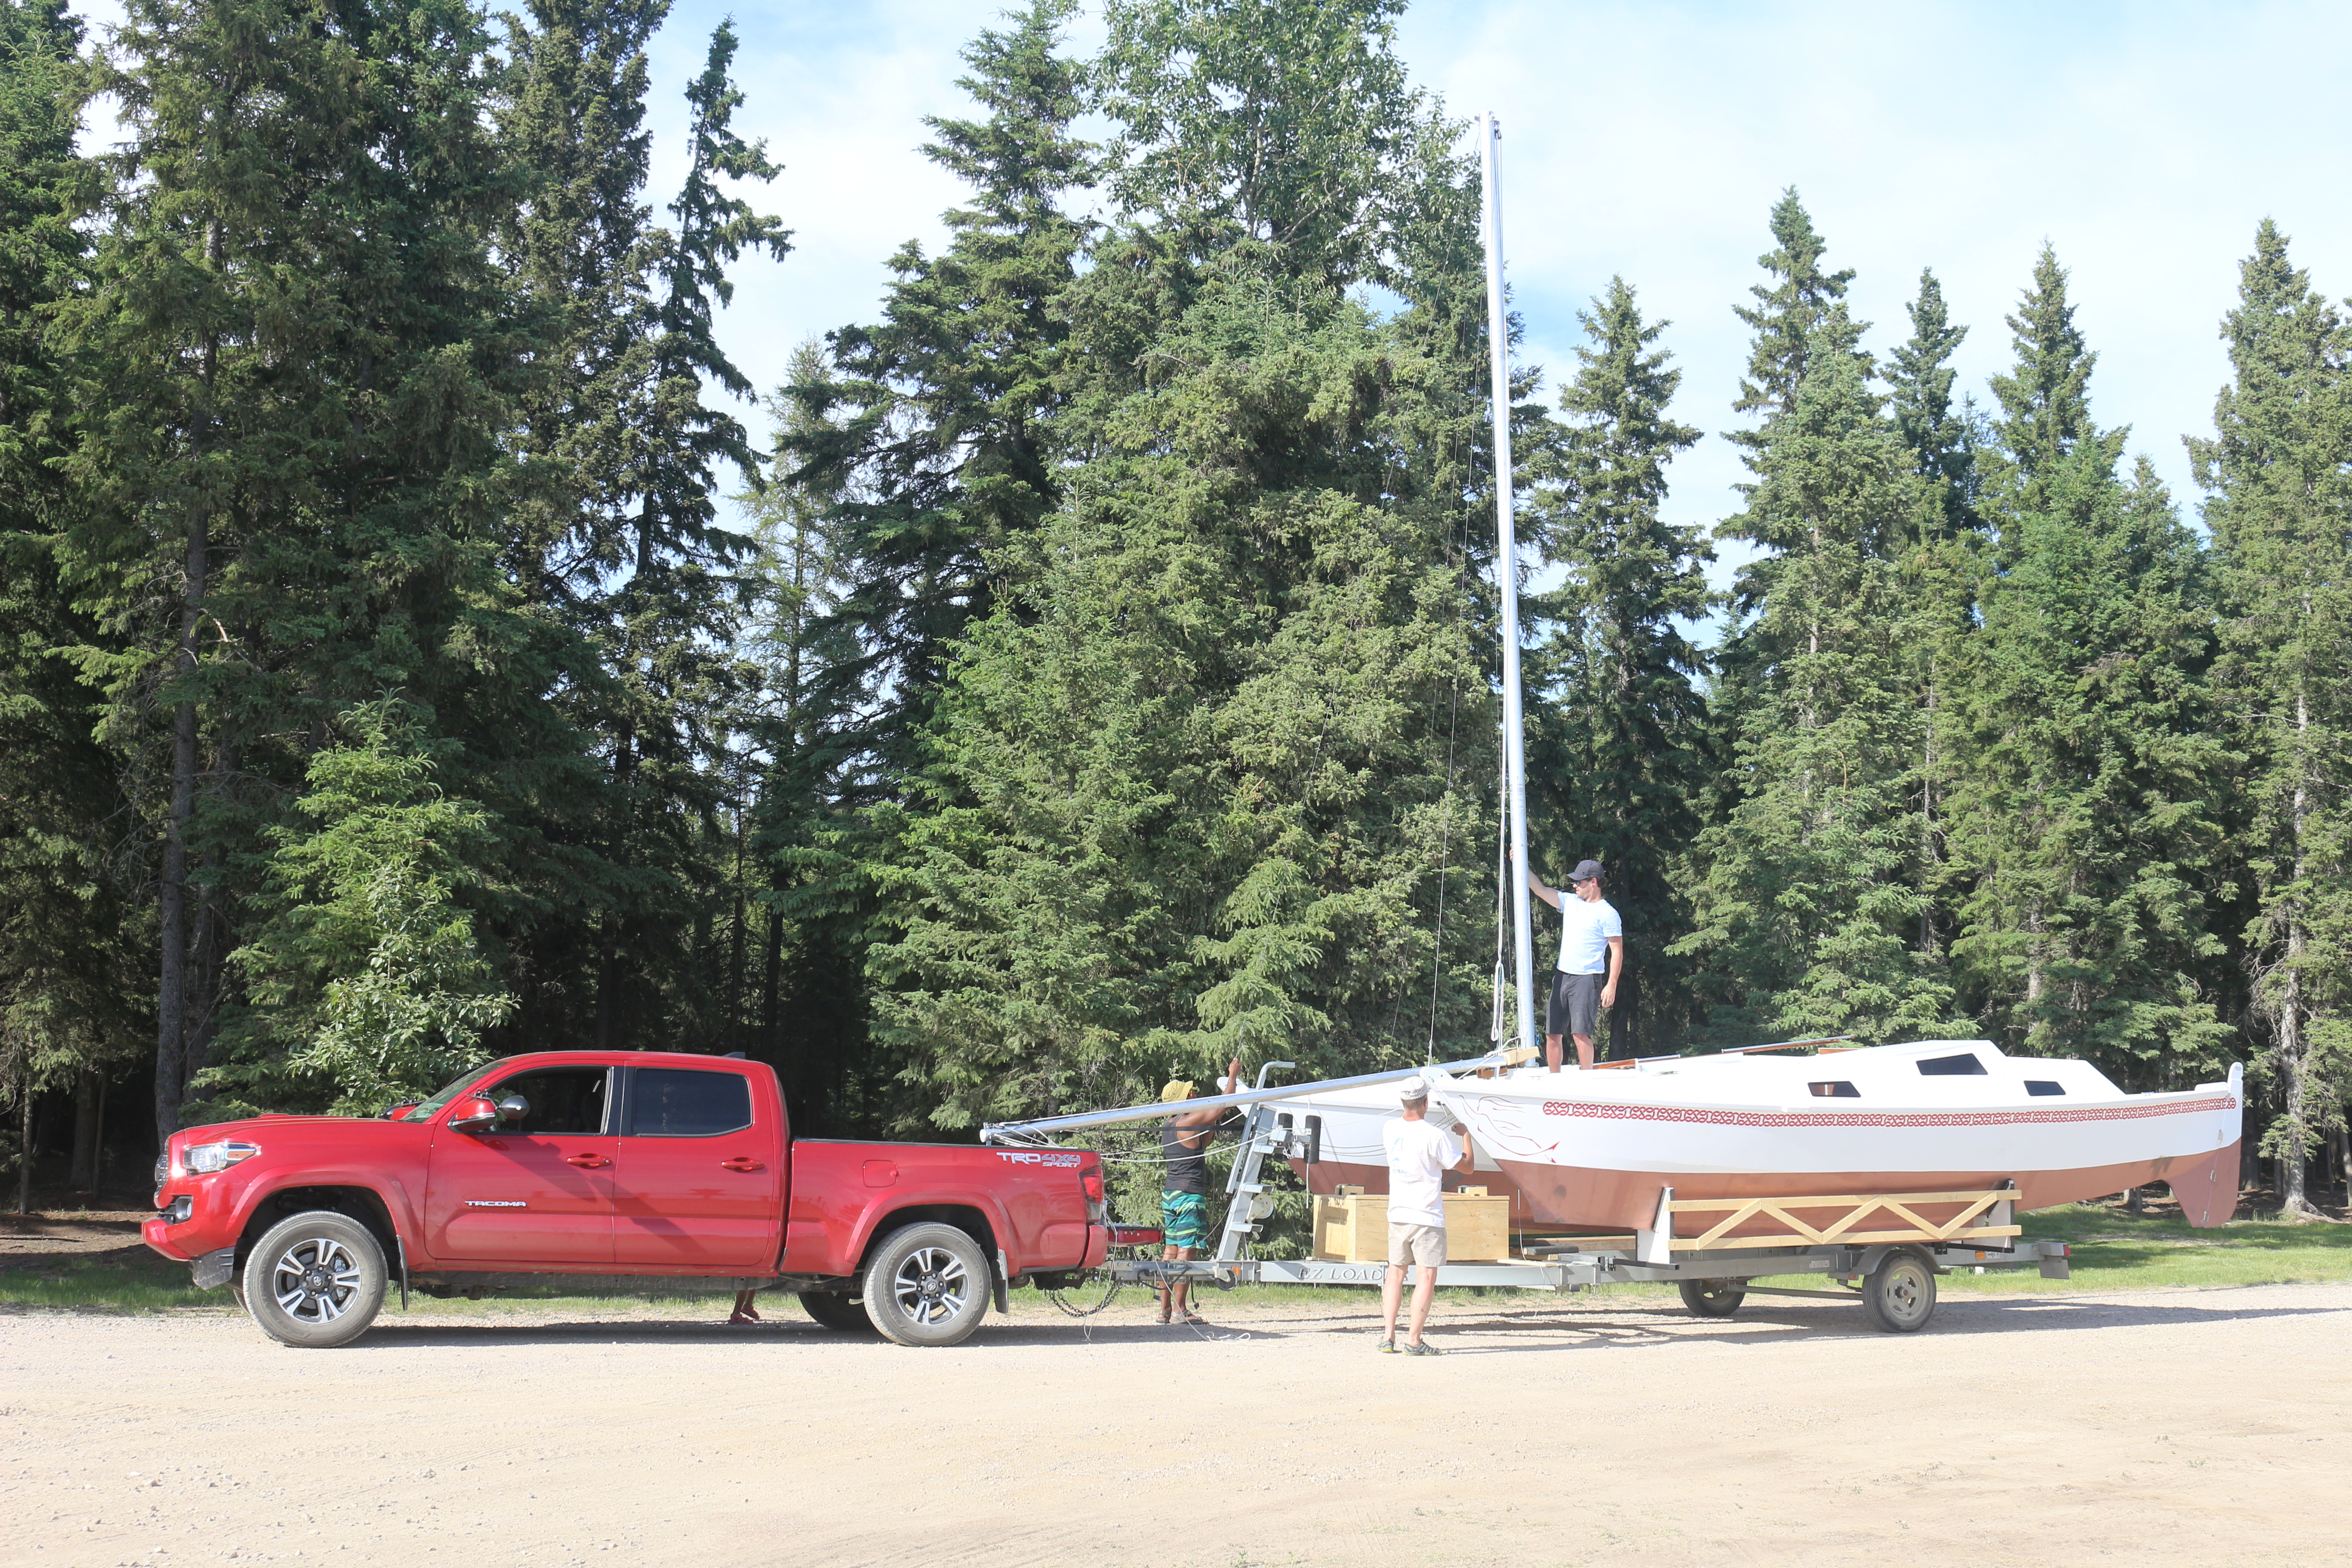
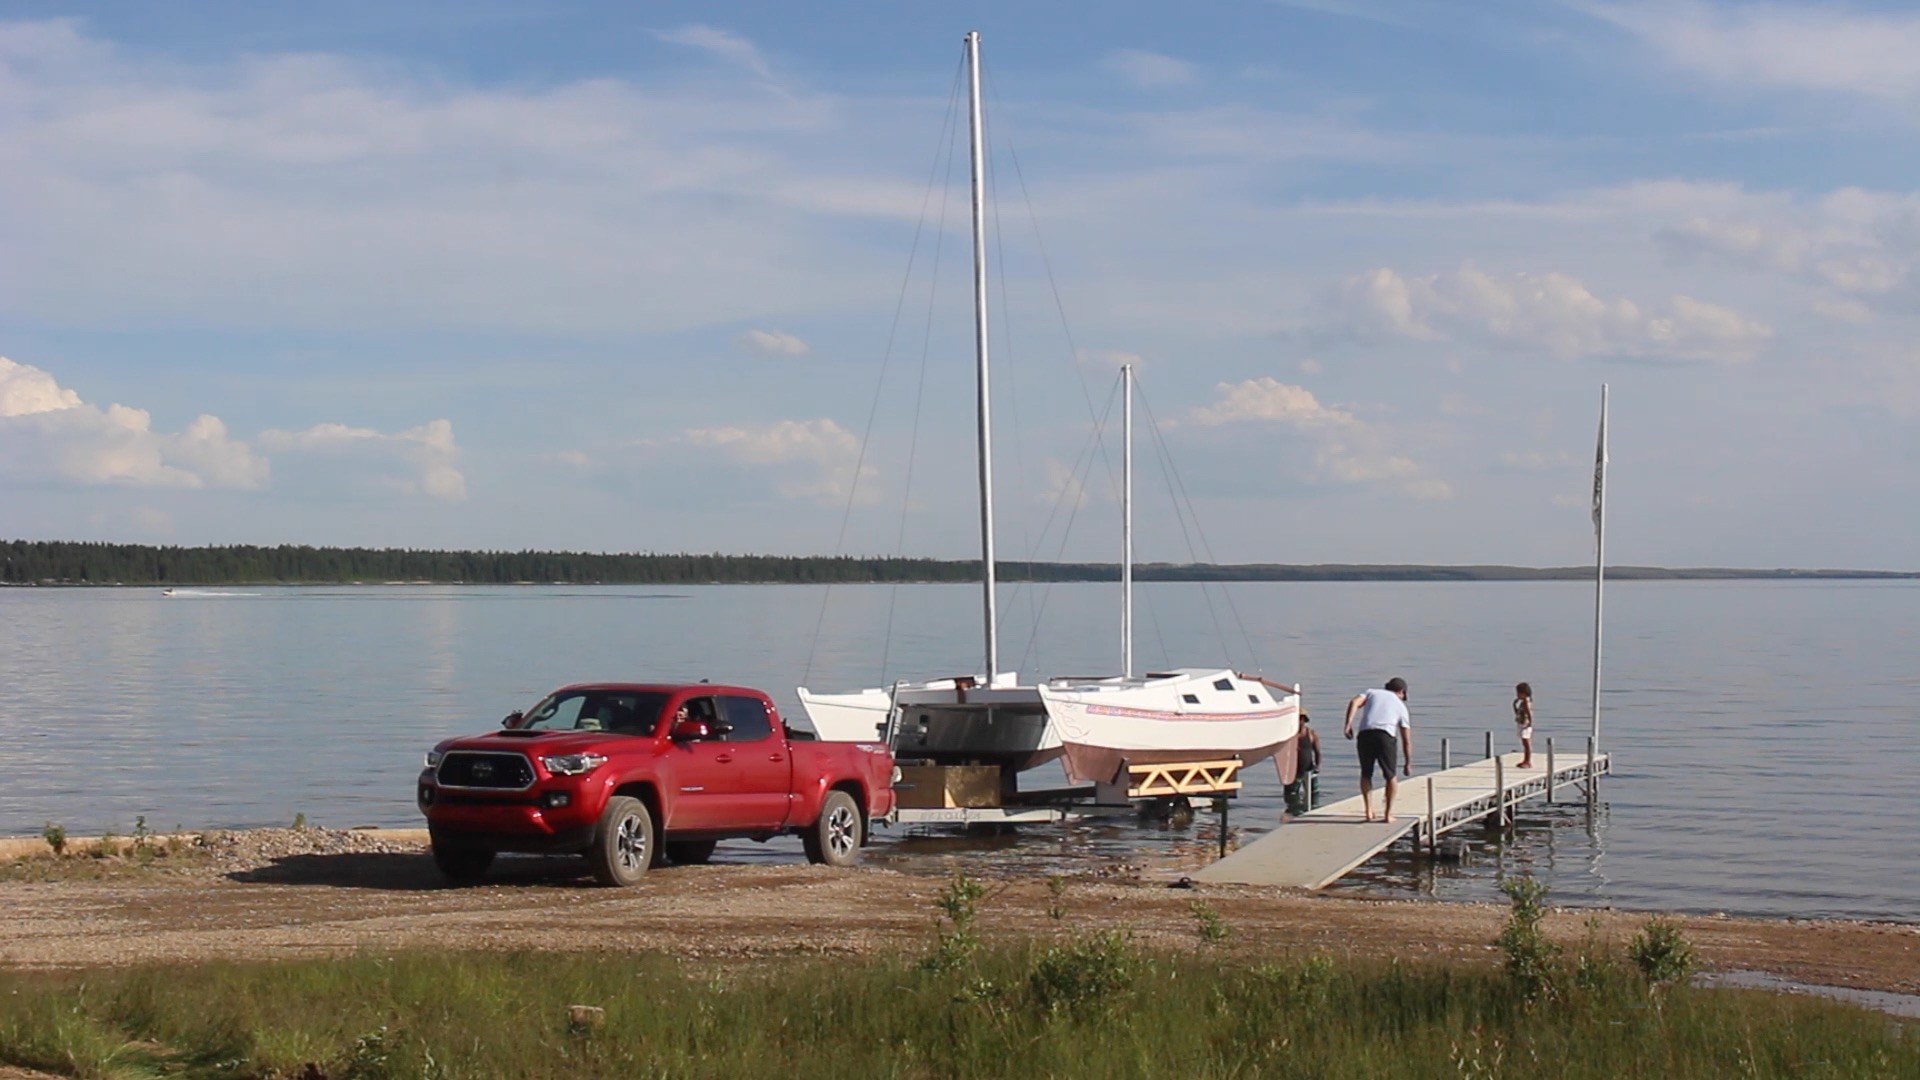
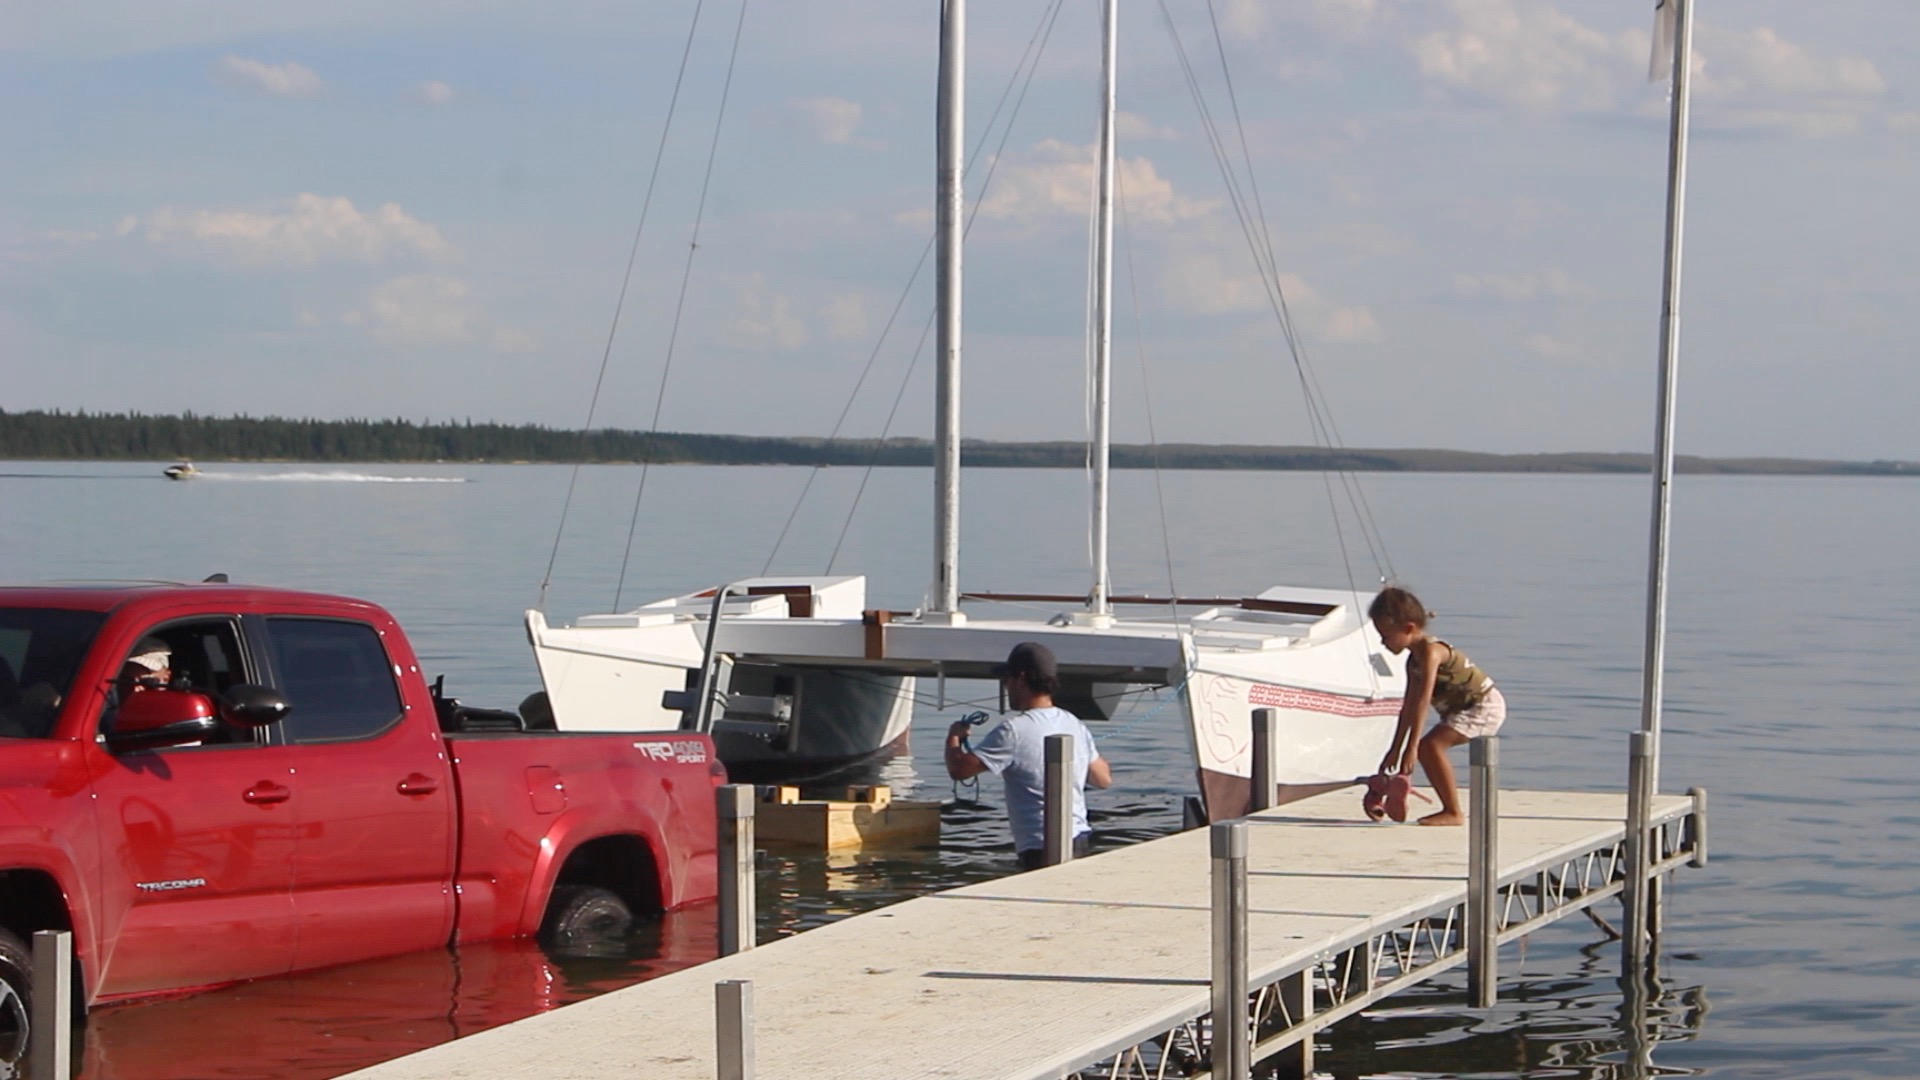
Next comes the masts. Using the mizzen mast as a temporary gin pole and the trailer winch as muscle, the main mast is raised.
Next the mizzen…
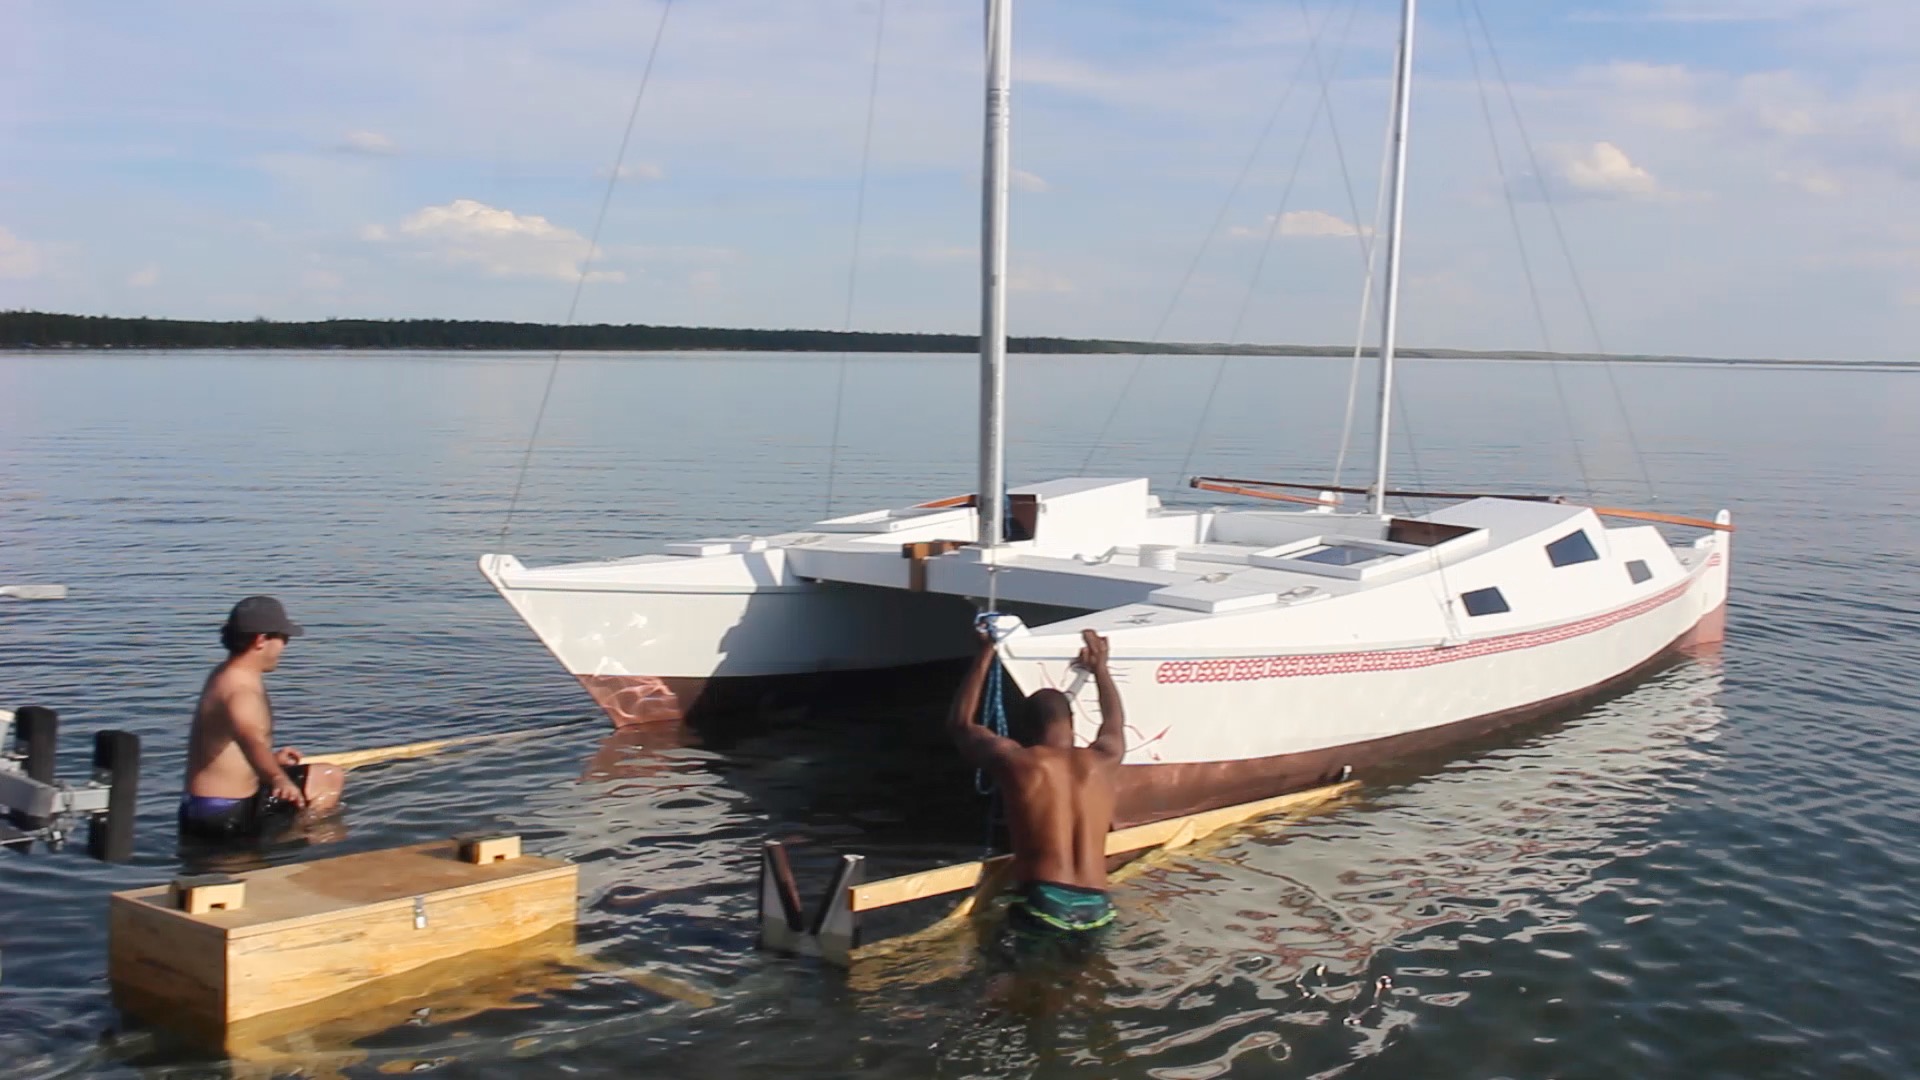
Time to splash…
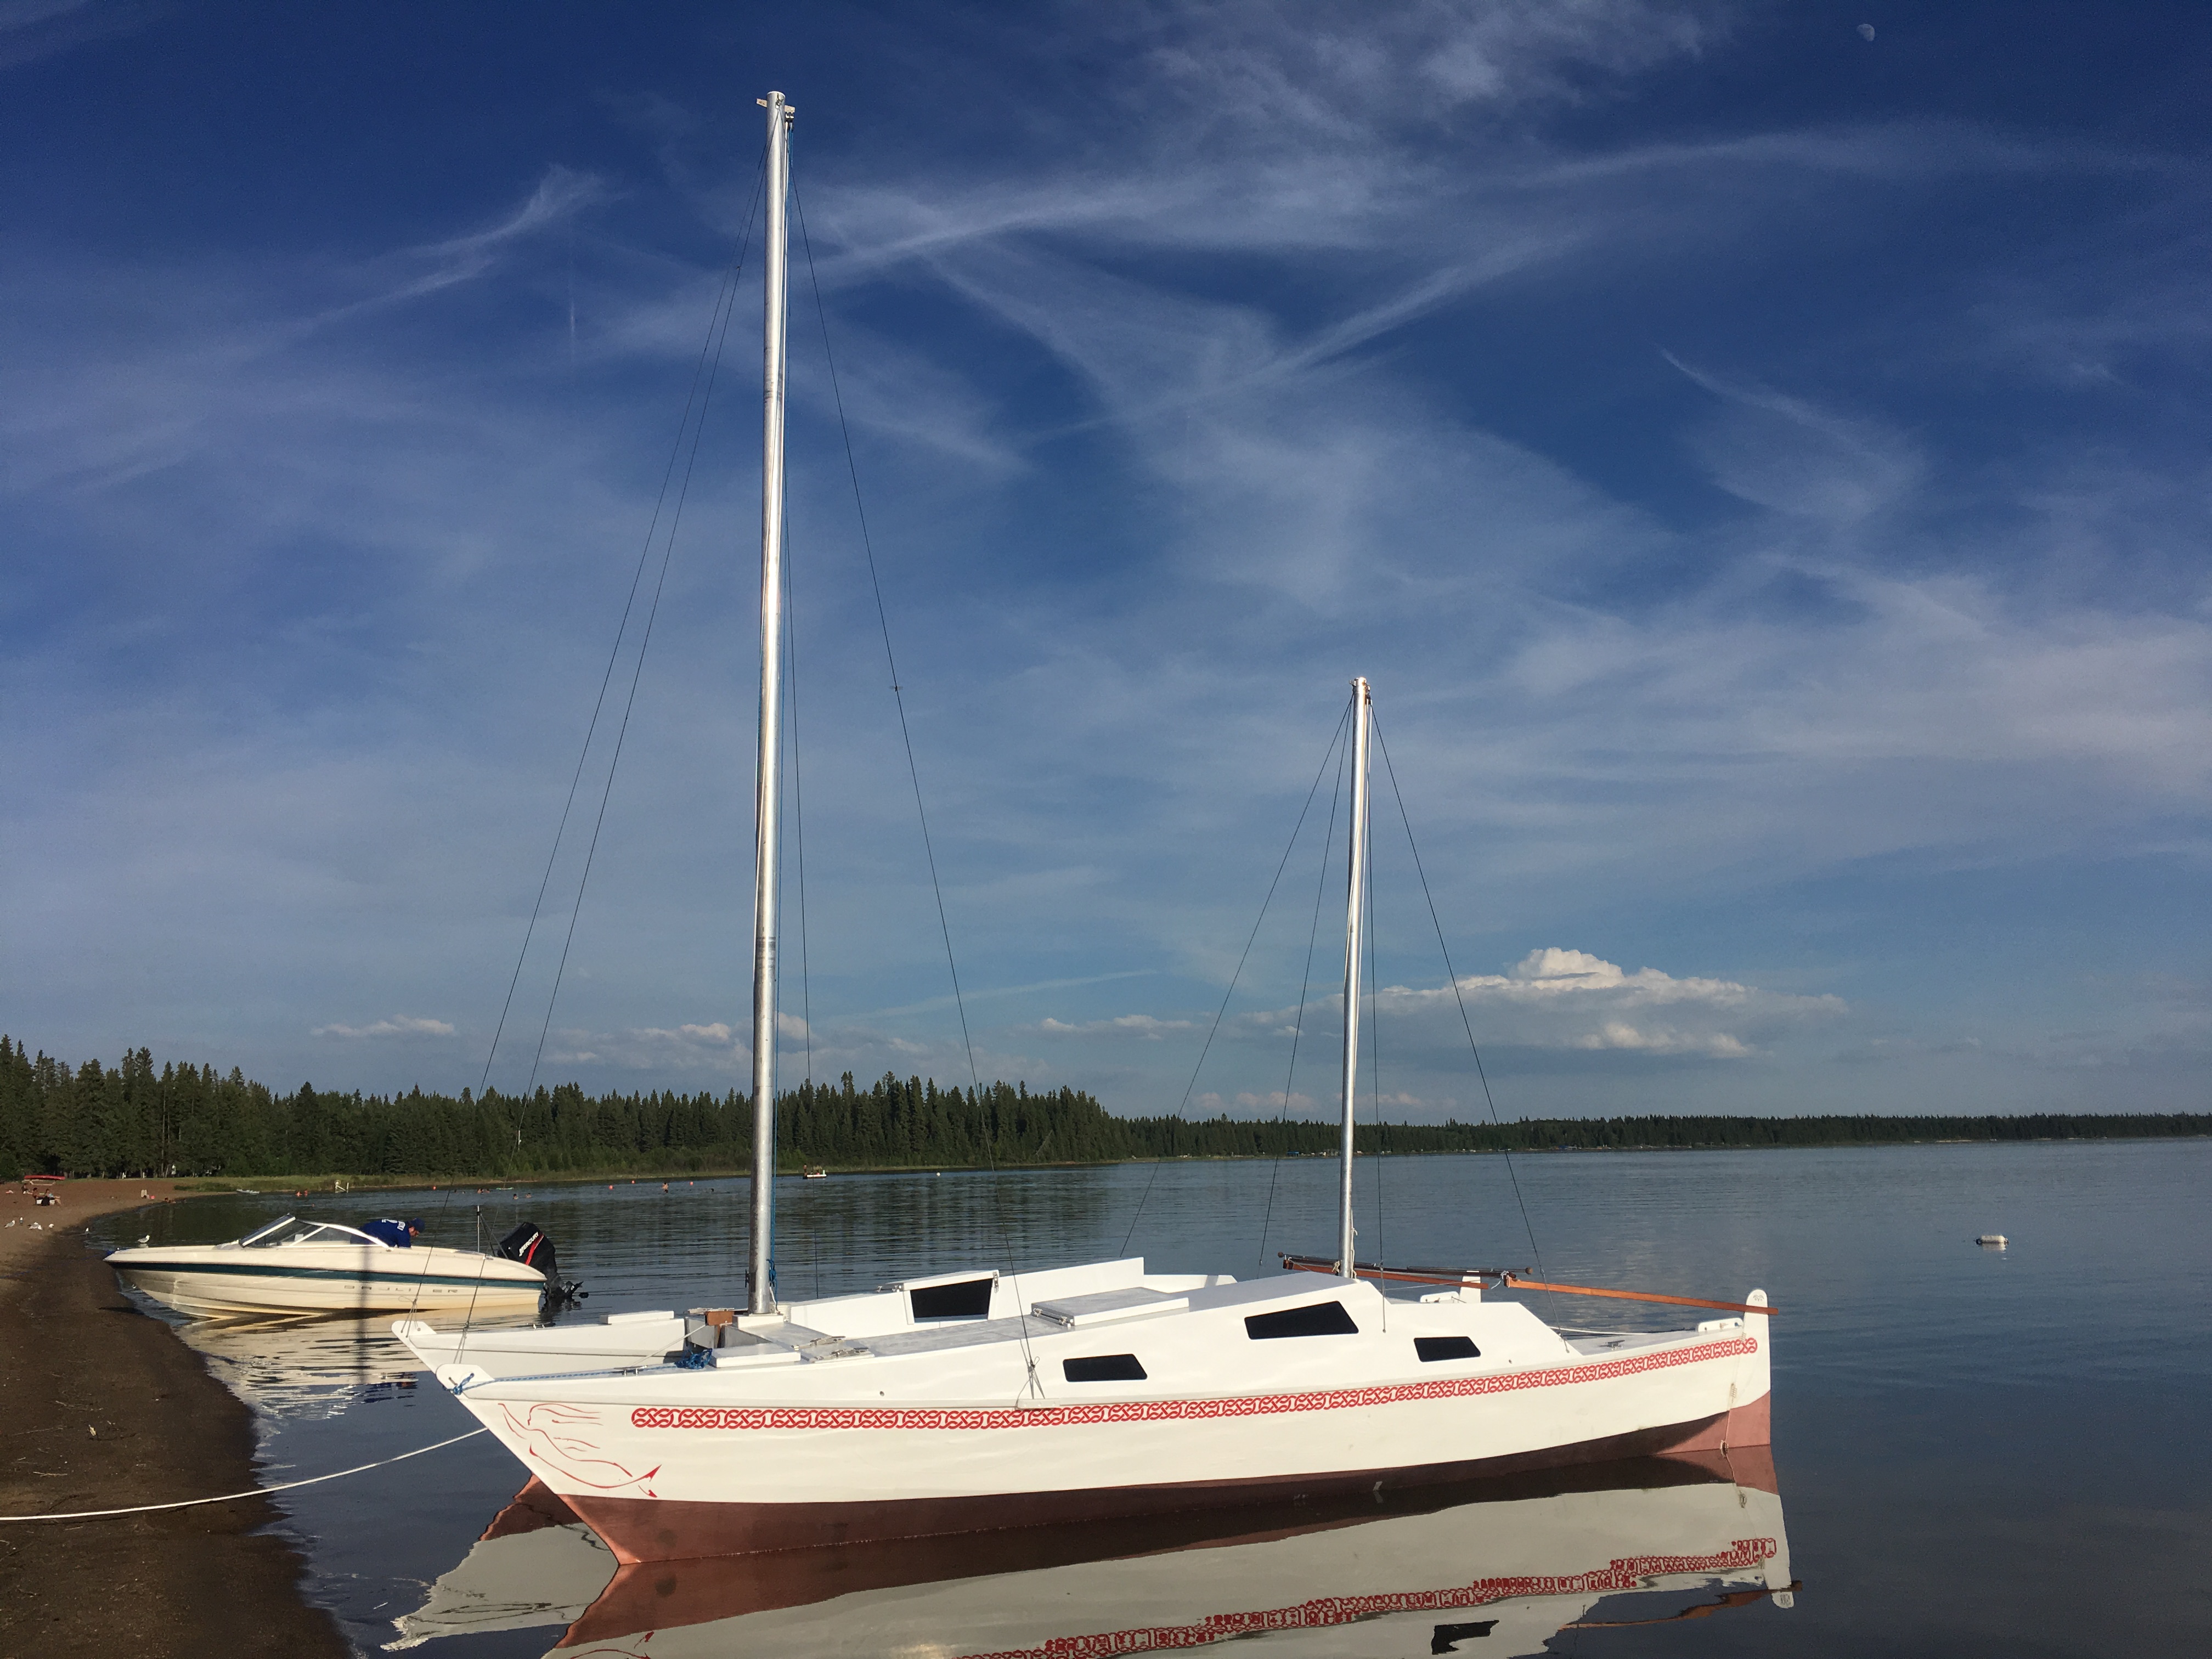
And voila, the Mana 24 Kit #3 is in the water, waiting for adventure.
Note: this series of photos was taken during the first assembly and launch of the boat. There have been some improvements to the trailer adaptation since then, including paint. More changes are planned for next season.
In an exercise of writer’s privilege I am going to jump ahead in the story. A number of people have inquired about trailering the Mana, indicating this is an area of interest for folks who might be considering the construction of one.
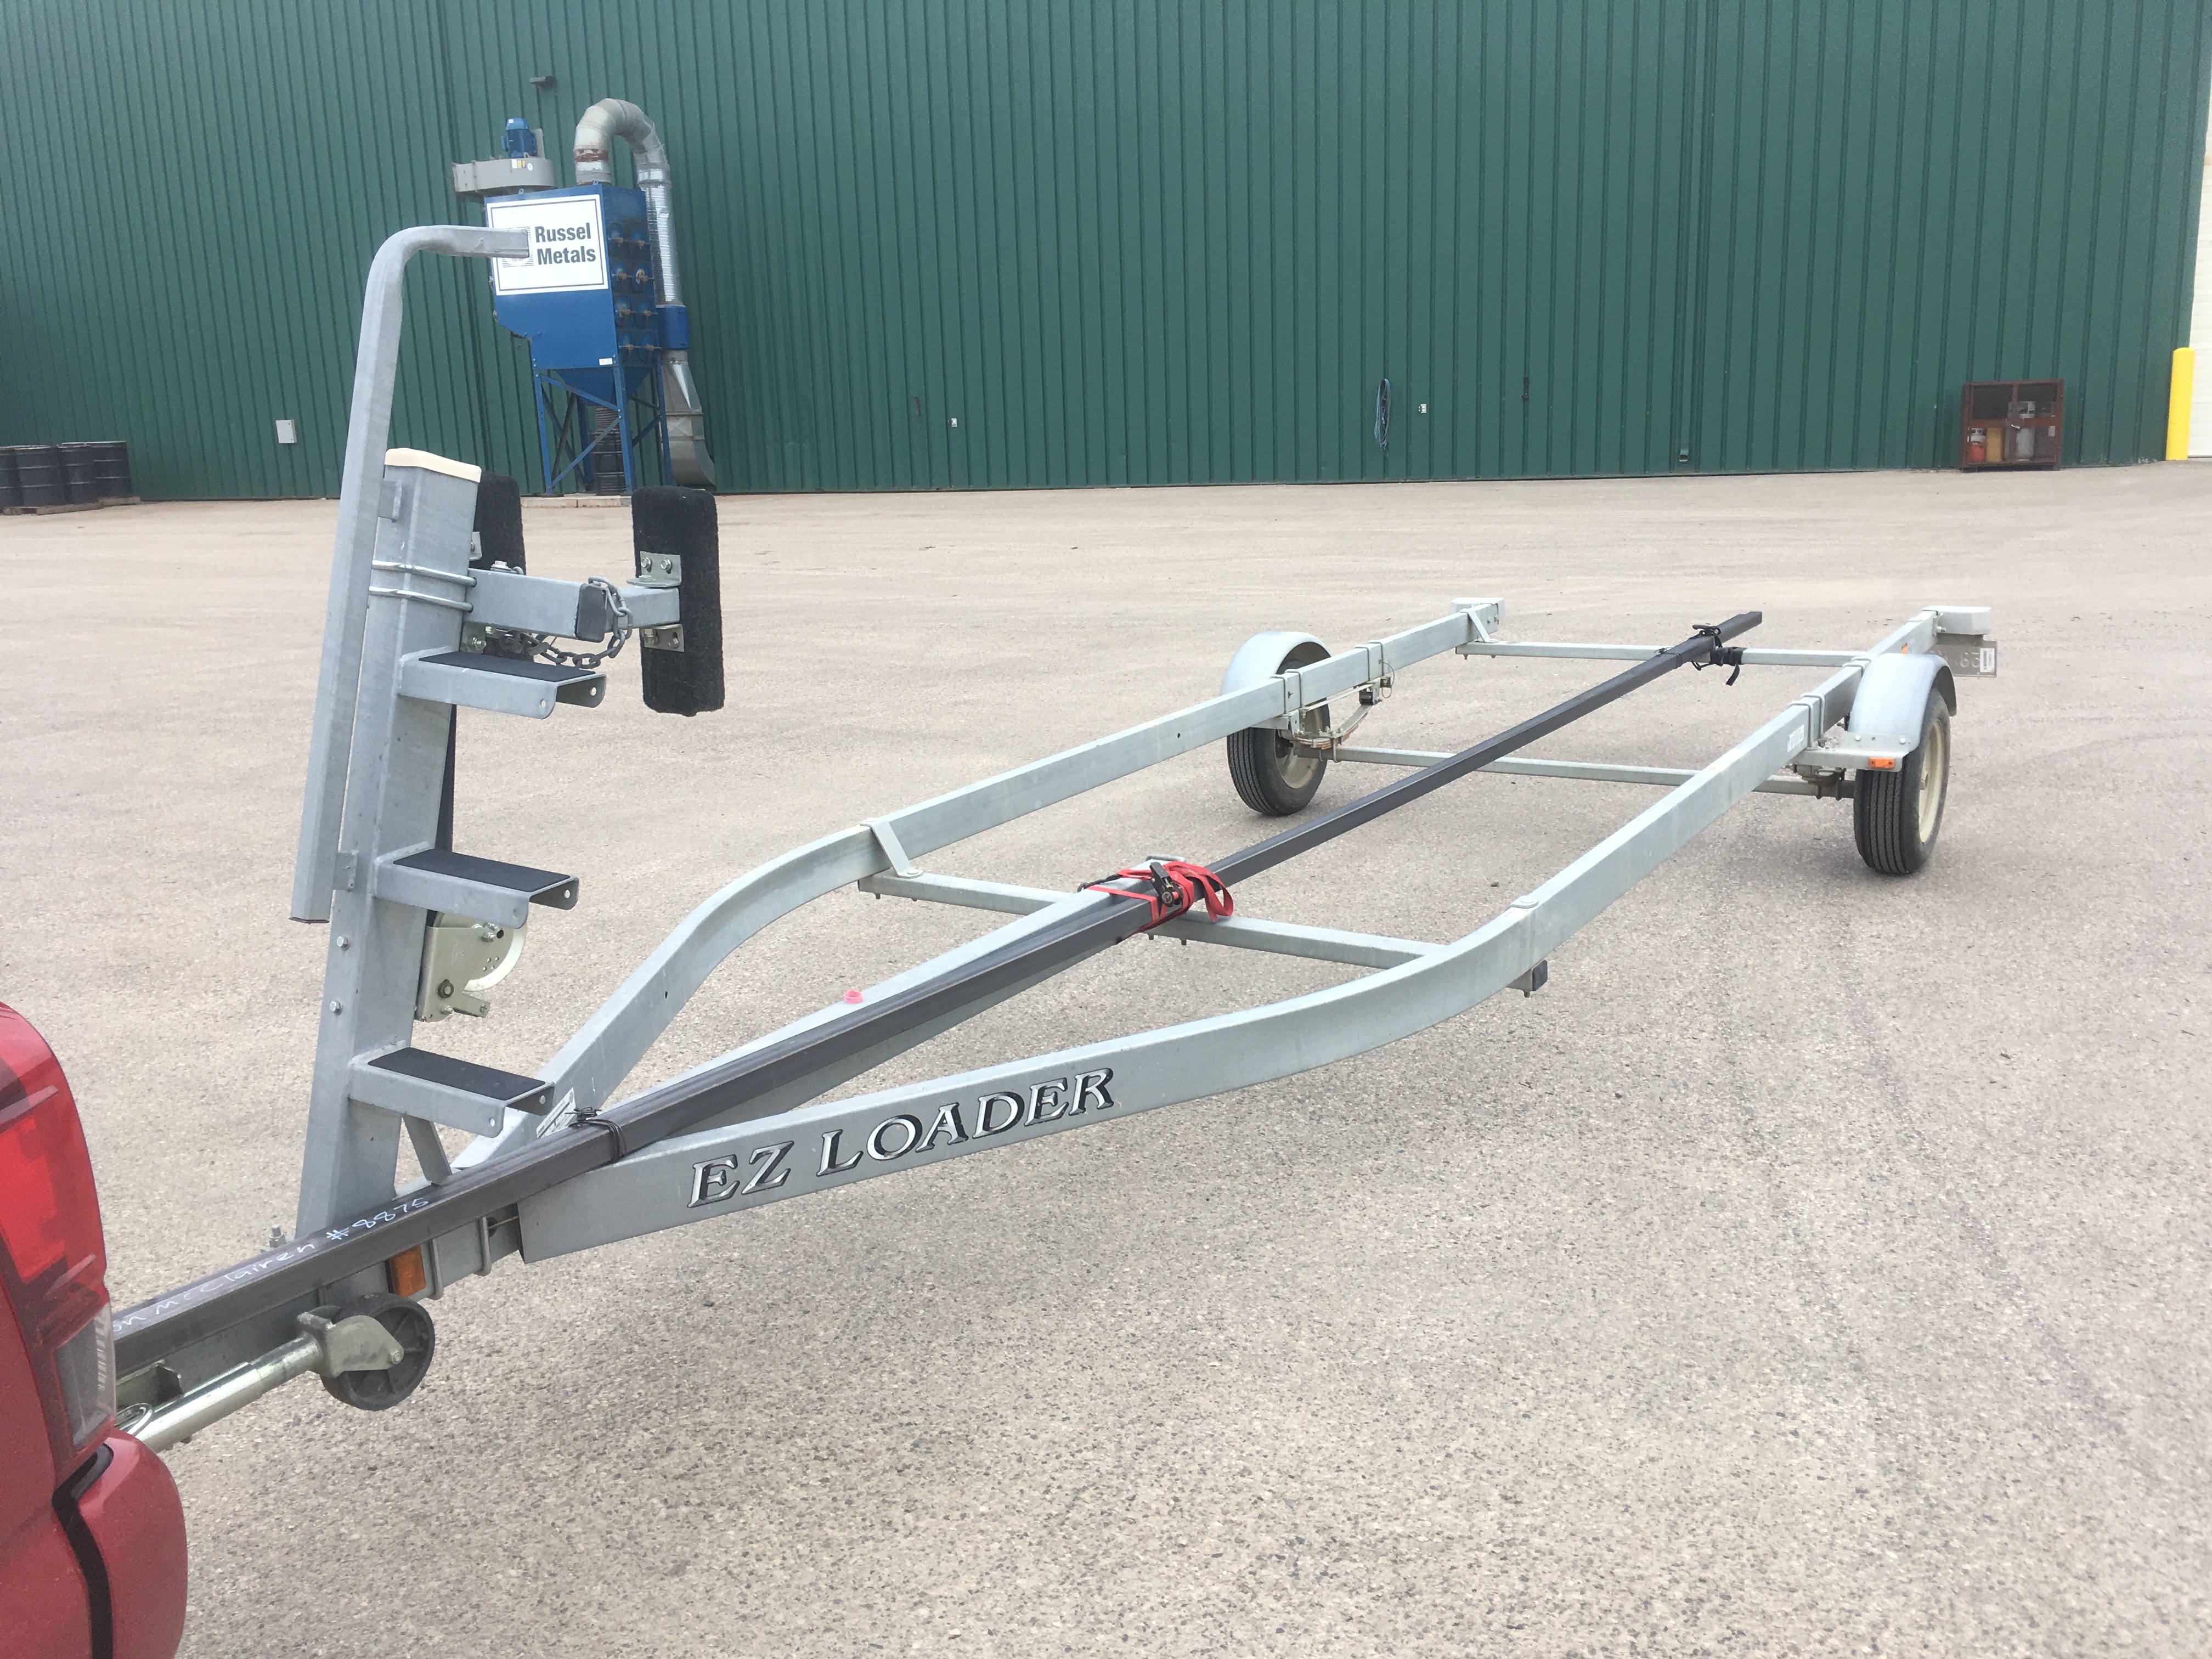
Before the boat kit even arrived in Canada, I had purchased a trailer. It had been previously used to carry a 21 foot pontoon boat until said boat was flipped in a windstorm and destroyed. Someone’s loss was my good fortune. The trailer is galvanized and features oil bath bearings. It had seen very little use and I considered my self very fortunate to come across it at a good price.
After my experience with the Tiki 21, I wanted to be able to assemble this boat on the trailer and launch it ready to sail. That criteria presents a challenge – the Mana when assembled has a width of 12 foot 8 inches and the laws of the land stipulate that a trailer and its payload not exceed 8 foot 6 inches in width. I remembered that Stiletto catamarans built in the 1980’s used a telescoping trailer to get around the problem. Fortunately another sailing enthusiast with whom I was friends on Facebook had recently purchased just such a boat and trailer. I asked if he could take photos of his trailer which he promptly did (thank you again, Jim). With something to copy, it remained for me to buy some steel and get to work.
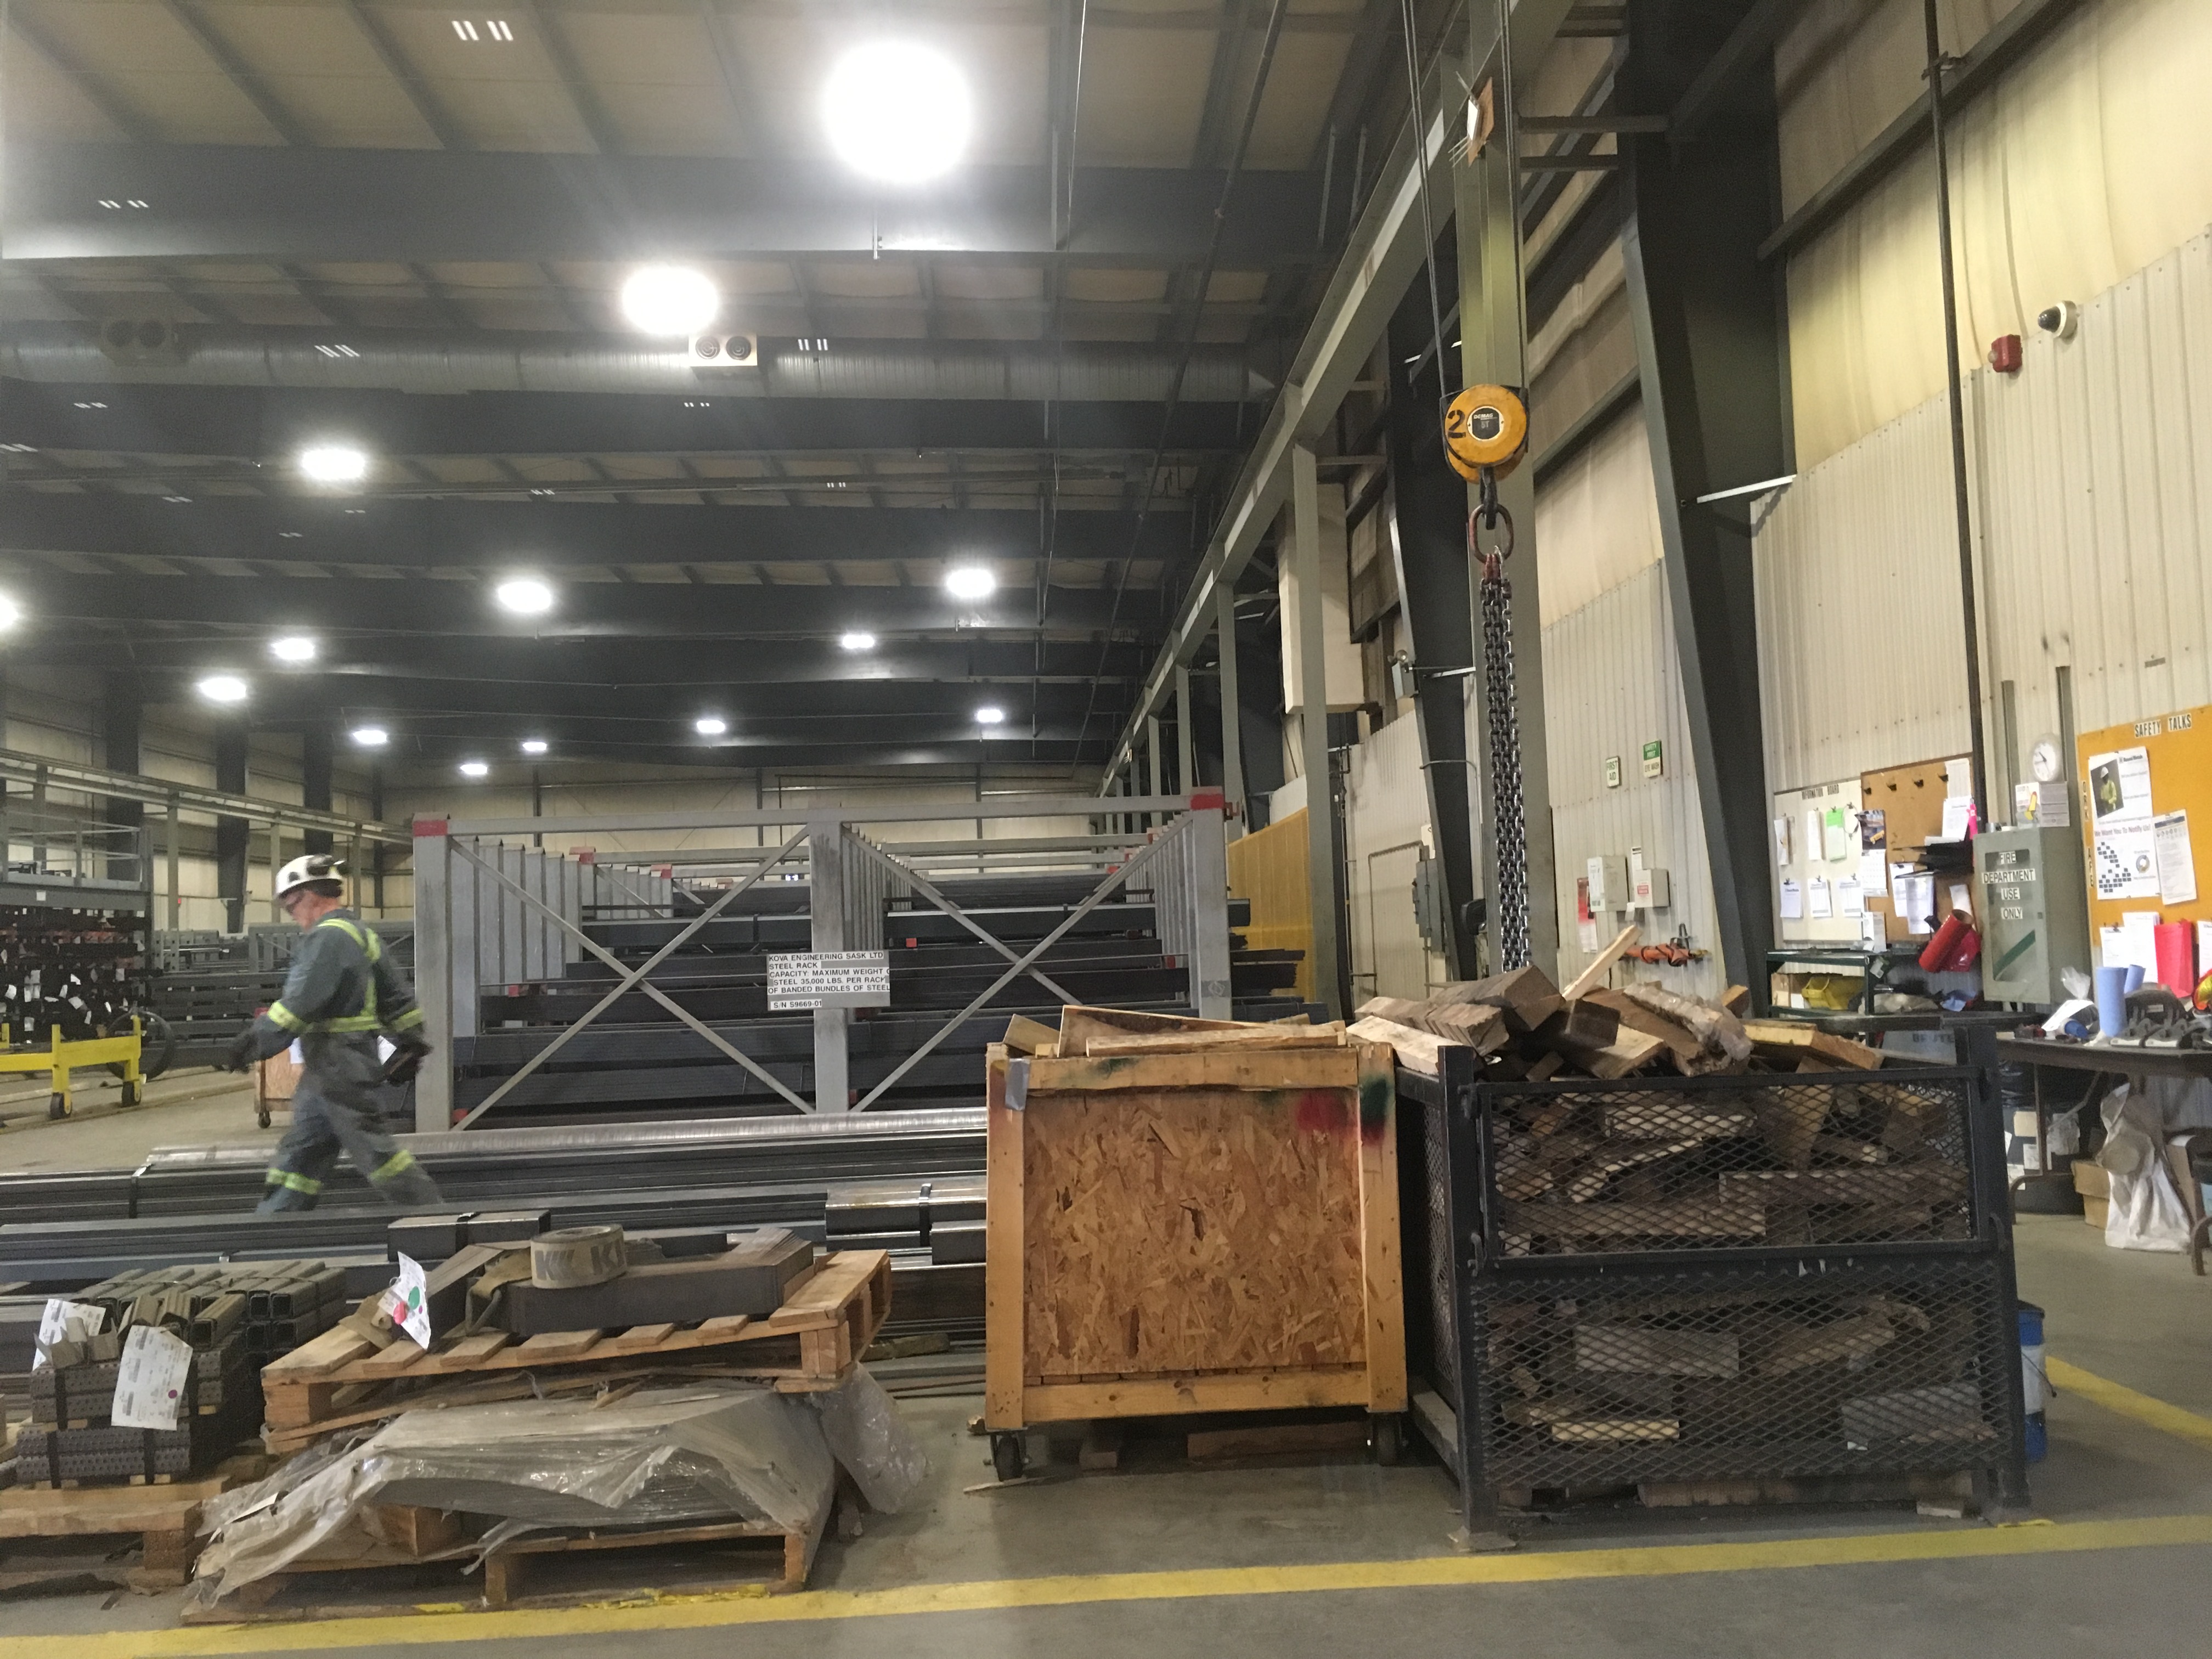
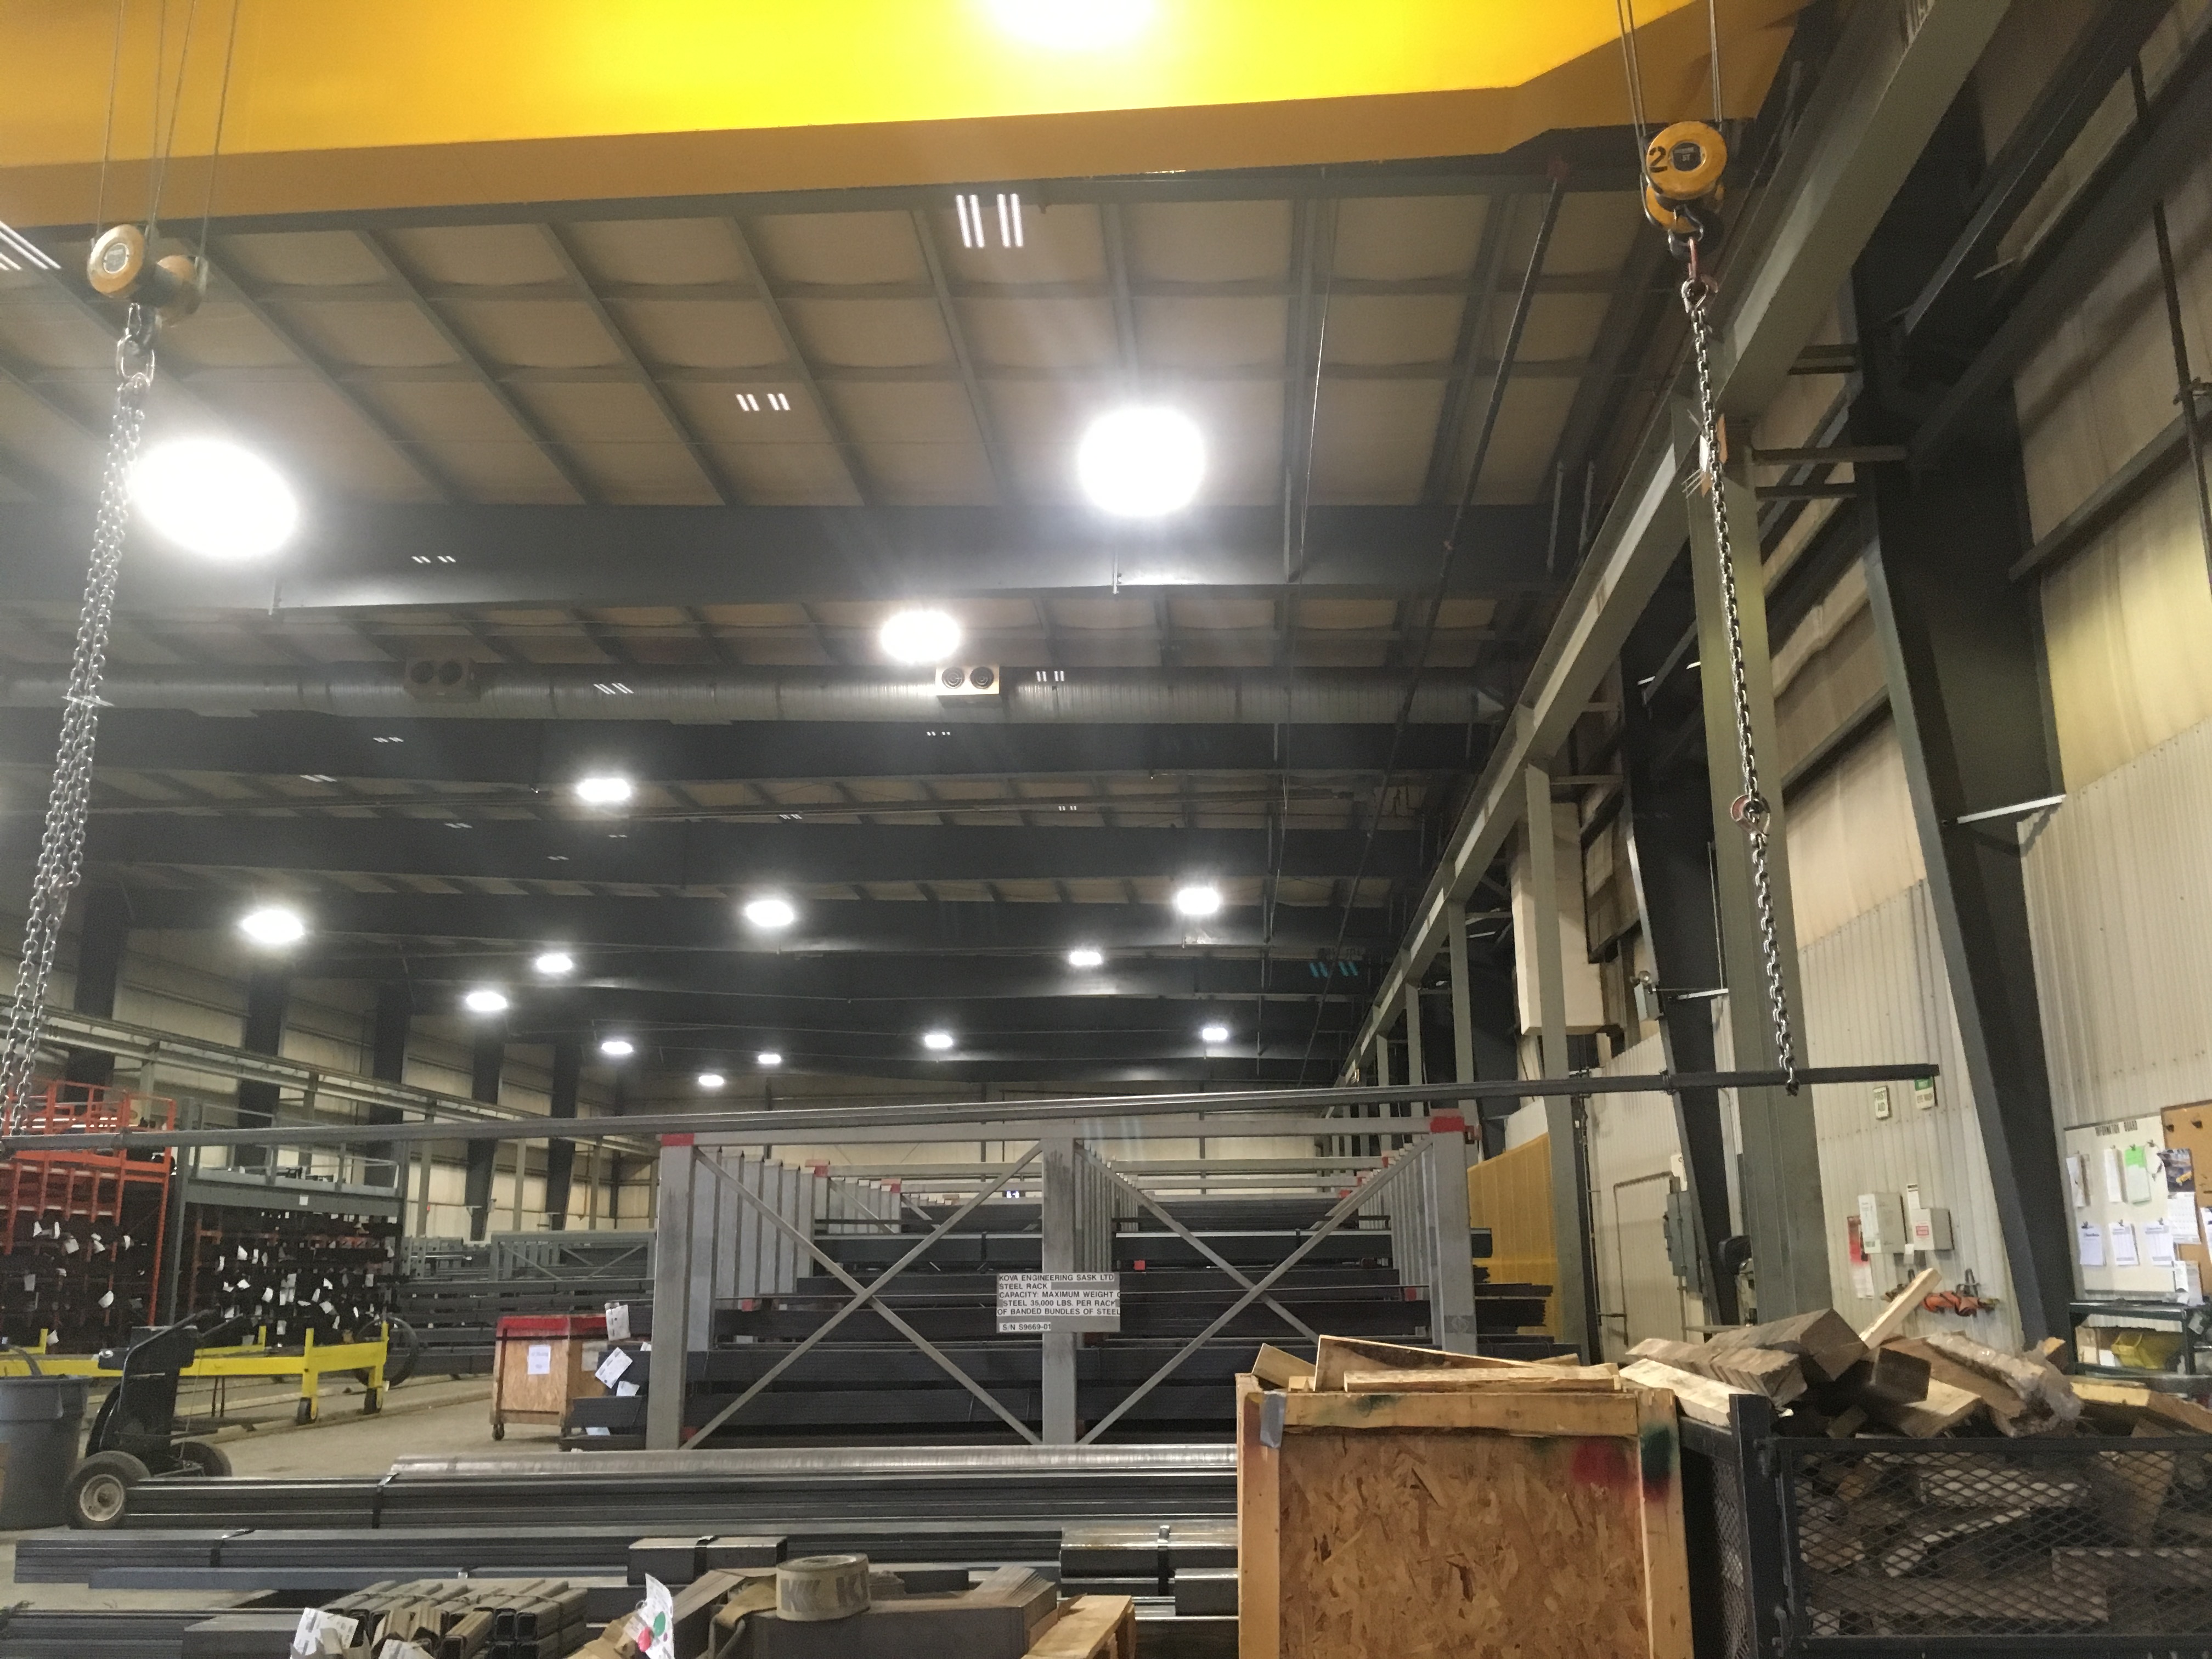
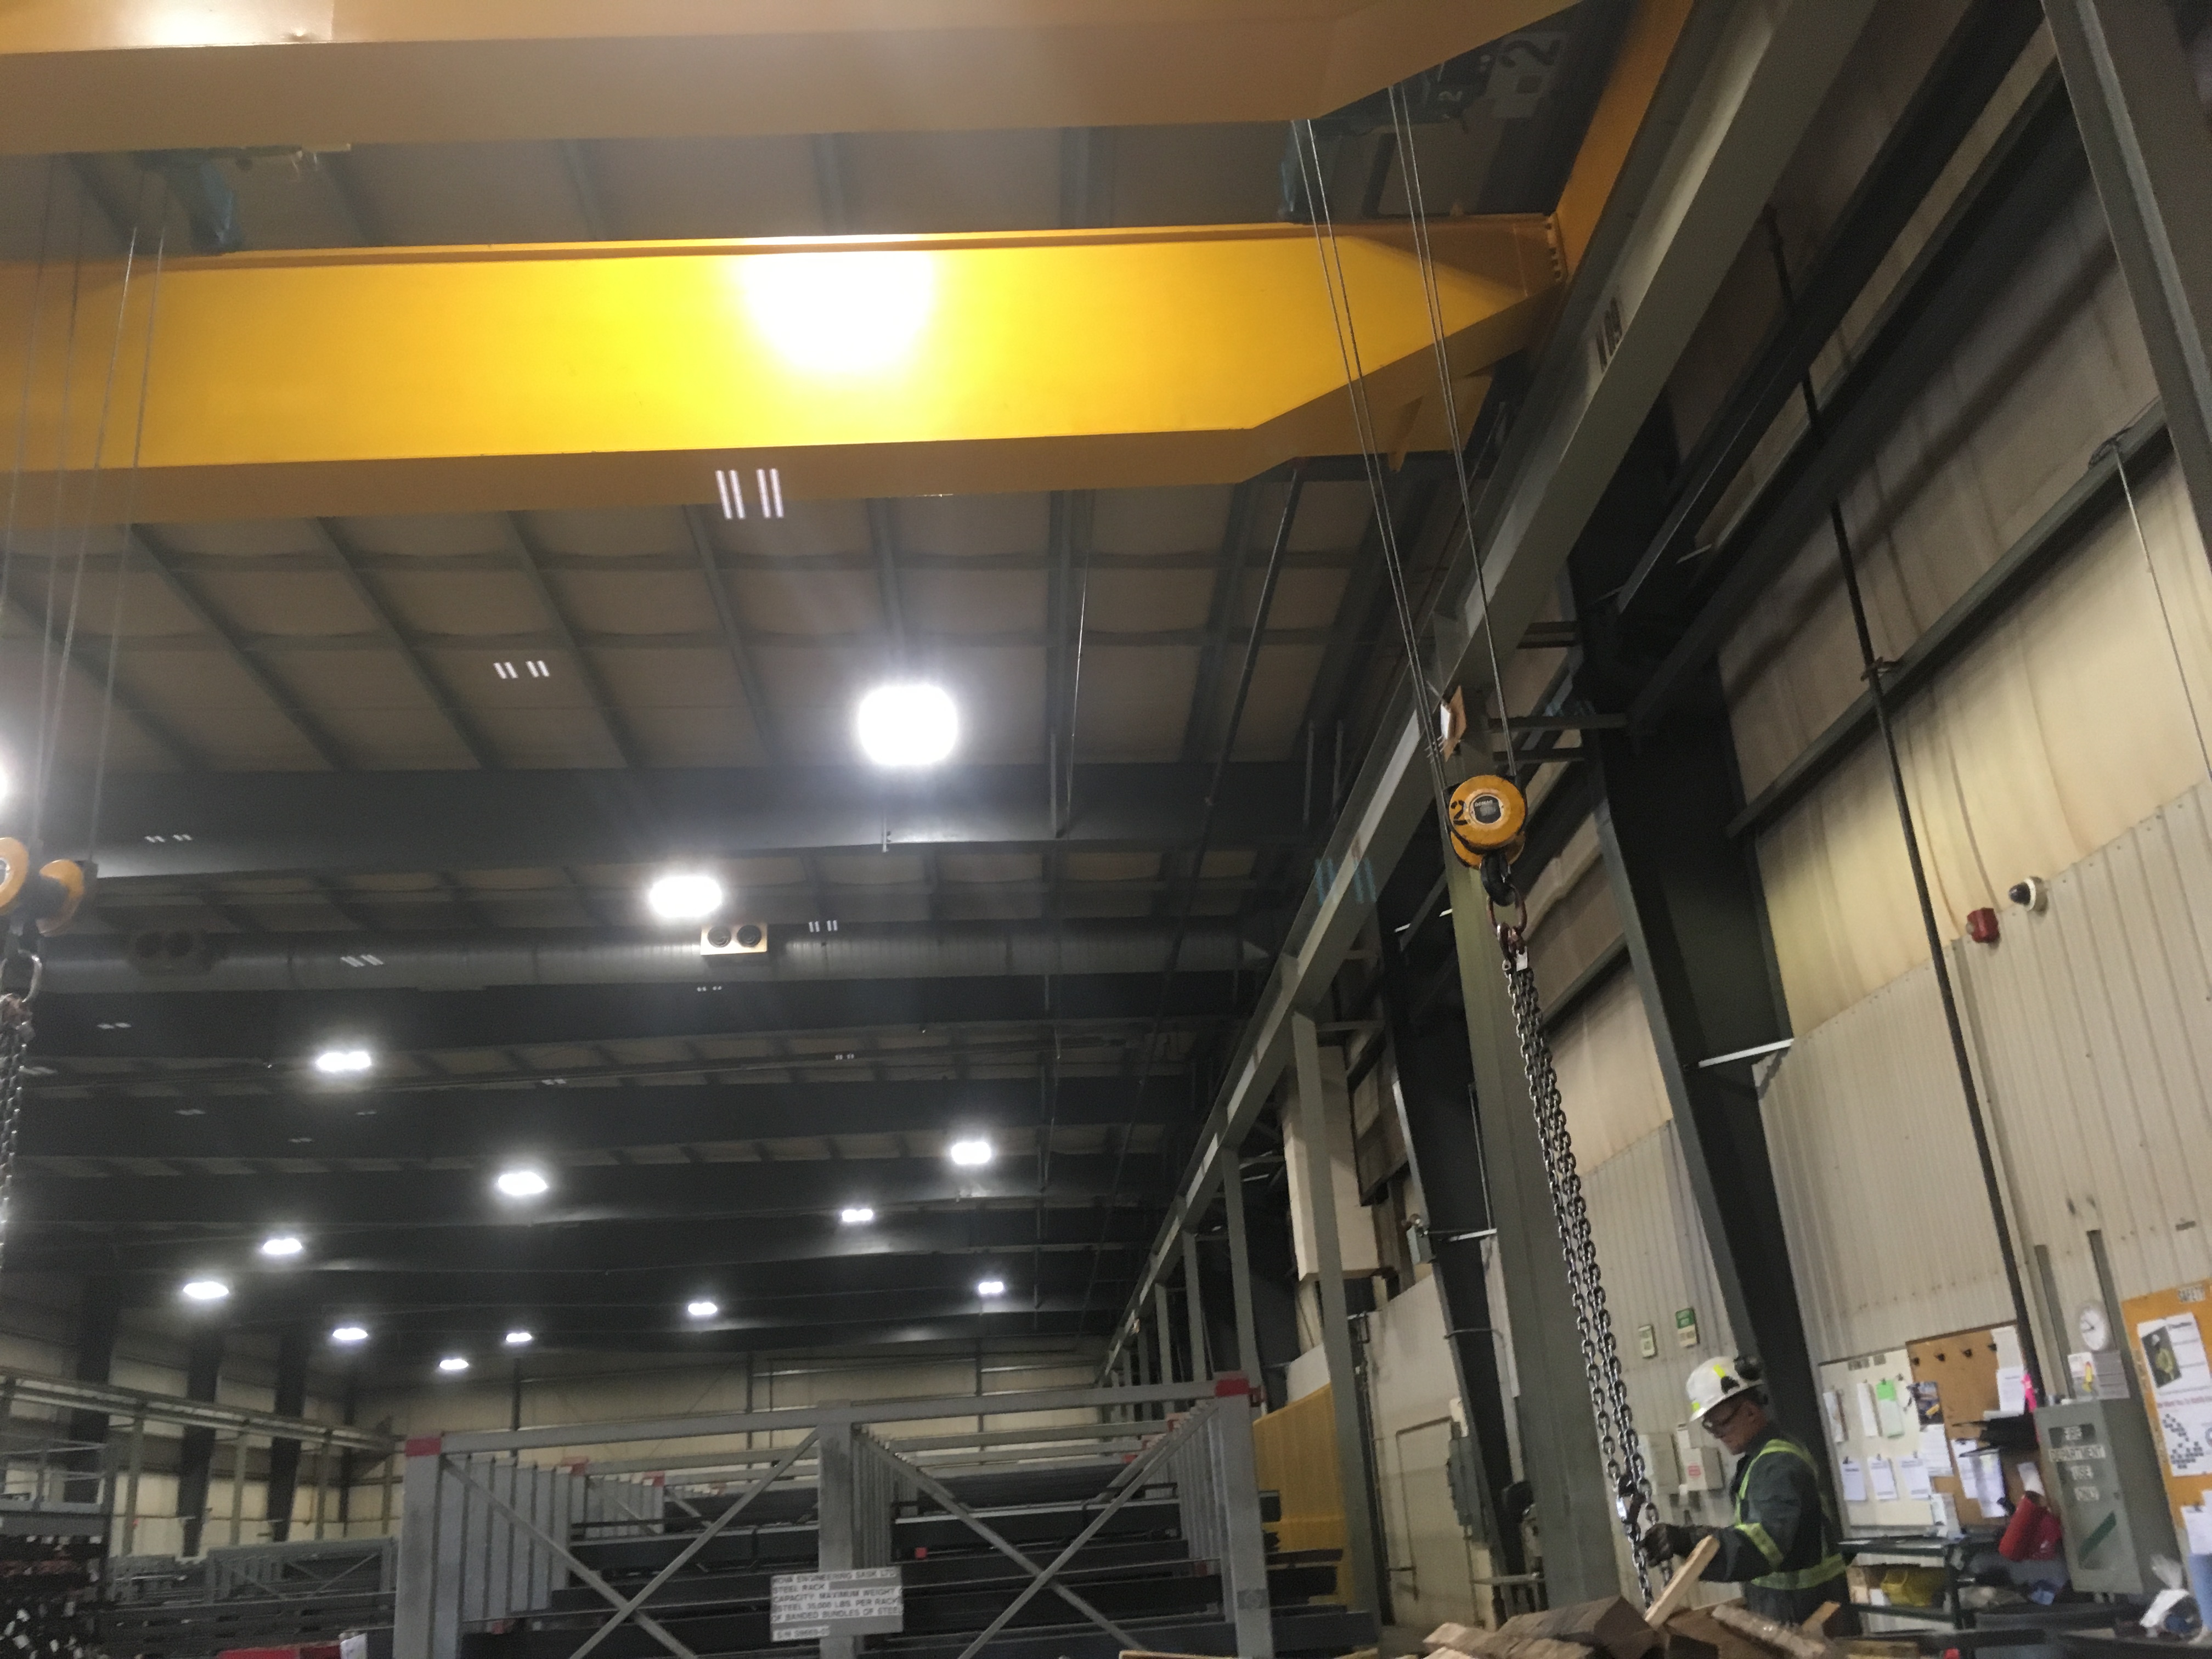
That led to a rather humorous scenario. My purchase at the local branch of Russell Metals consisted of one 20 foot length of 1 1/2 inch angle iron plus one 24 foot length each of 1 1/2 inch and 2 inch square steel tube . A multi tonne hoist, clearly accustomed to lifting loads many times heavier, was used to lift and place my meagre purchase on the trailer so that I could bring it home.
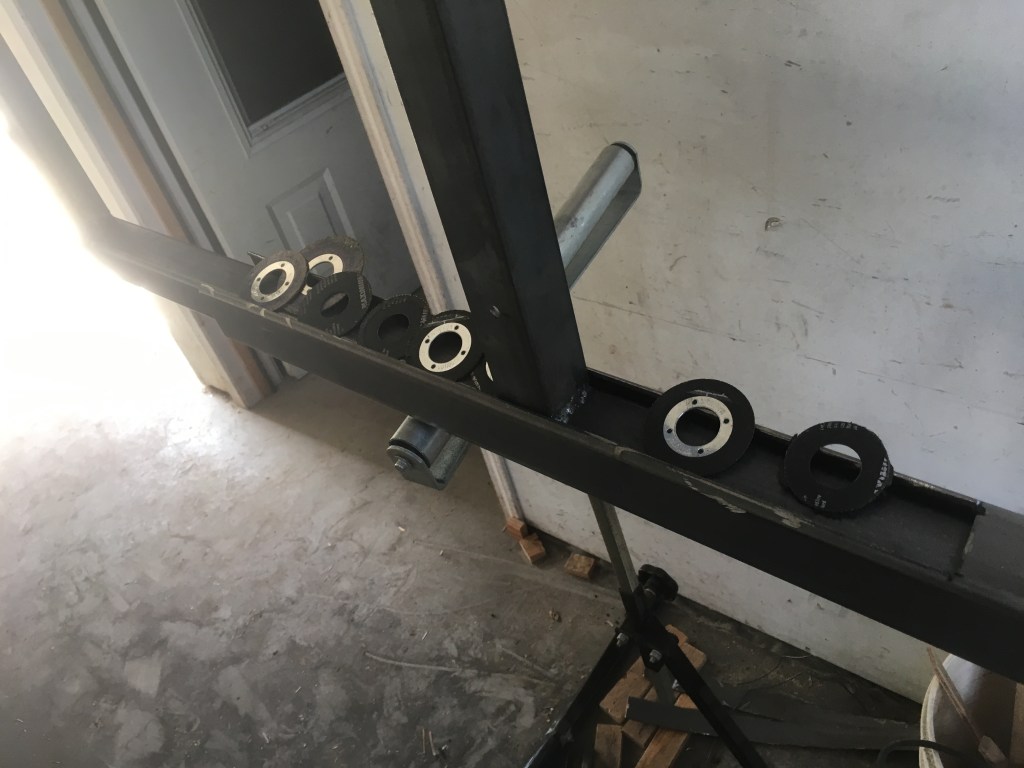
The Stiletto trailers use rollers for the inside tube to roll on. Small bearings, purchased at my go-to place for odd ball items when I’m fabricating, Princess Auto, looked like they would serve that purpose well.
Once home, the fabricating work began. For the next few days I put away my wood working tools and got out angle grinder, welder and drill press. I went through quite a few thin cutting wheels in the process.
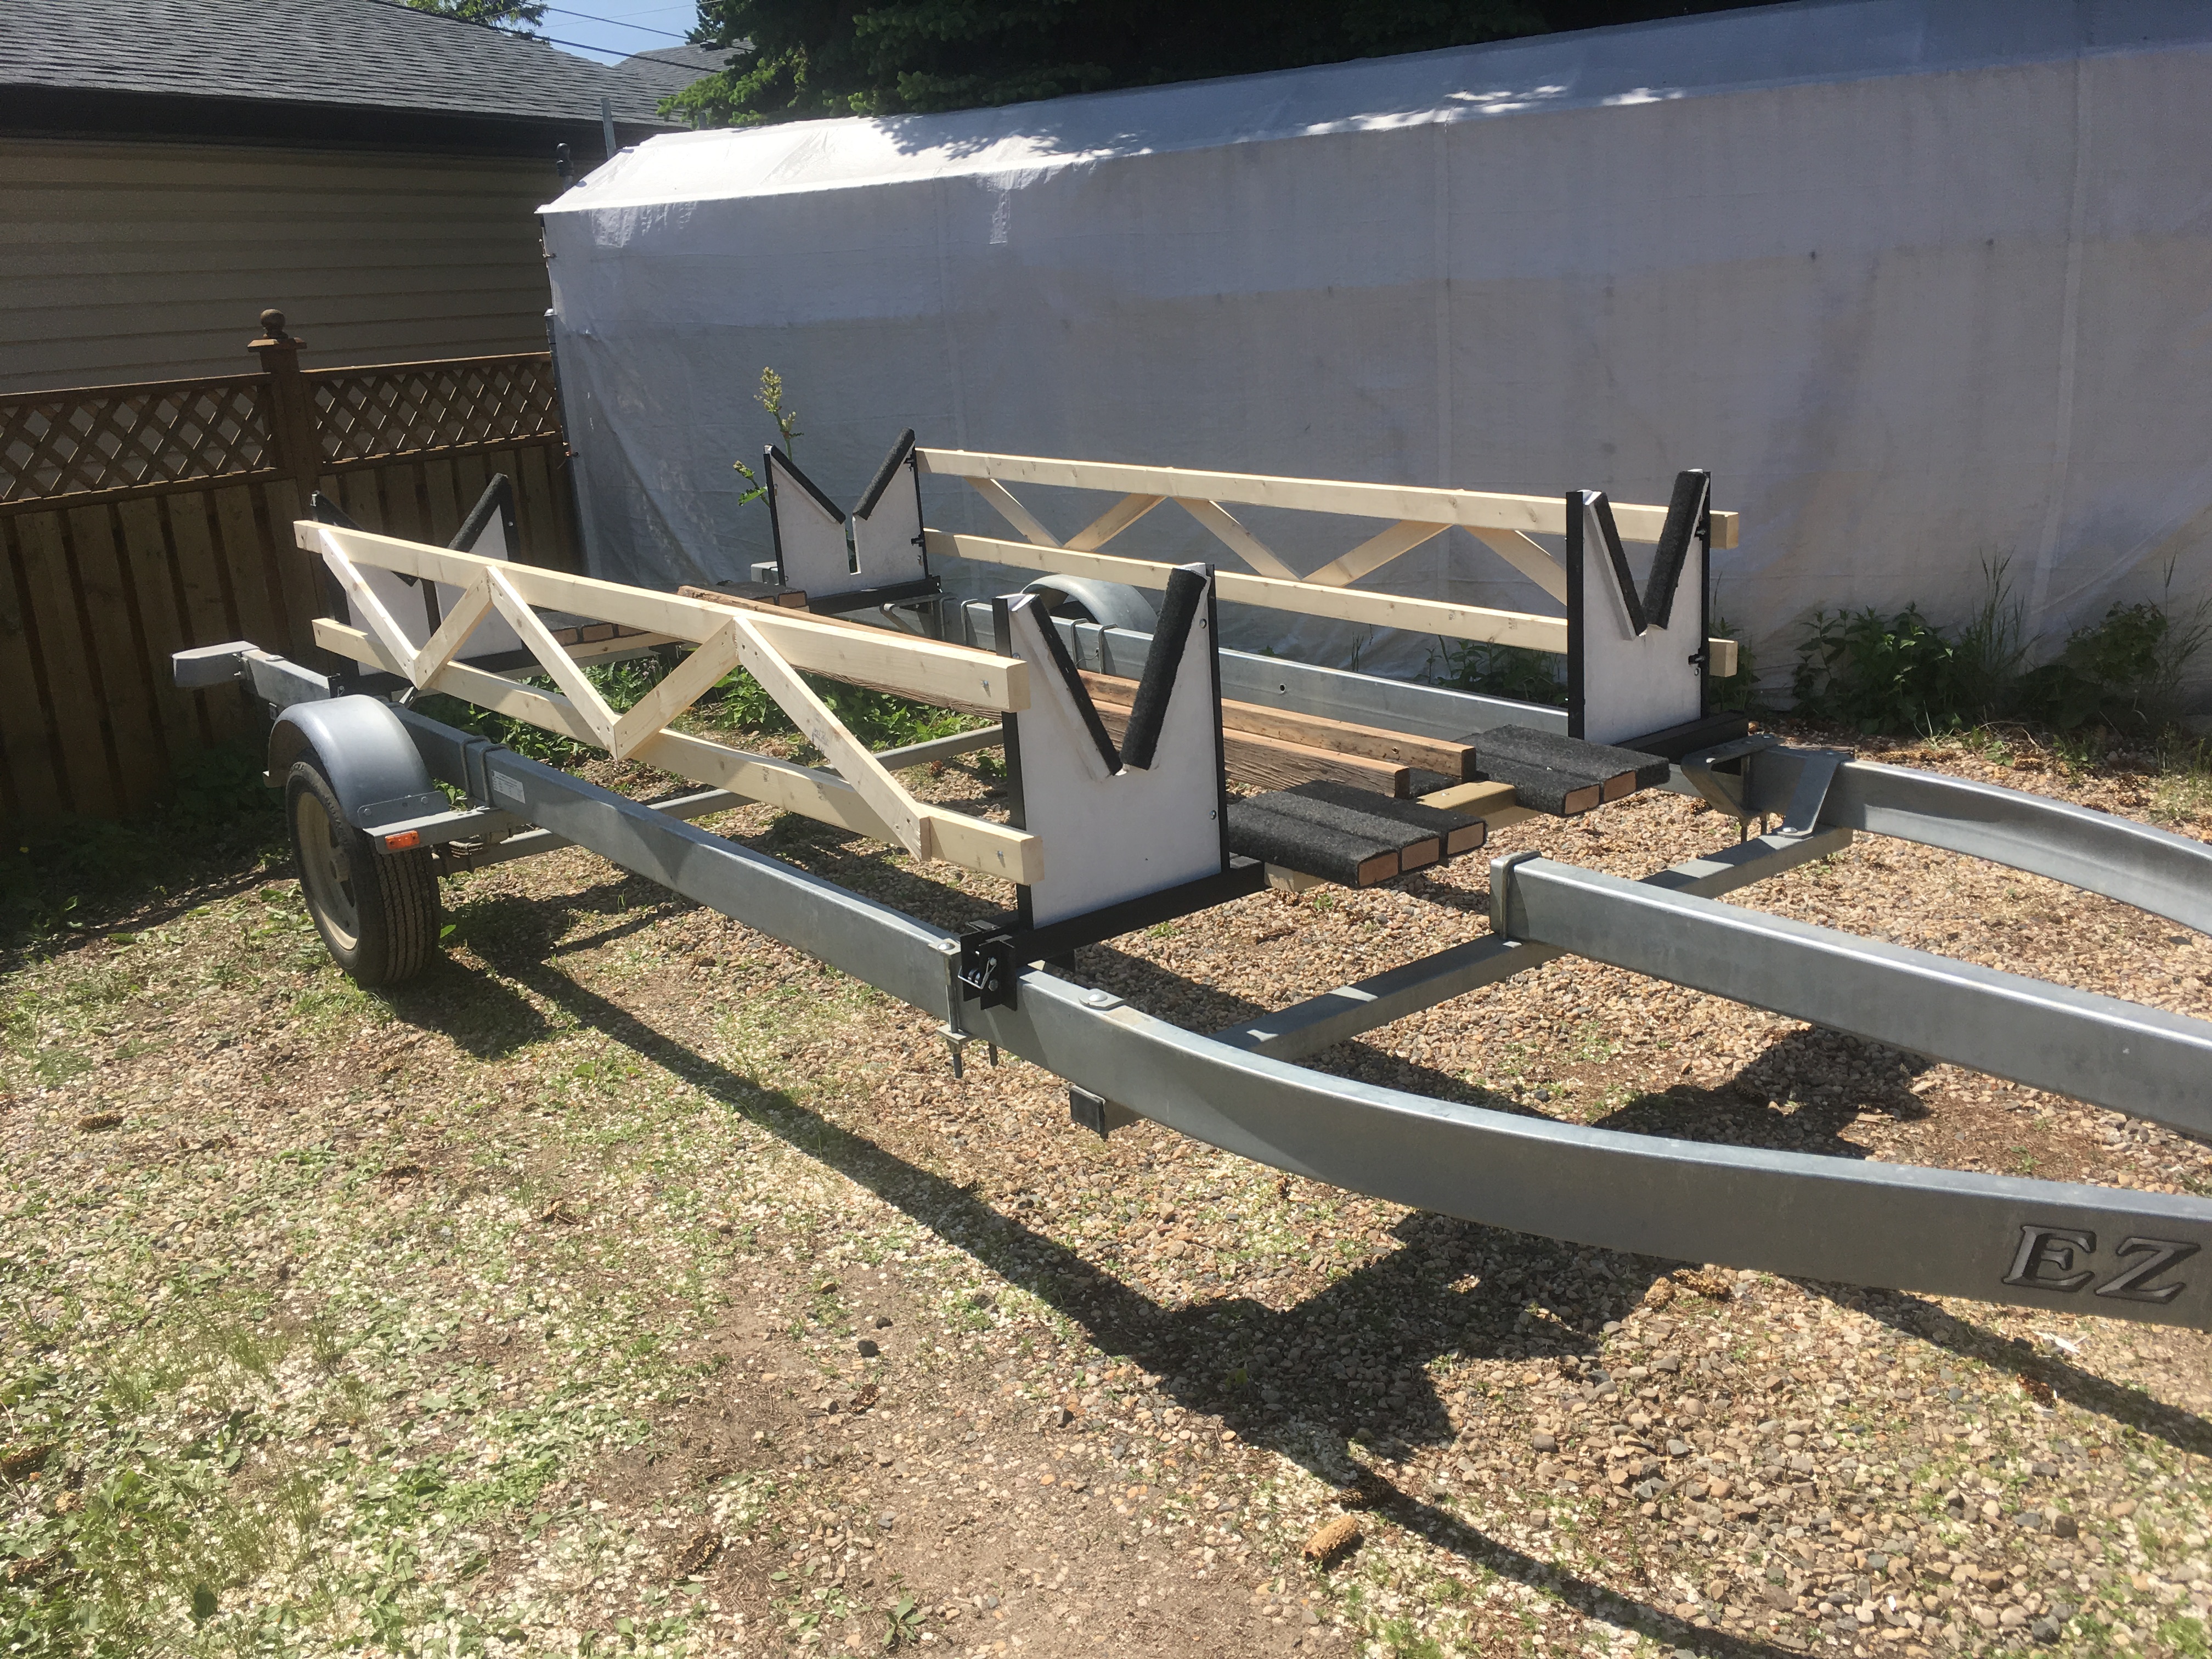
Bunks that mirrored those provided in the kit were bolted in place and braced.
It was time to add a boat to the mix. With the help of my sailing buddy and his very strong roommate, the hulls were moved out of the garage and loaded onto the trailer.
The next post will show the trailer in action, and I will discuss some of the changes planned to improve the launch and recovery process.
As I expected, once the build got into serious production, the blogging stopped. Priorities, you know. The build is more important than the blog. I did start writing a draft after one hull was essentially assembled but didn’t get beyond the draft stage and soon I was well into the second hull. I posted photos periodically on my Facebook feed but not everyone is on Facebook. I believe it is important to share the building process with those who may be considering such a project – I am hopeful that my experience will act as encouragement for others to become “boat builders”. Boat building is a noble undertaking, I believe, one that is uplifting and at the same time, humbling.
So here it is – many months since the last blog post on the construction of the Mana kit #3. I have decided to take the approach used by another Wharram owner, Stewart Coates who along with his partner Zaya, sails a Tiki 38. Stewart is a prolific blogger who shares accounts of his travels often a year after the event.
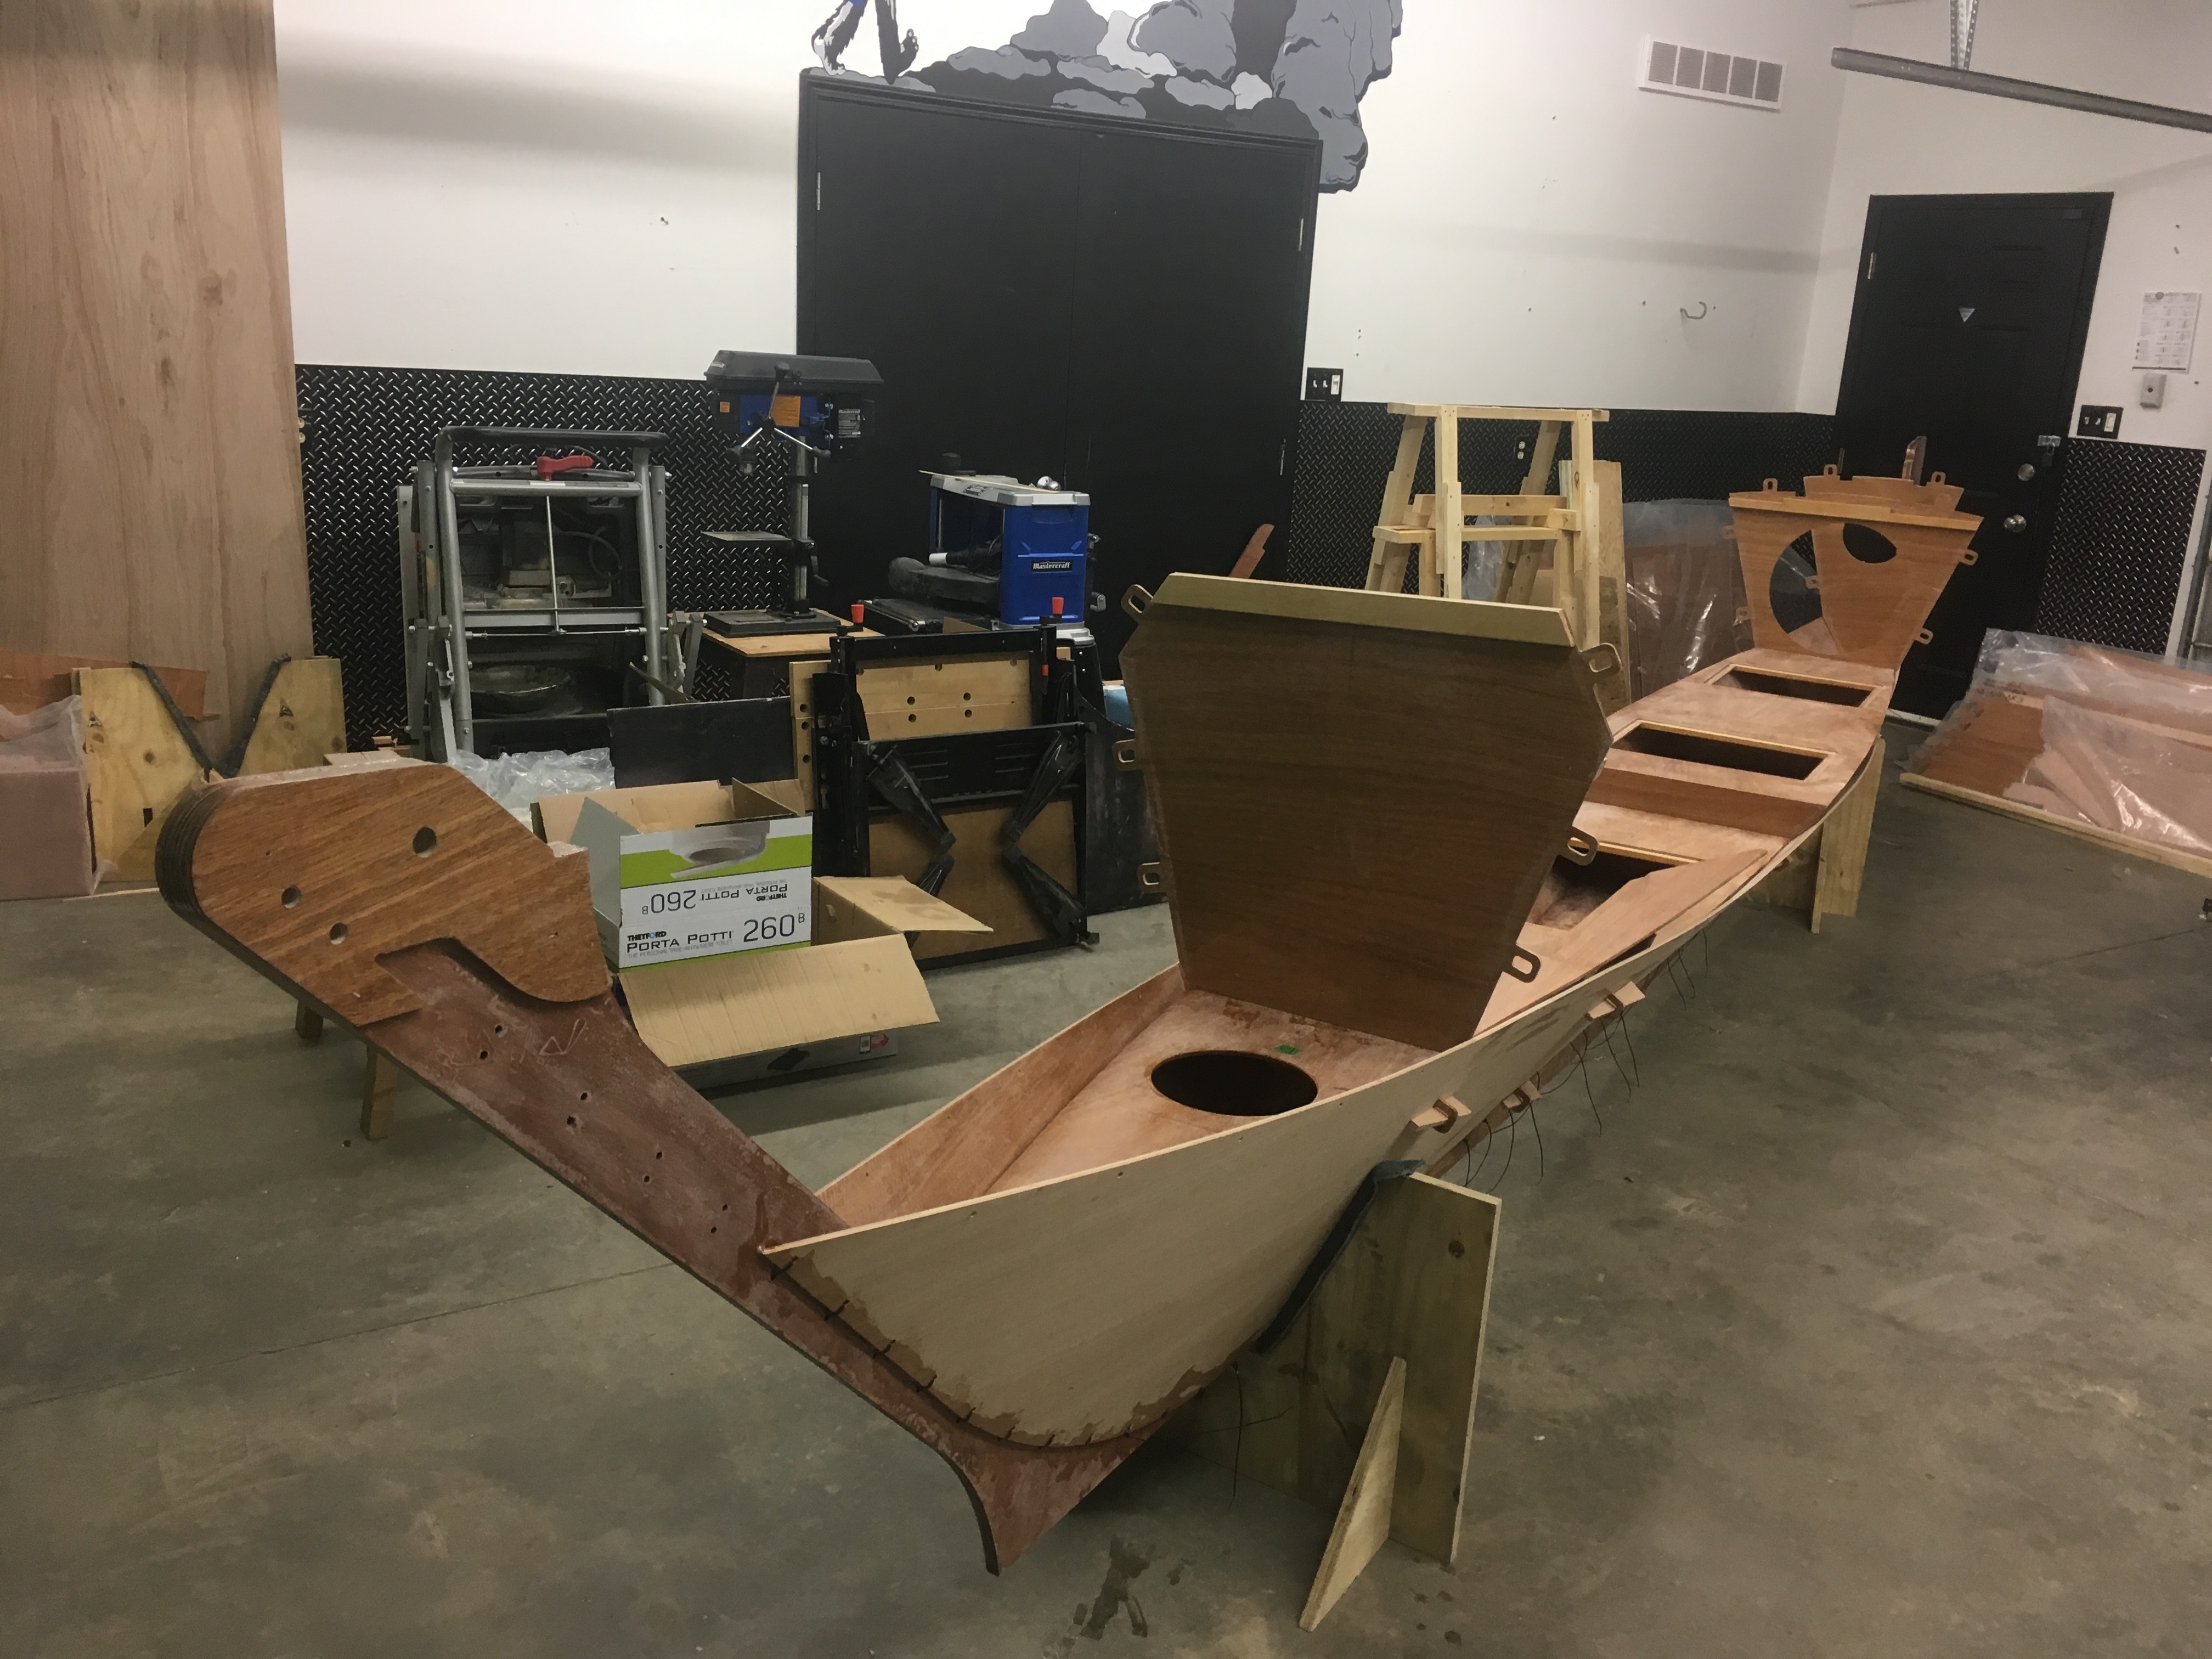
When we left off , I had just moved into my new digs early in October, with preliminary assembly of some parts enabling me to set up the starboard hull quickly.
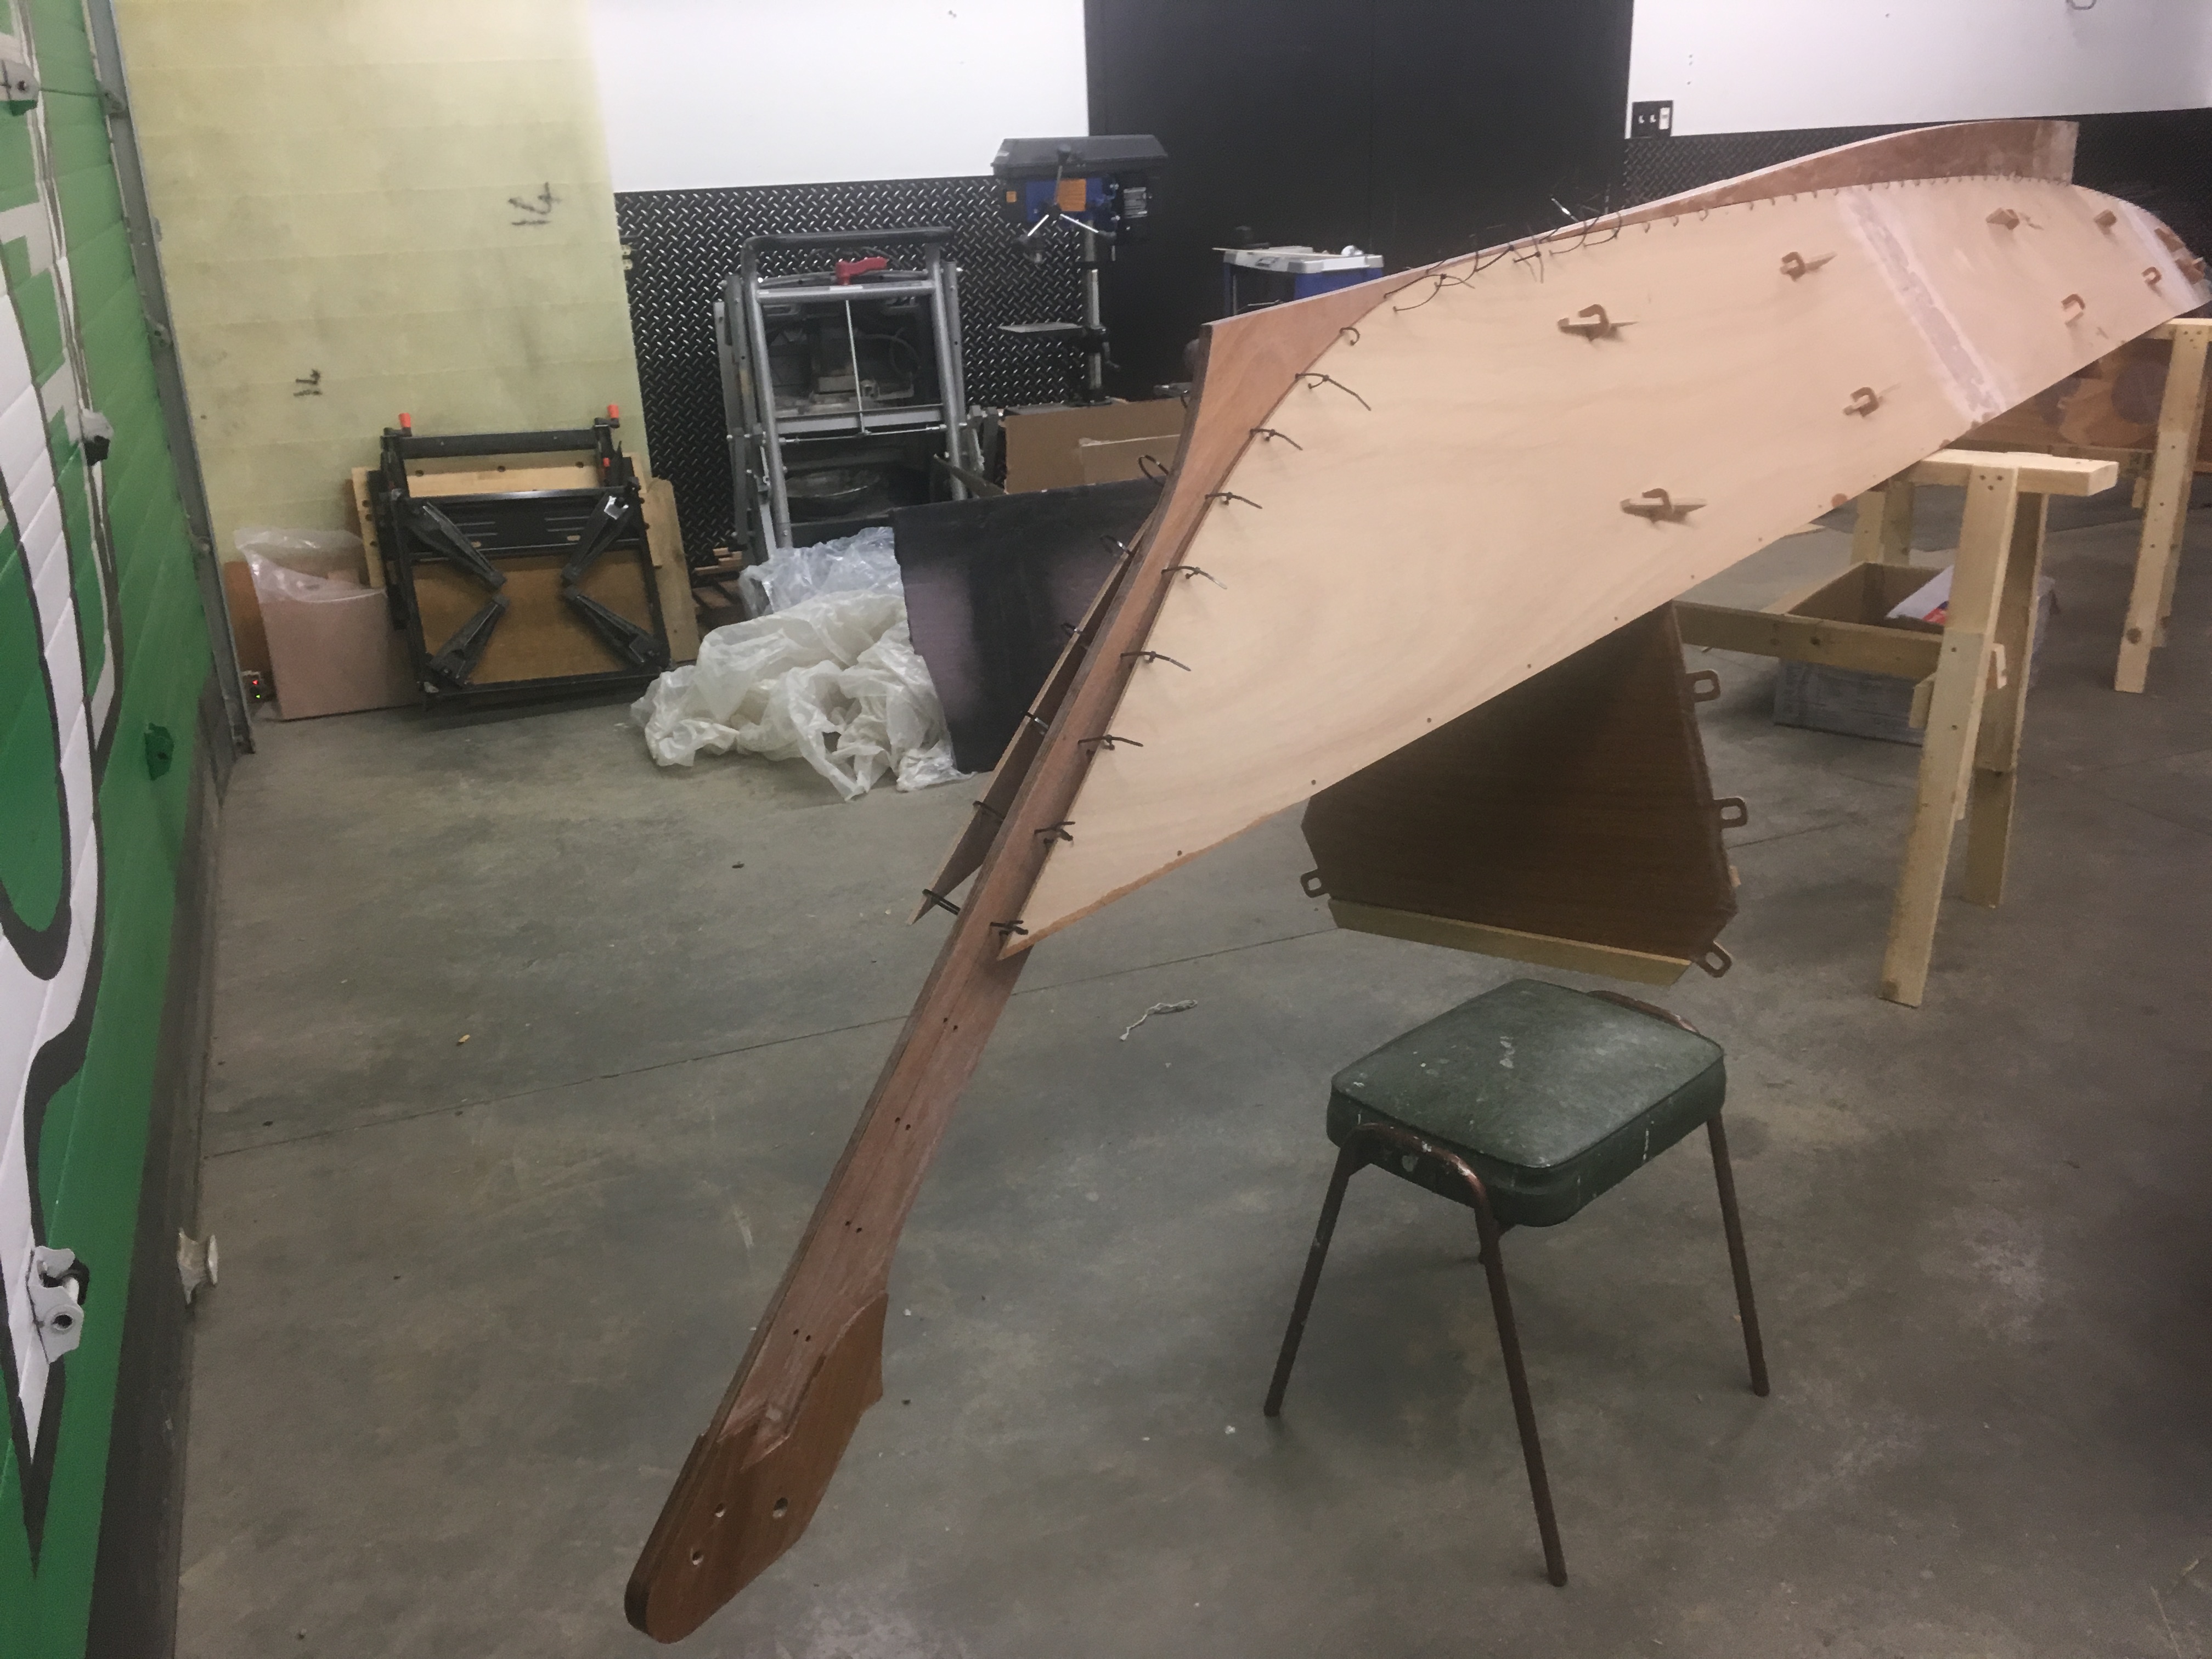
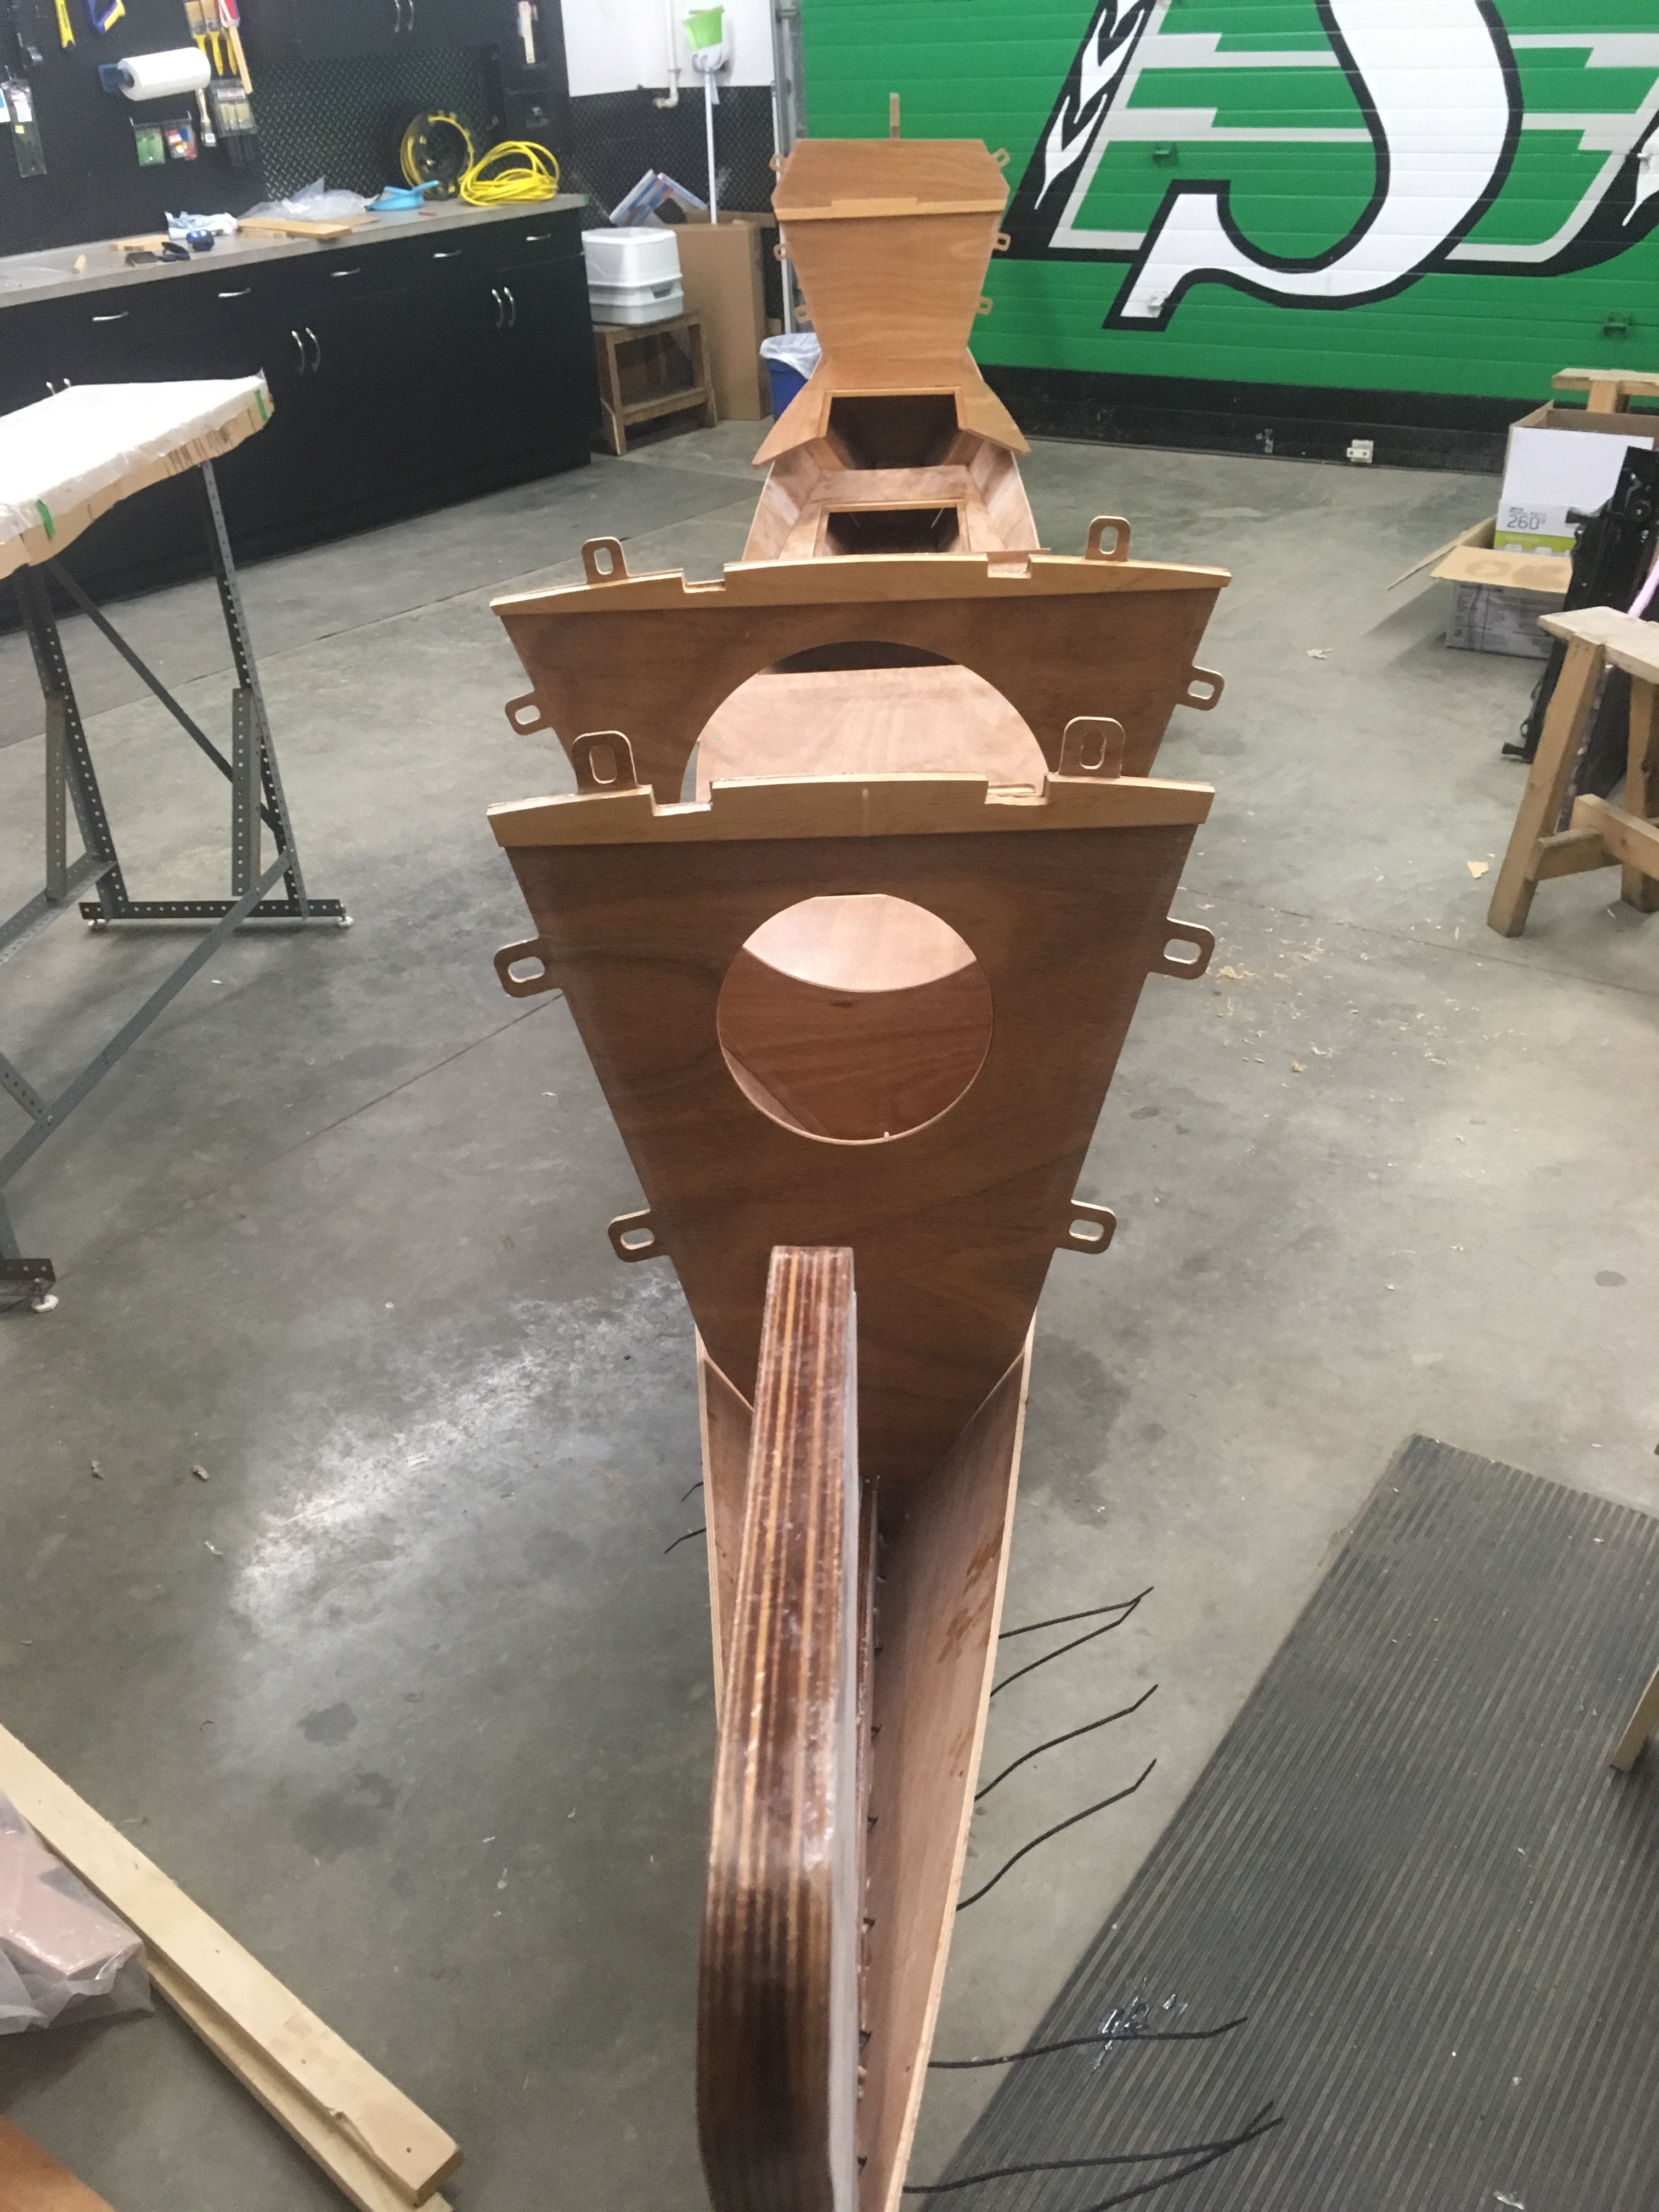
The photo at the top of the post shows the keel along with bulkheads 1, 2 and 3 attached. In the next photos, the bottom panels were then slotted onto the bulkheads and temporarily held in place with the ingenious use of tabs and wedges. The stem and stern posts were added, and stitched in place using zip ties. The precision of CNC cut components ensured that the bulkheads would be aligned correctly. Zip ties inserted into pre-cut holes made quick work of pulling the various components into a shape clearly resembling a boat.
With the boat turned right side up again, it was placed into cradles thoughtfully supplied with the kit. It was time to start gluing things together.
One of my favourite stories from my summertime job in a Vancouver Island sawmill in 1967 was the joke that workers liked to pull on naive newbies to the mill. They would tell the unsuspecting victim that a certain pile of lumber had been cut too short and would then send him in search for the “lumber stretcher” to remedy the problem. The unfortunate victim would go from one area of the mill to another, asking for the device, only to be told that he should try in yet another place, until he had covered most of the mill and someone would relent and let him in on the joke. Fortunately for me, the mill workers thought that a farm boy from the prairies would have too much common sense to be caught by such a prank and they didn’t pick on me!
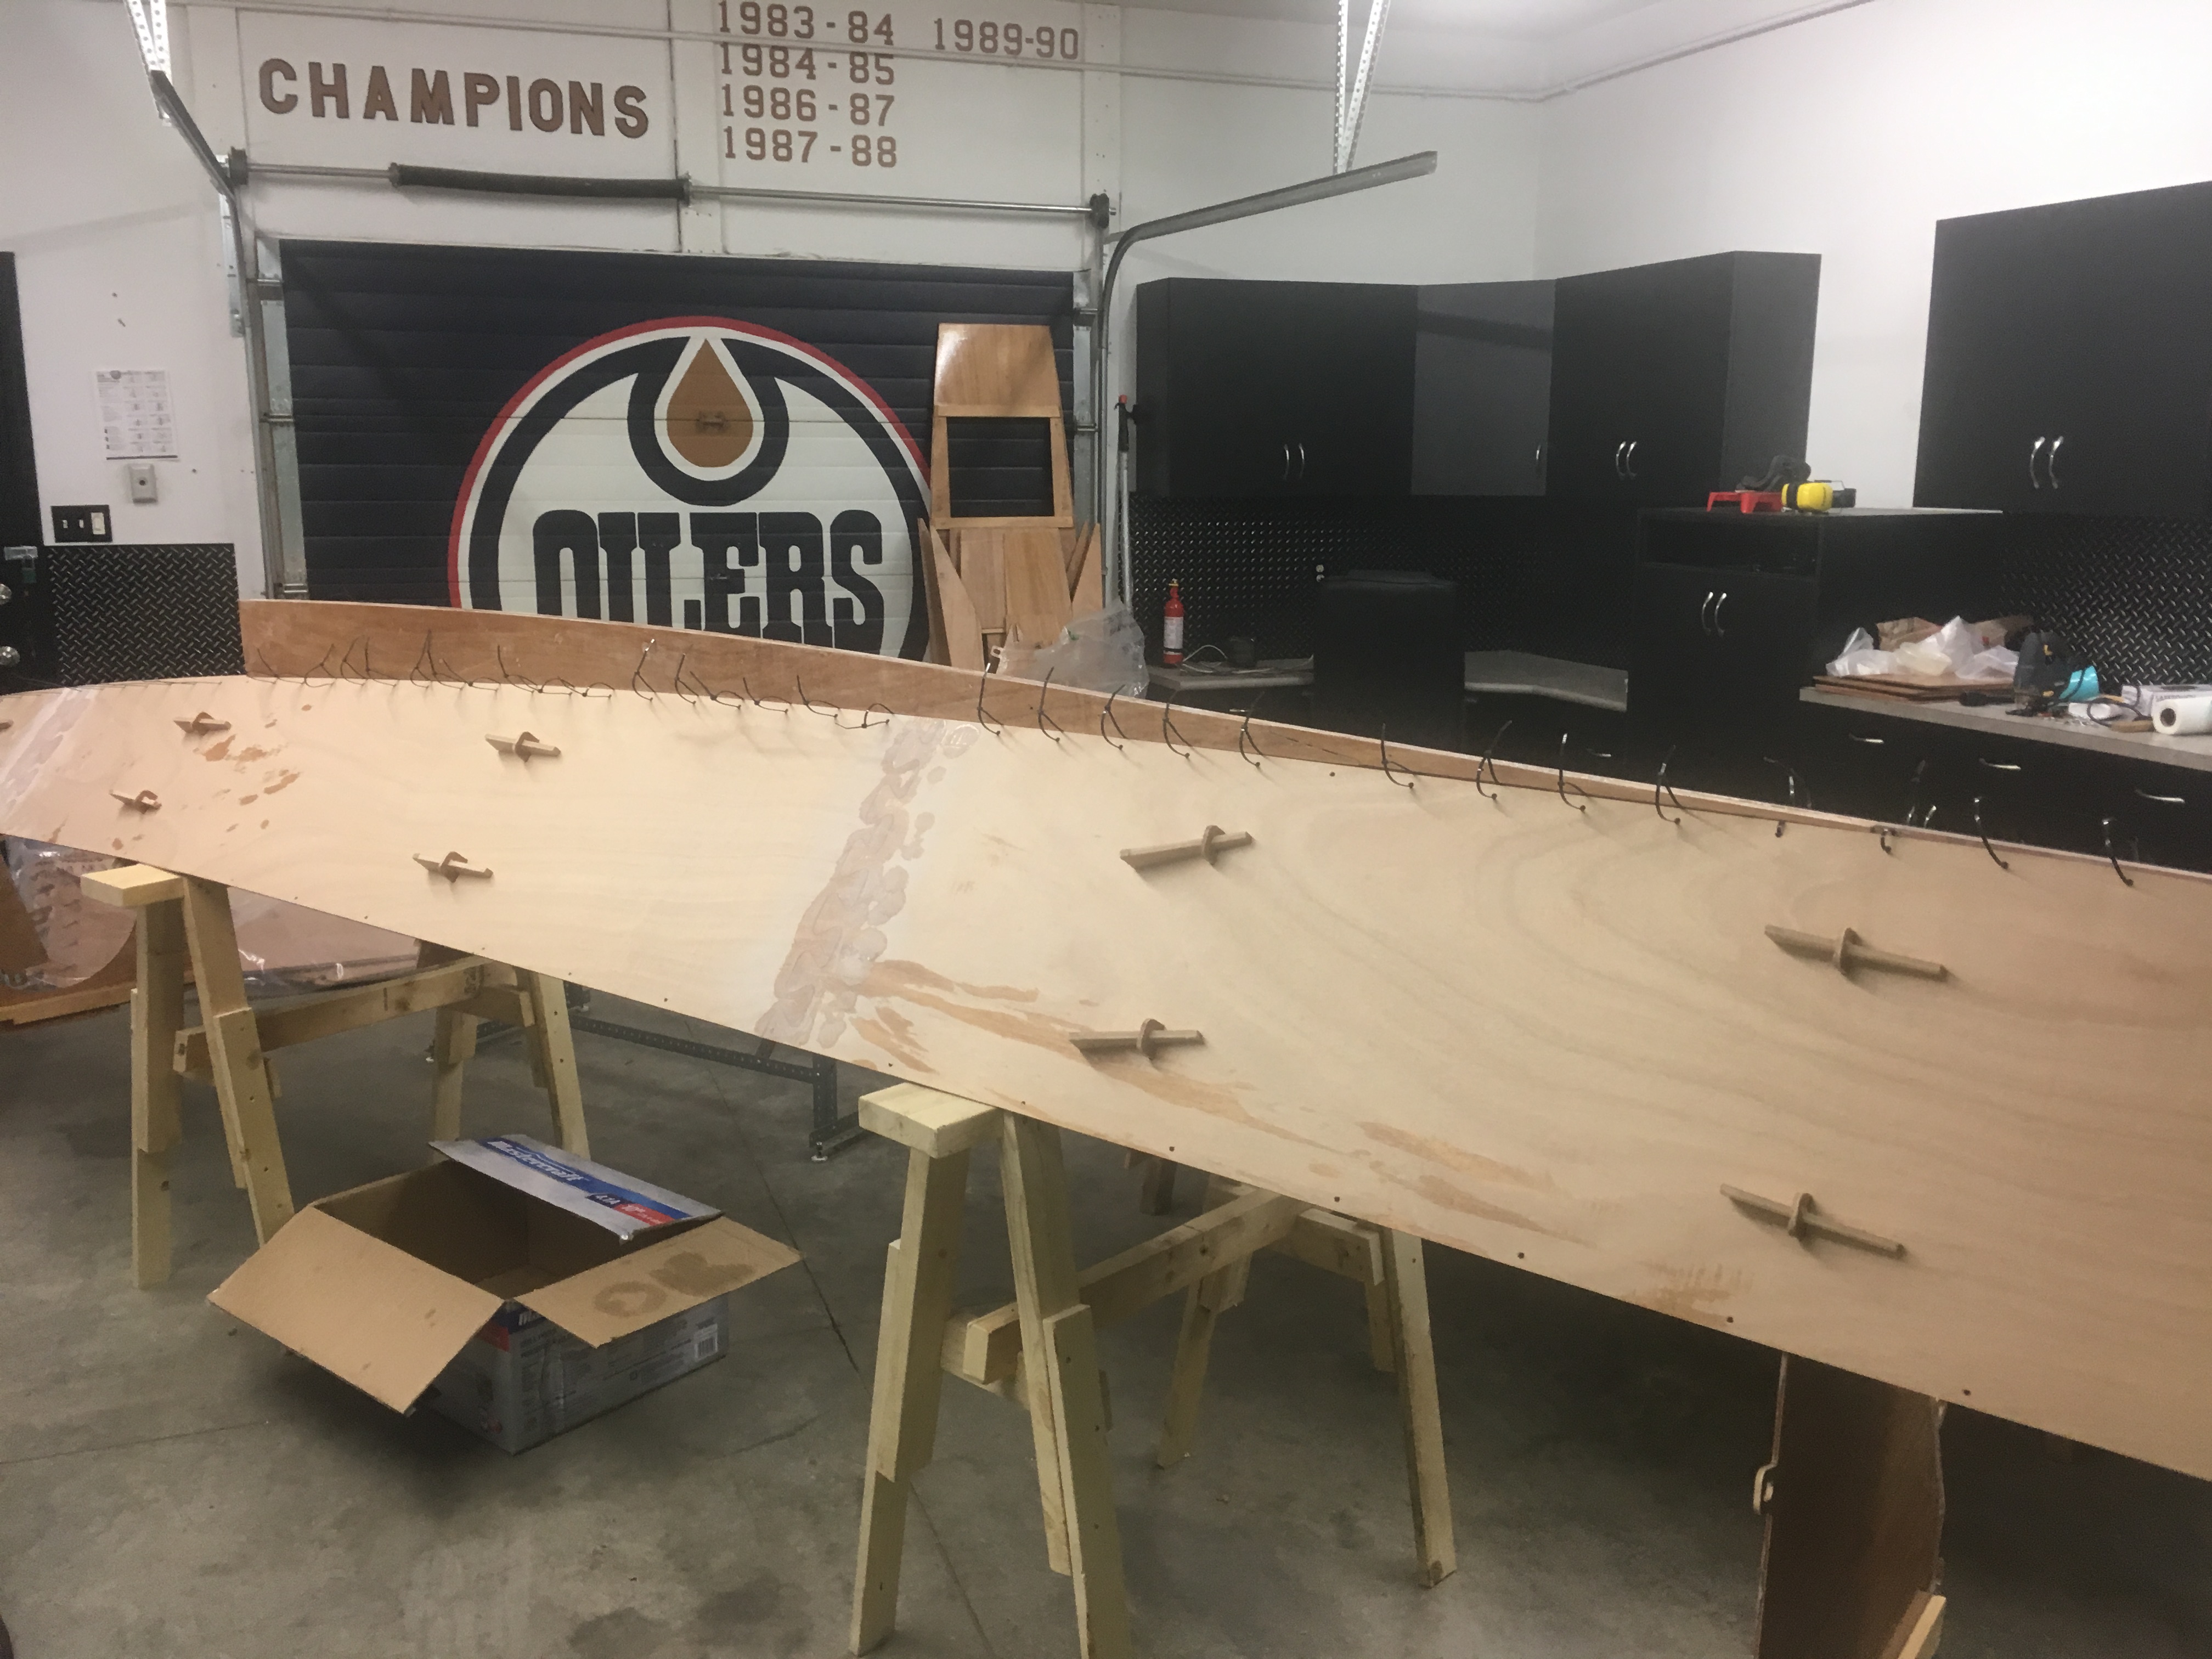
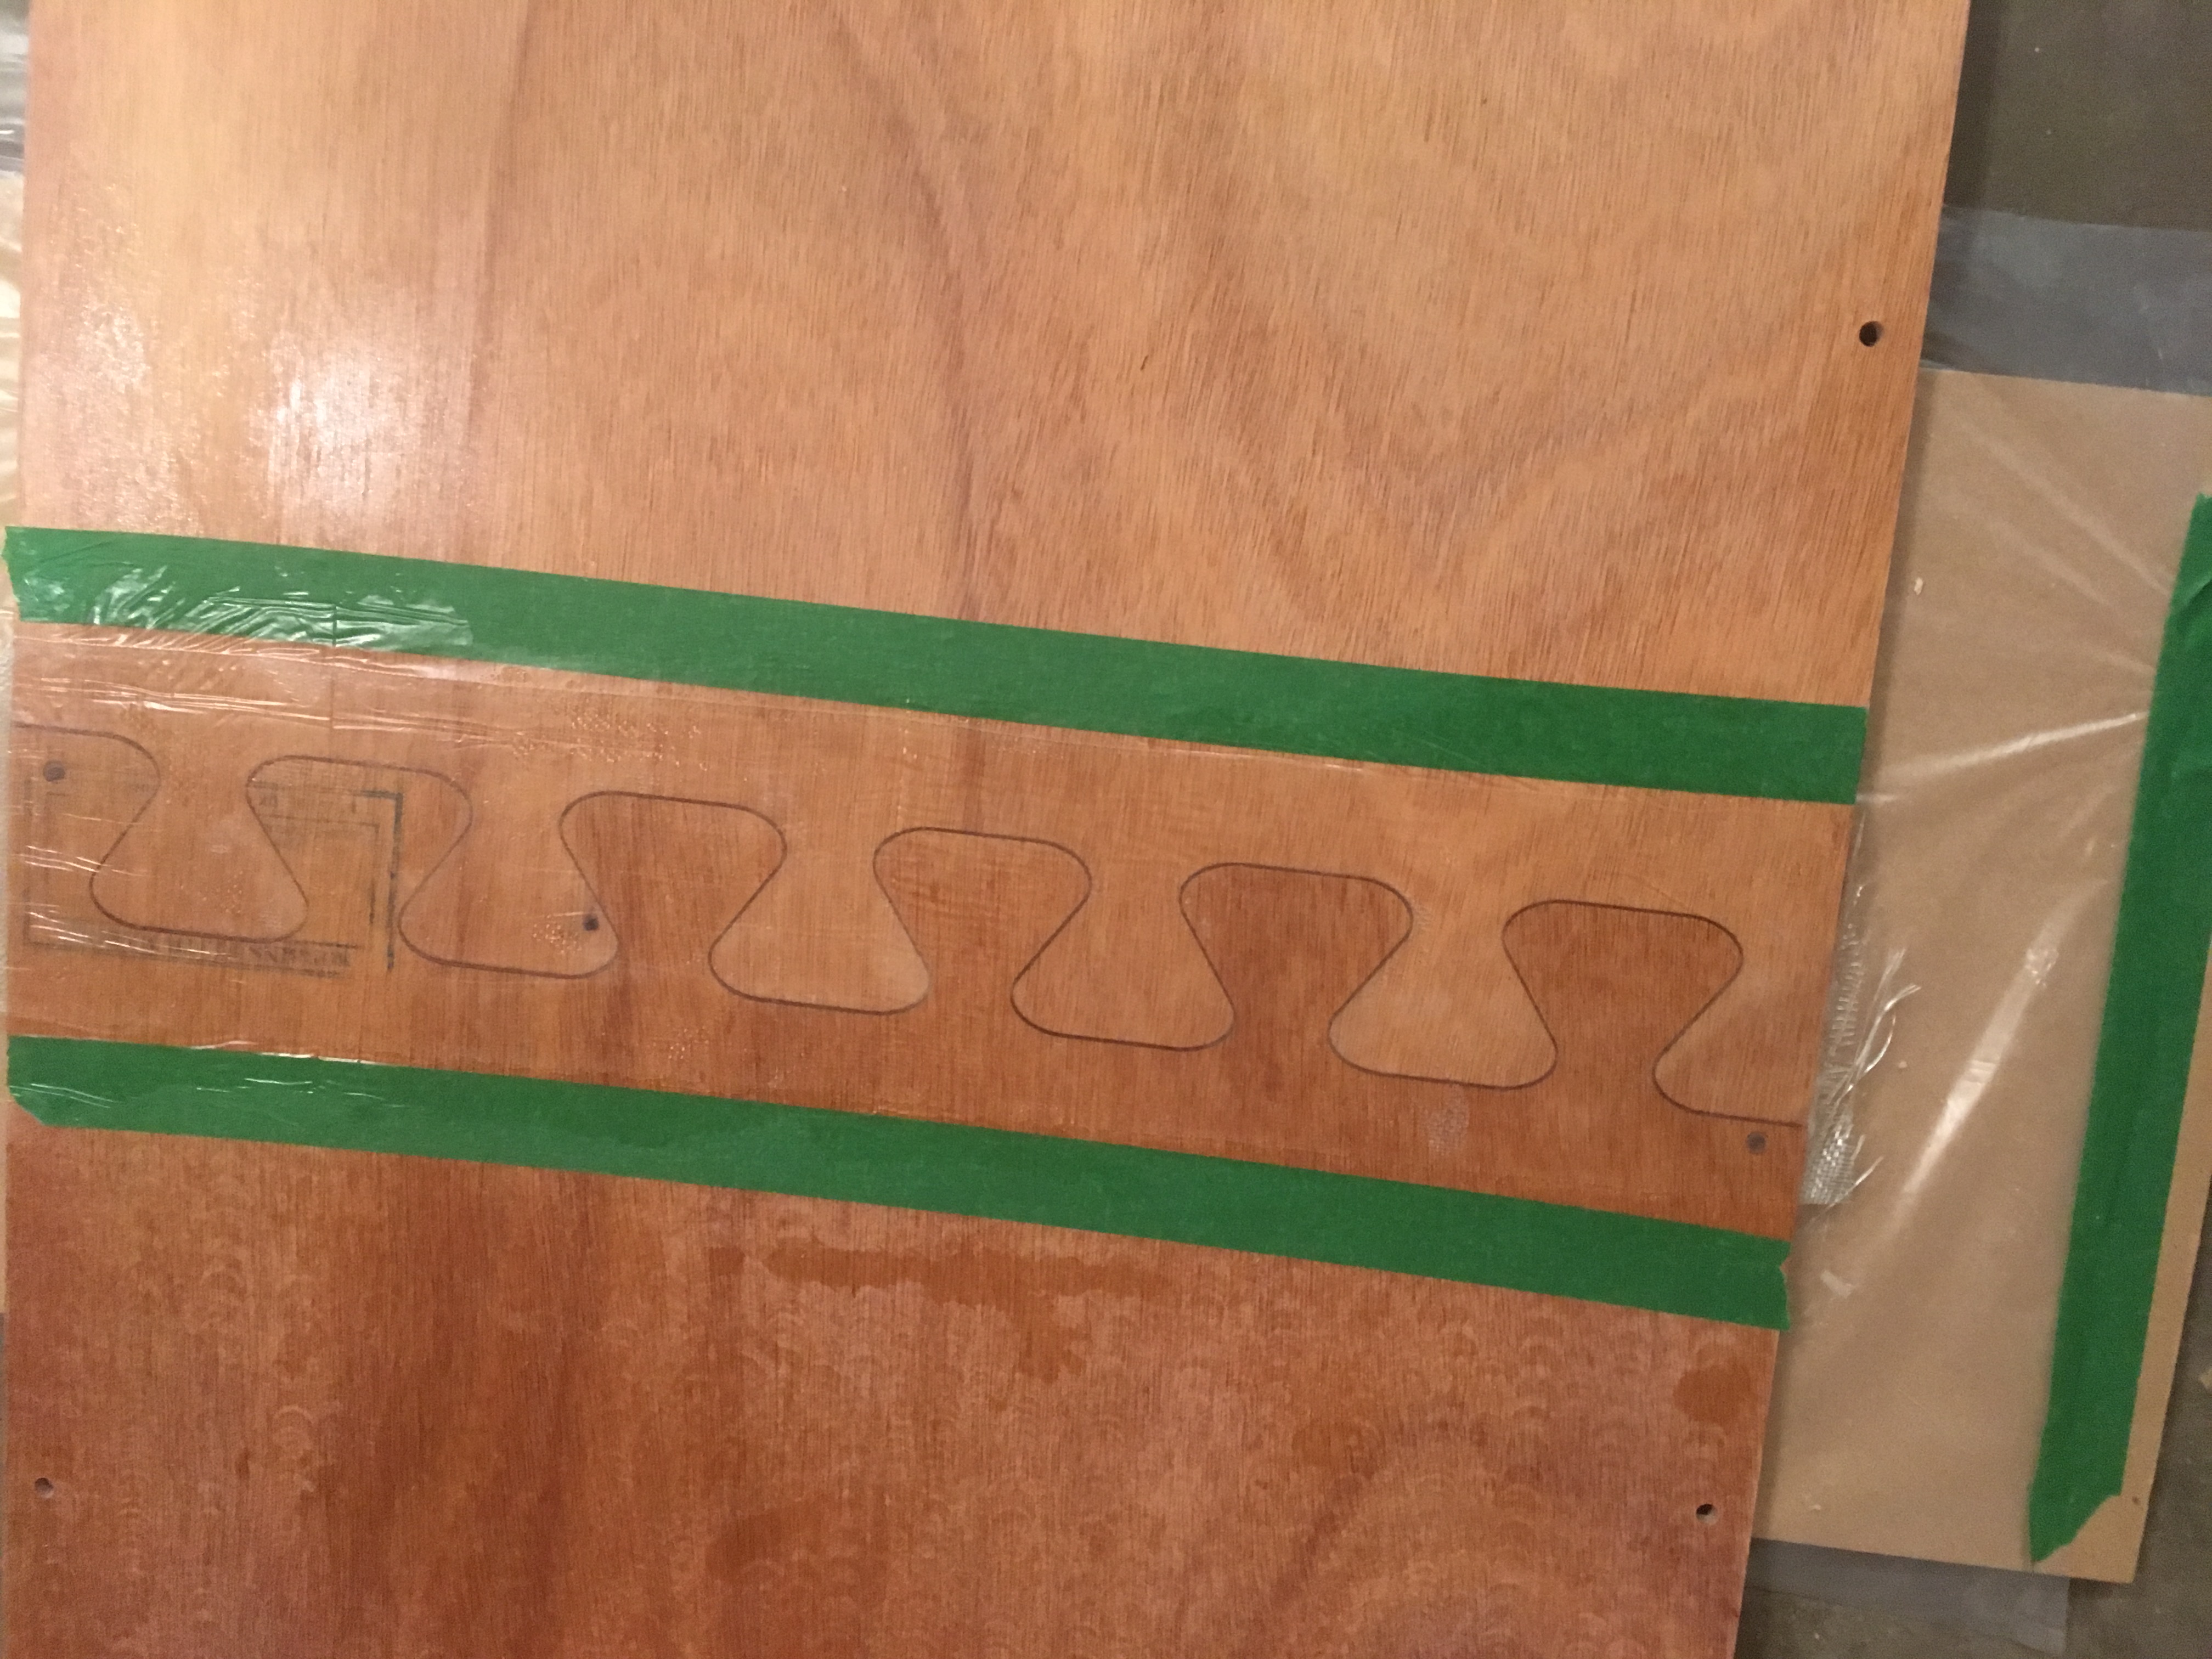
Boat building does have a similar problem to that posed by the mill workers – how to make short boards into longer ones in order to build boats beyond the length of available lumber. Various methods have evolved in the history of boat construction, including the scarf joint (which we will encounter in a future post). The advent of CNC directed routers, able to cut out patterns with great precision, has enabled one modern version of “lumber stretching” that the Mana “cat kit” incorporates – the jigsaw puzzle joint.
On the Tiki 21 that I built in the 90’s and on most of the modern designs from James Wharram Designs, plywood panels are joined, end for end, in a butt joint with a piece of plywood epoxied over top of the joint. This method is effective and requires no specialized scarfing equipment or expertise but it does not leave a smooth panel on the interior of the hull. The jigsaw joint used on Mana 24 gets around that limitation – a 100mm strip of fibreglass tape reinforces the joint instead of a piece of plywood.
The puzzle joint ensures that the joined panels line up correctly. I followed the advice from JWD and placed MDF board above and below the joint along with plastic sheeting, weighed things down overnight while epoxy cured, and the results were a nice smooth, 23 foot long panel.
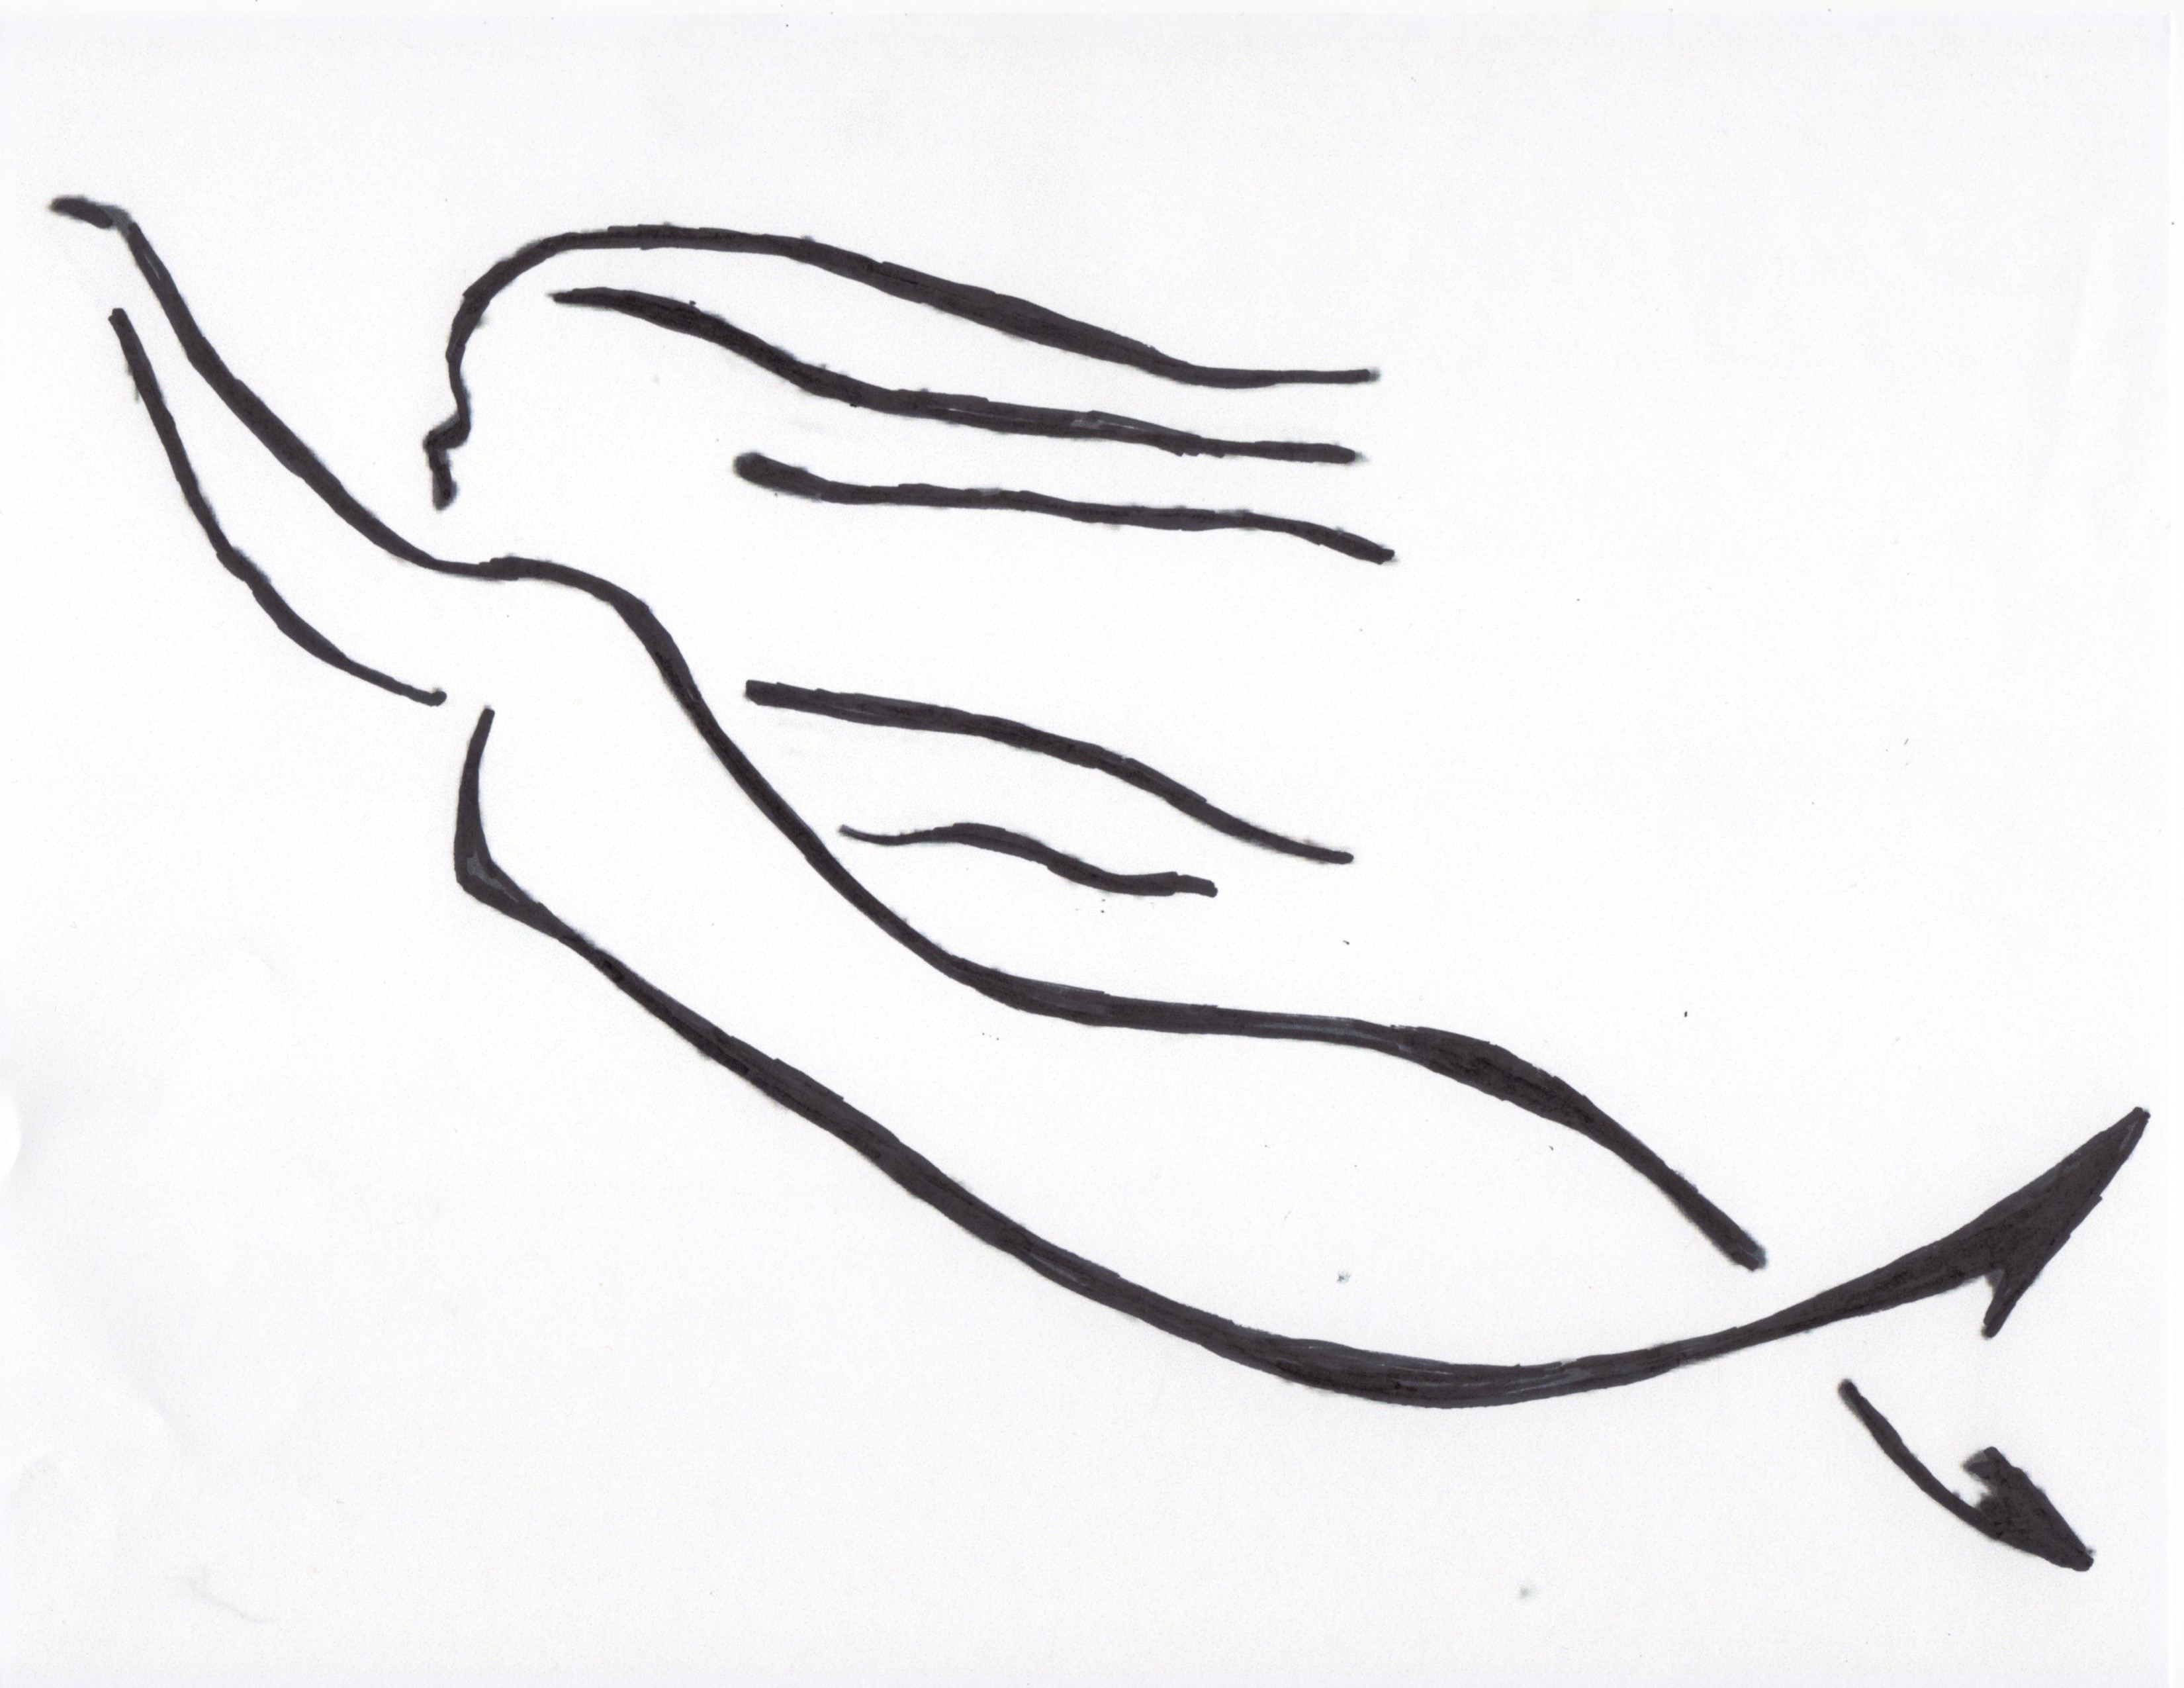
Mermaids play a significant role in the myths and legends of my Highland ancestors, assisting them in their journey from Ireland to first the islands and then the mainland of Scotland. I am enlisting their assistance once again as I embark on my latest project, the construction of a 23 1/2 foot catamaran sailboat. I drew this design to grace the bow of each hull when the boat is completed.
The catamaran is the latest one to be offered by venerated designers, James Wharram and Hanneke Boone. The prototype Mana 24 was launched last year, sixty years after James set out on a boat of the same length to be the first to sail across the Atlantic Ocean on a catamaran. His inspiration for that boat and those for which he subsequently became famous was the sea-going double canoe sailing craft of the Polynesians.
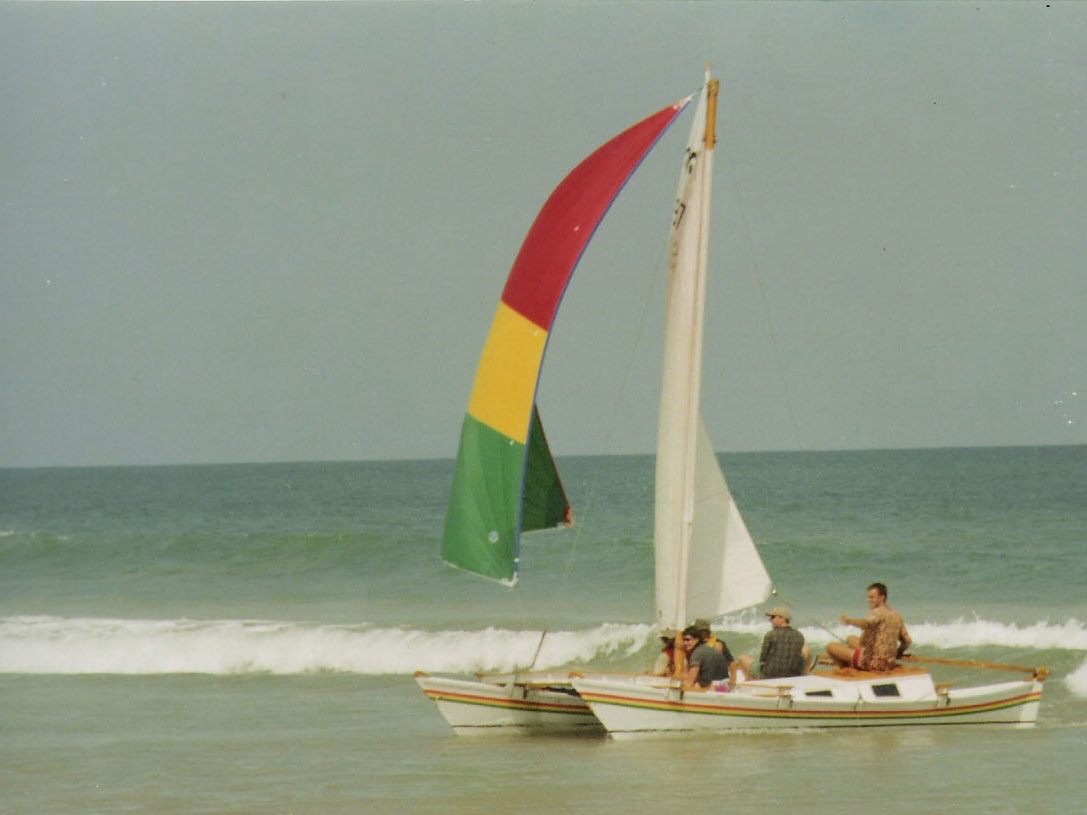
This will be my second Wharram designed catamaran. In the 90’s I built a Tiki 21 and sailed it on Brightsand Lake for three summers before loading it in a 40 foot container and shipping it to Ghana. Here is a shot of it sailing onto the Ghanaian shore in 2002.
Stay tuned for photos and updates during the construction phase. May the Mermaids of the Prairies ensure us fair winds and safe passage.
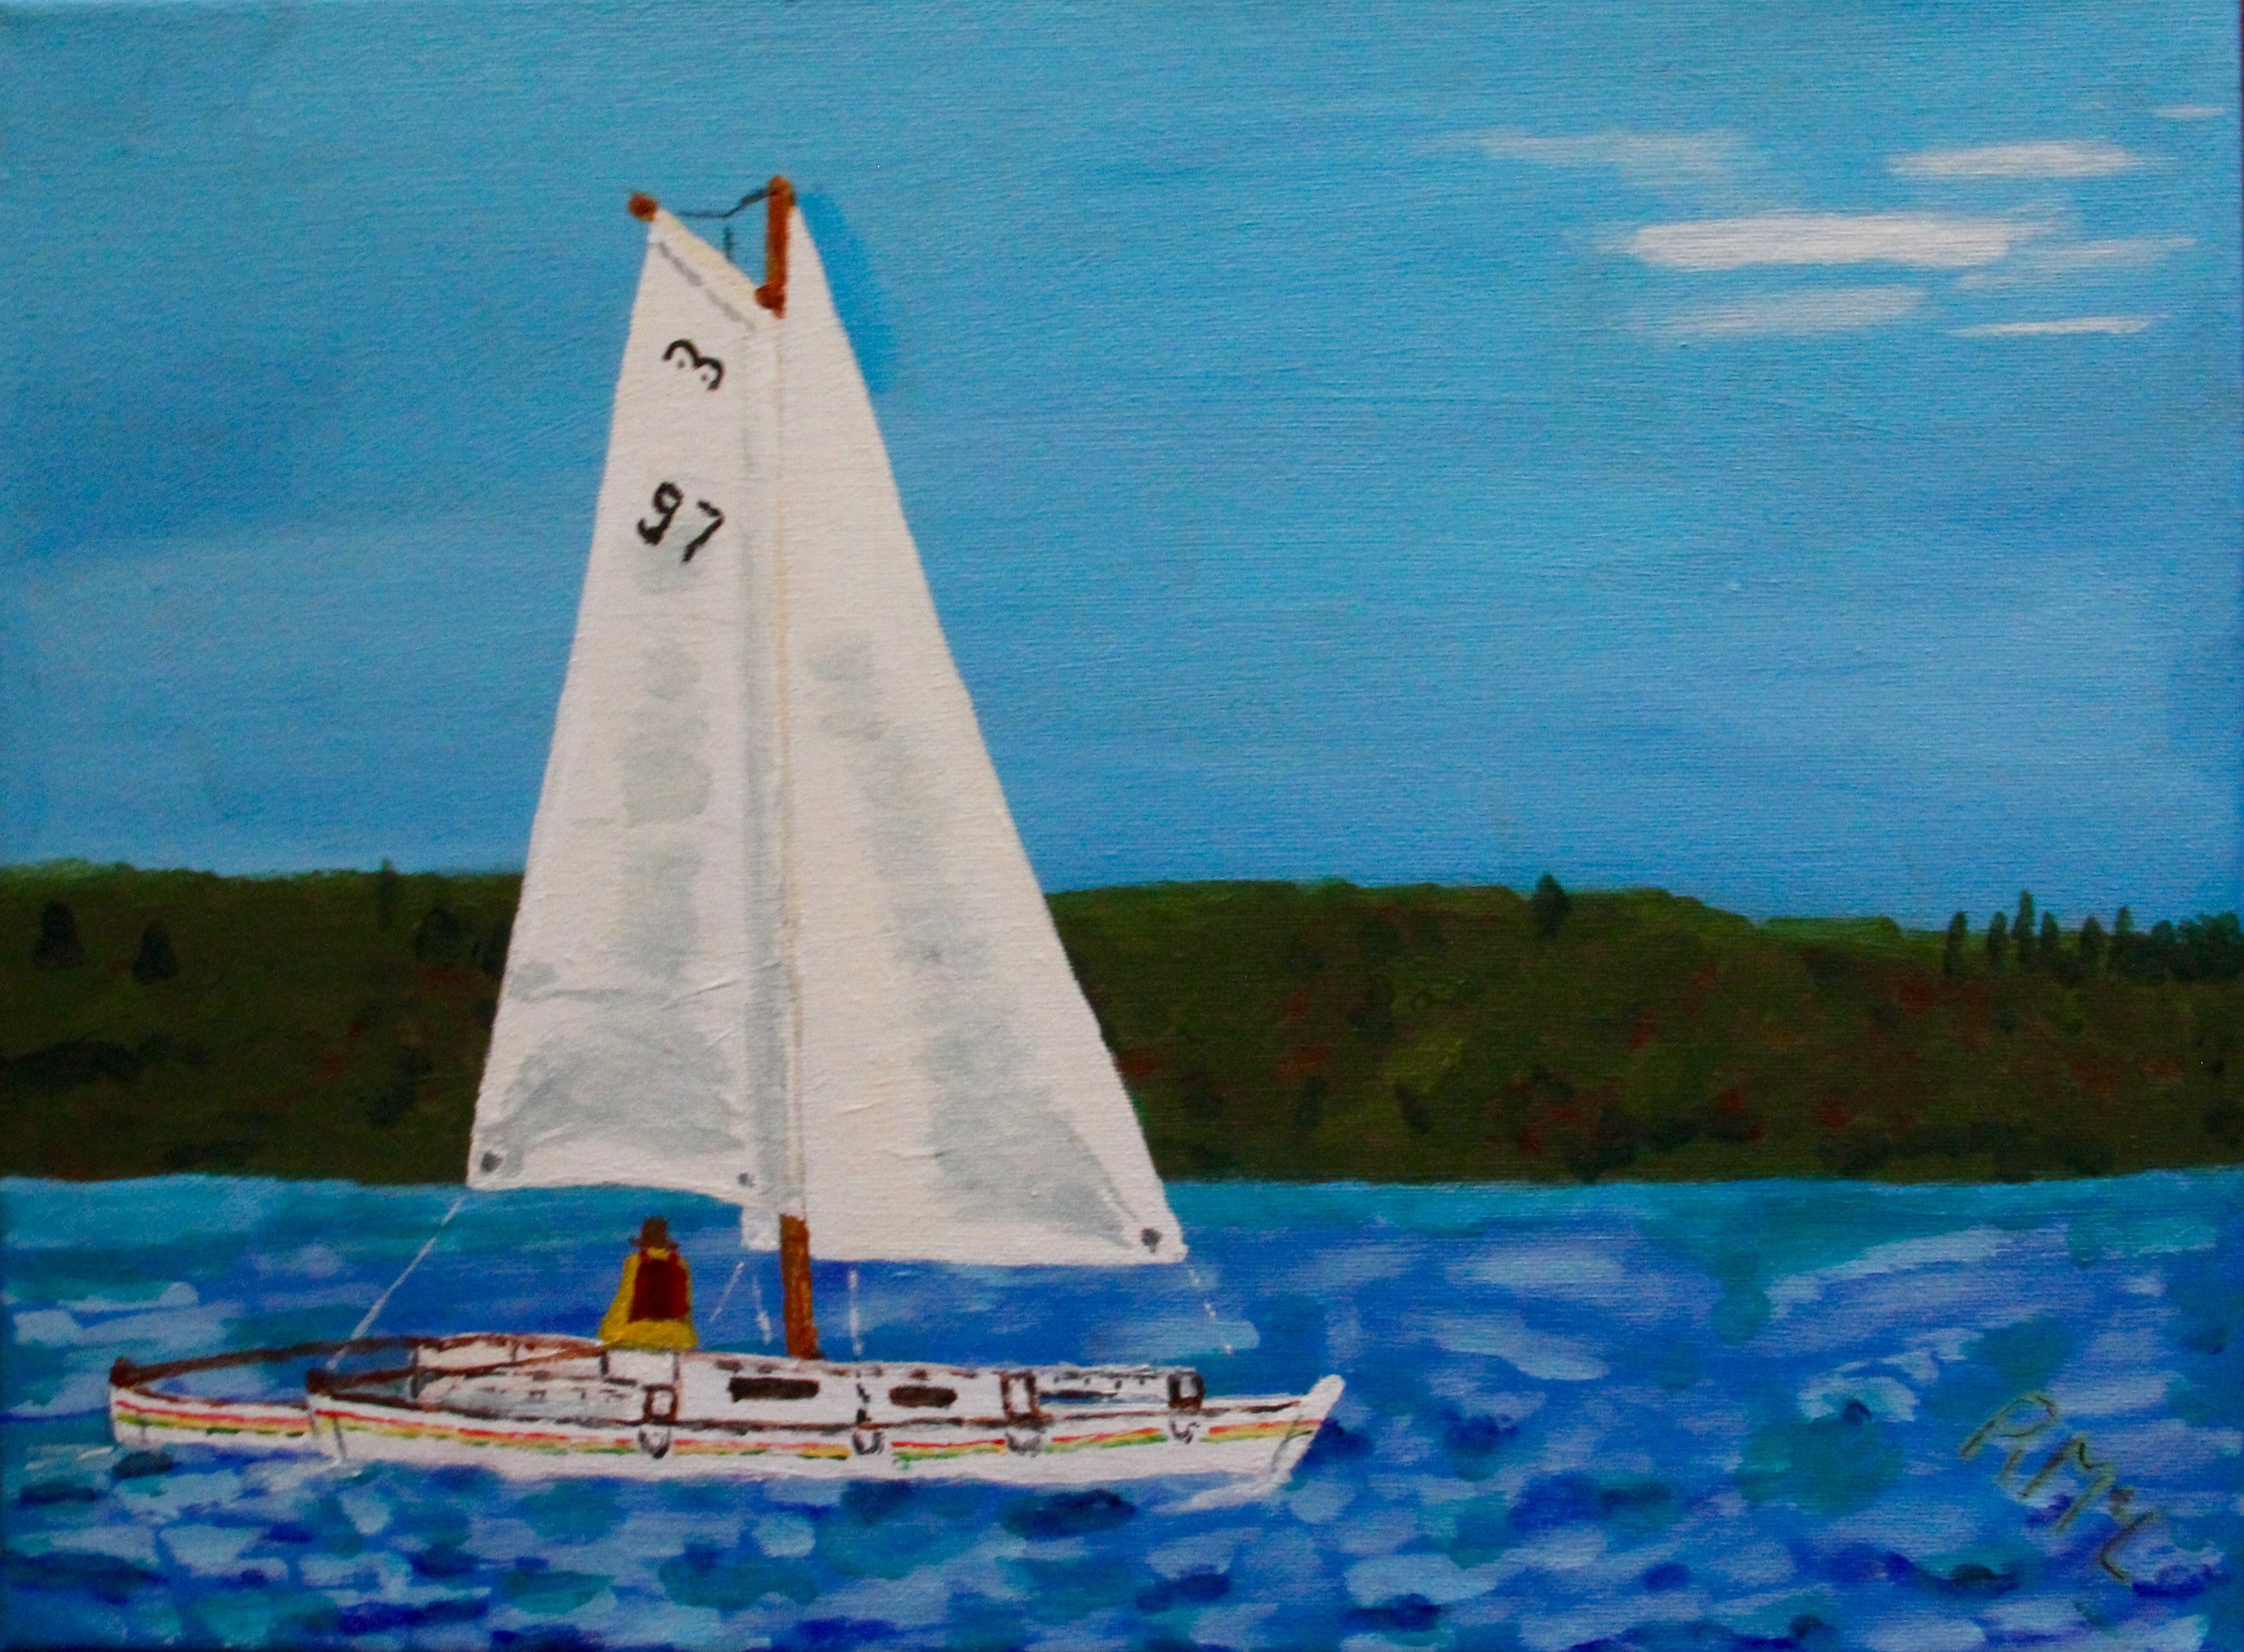
For over forty years, sailing has been a passion of mine. In that time I have owned five sailboats of various types and sizes. My lone sailing lesson consisted of an afternoon on Jackfish Lake with my next brother who had learned how to sail while in the Coast Guard. He helped me to set up my first sailboat, a home-built fifteen foot wooden craft that I purchased for $500 and we sailed for a couple hours. After that I was at my own devices, relying on sailing magazines and a how-to-sail book that I had come across in a bookstore. This was long before the advent of the internet and YouTube – it was trial and error hands-on experience.
Somewhere along the way in my reading, I encountered a man who had profoundly changed conventional sailing in Europe with his designs for two hulled sailboats inspired by and modelled after traditional Polynesian sailing craft. In 1956 James Wharram and his two female crew members became the first to sail across the Atlantic on a 23 1/2 foot catamaran that he had designed and built. I became enthralled by his designs and his philosophical approach to sailing with an emphasis on stability and low cost construction. In 1999, I completed the construction of a 21 foot catamaran, designed by James Wharram, using a set of plans drawn by his partner, Hanneke Boon. The boat was a Tiki 21, given the number 97 since mine was the 97th set of plans sold by James Wharram Design for that model. The reference photo for the painting above was one of the few photos taken of that boat, sailing on Brightsand Lake.